An updated secrets and collectibles guide for Agony Unrated. Not a simple copy+paste, revised specifically to account for changes in Agony Unrated!
You Might Also Like:
Agony Unrated – How to get All Endigs
Introduction
This guide is specifically for the Unrated edition of the game! There ARE changes, and some hidden things are not consistent between the two versions, so make sure you are playing Agony Unrated if you are using this guide! Check out my original guide for the original, as it more accurately reflects that version. 🙂
I’m nearly finished here, just updates to some of the ending information, and I’ll keep looking for those last few statues I’m missing.
Credits:
Thanks to Boxkid and Icarus, who assisted me with the locations of some statues and secrets in the original guide.
A Glossary of Relevant Locations
To help guide each section, I’ve detailed the names and a brief description of each of the major locations. For most of these, the names will pop up on screen when you enter them.
Chapter 1 Locations:
The Judgement Chamber – The 2nd major room in the game, where you first balance hearts on scales
The Judgement Chamber (Succubus Area) – In the left corner of the Judgement Chamber is a Succubus Door to an extensive cavern network leading to the Maze of Madness
The Abandoned Prison – The cave system which you pass into from the Judgement Chamber
The Abandoned Prison (Succubus Area) – Above the cellblock is a Succubus handhold leading to a small tunnel
The Maze of Madness – The large mazelike area where you first encounter an Onoskelis
The Pit – The multi-floored circular location found after The Maze of Madness.
The Pit (Succubus Area) – From the entrance to the Pit, on the left side is a Succubus Door leading to a network of tunnels
The Spider’s Lair – Where you end up after dropping down at the end of The Pit. Includes the room full of Iron Maidens, and extends all the way until you pass the section where the giant demon is bound.
The Walls of Seduction – A massive canyon where you end up after possessing the Chort. Also includes some cave systems.
The Temple of Pleasure – The large orgy room where unsettling music plays.
The Guardian of Light – This is the room where you fight Baphomet
Chapter 2 Locations:
Dark Forest – The starting location at the beginning of the chapter, a forest on the edge of an ocean of fire. Extends until the point where you jump down into the pit.
Hills of Agony – This area begins when you drop down into a clearing full of people moaning in the mud. Extends until-
Hills of Agony (Succubus Area) – To the right of the pond, there is a cliff face with Succubus Handholds that lead to a hidden area. If you follow it to the exit, it comes out to the place where you first possess an Onoskelis.
Eternal Fire – After crossing the bridge from the Hills of Agony, this is the subsequent location. Is comprised mostly of a cave and a some buildings.
Tower of the Goddess – This location includes the entire area where you chase the Onoskelis to possess her. Its mostly islands and a large pond.
Goddess Chamber – This is the ACTUAL multi-floor tower portion where you meet with the Red Goddess.
The Floating Forest – This is the large area with many islands (some moving) with poisonous water around them.
The Fractal Forest – A dark purple chaotic area, full of rolling balls of corpses. Has some dimensional portals which take you to isolated pockets of a similar area. The Succubus cannot enter these portals, which significantly limits her usefulness collecting items here.
Waterfalls of Blood – A small cave system between the Fractal Forest and the Mushroom Mind. Notably, has waterfalls of blood.
Waterfalls of Blood (Succubus Area) – There is a Succubus Door in the cave right before the Waterfalls of Blood on the right side wall. Leads to another section of the cave system.
The Mushroom Mind – Large trippy area which takes place entirely on large tree trunks connecting to each other.
The Tree of Life – A large tree, obviously. Most of this location is a large arena where you have to avoid a Chort.
The Room of Joy – The last room in the chapter, its an ice-filled room with a pond.
Chapter 3 Locations:
Frozen Fire – So this area is extremely large, can be confusing, and has no real location names to differentiate it from others. So I’m going to make up my own names to divide up each area for easier discussion
Frozen Spawn (made up name) – This is my name for the location where the player spawns, usually has a Chort and some Martyrs in it
The Frozen Wastes (made up name) – This is my name for the large, open area to the left of the Frozen Spawn. The Martyr will freeze to death when in this area for more than a few seconds.
The Upper Ice Caves (made up name) – Starting from the right cave system from spawn, this is a series of caves which ends up overlooking The Ice Pit (my name), and will eventually lead back up to a second entrance to the Frozen Wastes.
The Ice Pit (made up name) – A dark, maze-like area with slippery floors and a bunch of enemies. The Upper Ice Caves overlooks a portion of it, and there are multiple entrances into it.
Frozen Fire (Succubus Area) – Accessible from the painting-door room near spawn, there are Succubus Handholds in the ceiling.
The Great Rite – This room has a giant statue of the goddess in the center, and a teleporter that takes you to the next part of the chapter.
The Bridge of Melted Fire – This is where you meet the Painter, and cross the giant ice bridge
The Bridge of Melted Fire (Succubus Area) – To the left side of this section is a Succubus Door, that also gives an alternate path over the bridge
The Ishtar Gate – A very brief section that comprises a small hallway into the Fallen Kingdom.
The Fallen Kingdom – A large, open area full of Ifrits. You travel around primarily on tree branches.
The Ishtar Chamber – A large building floating in the Fallen Kingdom.
The Ishtar Chamber (Succubus Area) – Behind the altar, there are some trees with Succubus Handholds you can climb to access a hidden area.
The Ishtar Temple – The 2nd half of the Fallen Kingdom section, also a large open room. Leads to the end of the chapter.
Chapter 4 Locations:
The Rivers of Blood – This is a small region at the very beginning of the chapter, comprised of rocky paths by a waterfall. As soon as you go through the Succubus Door, or the Gravity Wall, you enter the Brazen Bull.
The Brazen Bull – This area is above the Rivers of Blood, and includes the location with the rolling corpseballs, a small temple-like area behind it, and a small ruined village higher up on the cliffside.
The Brazen Bull (Succubus Area 1) – There is a Succubus Door plainly visible at the very beginning of the game. It leads to this area, and the player will come out in The Brazen Bull on the other end.
The Brazen Bull (Succubus Area 2) – Starting from the save point in the Brazen Bull, walk directly ahead towards the section with the corpseballs. If you look upwards on the wall ahead, there is a column with Succubus Handholds on it. It leads into a chamber with a few collectibles.
The Chaos Temple – At the top of the cliff, this lengthy ruined city area is filled with Harpies and broken down buildings.
The Plague Chamber – After the sigil door in the Chaos Temple, you enter a green, foggy room with a Chort in it. This is the Plague Chamber.
The Plague Chamber (Succubus Area) – In the back of the Plague Chamber, there is a pit that only the Succubus can survive dropping into. It ends in the Forgotten Caves.
The Desert of Light – Doesn’t look much like a desert, its a fleshy area that’s mostly on fire. Its difficult to explore because the ground randomly kills you sometimes, but there are some hidden things.
The Forgotten Caves – This is an extended series of caverns, mostly covered in flesh like walls. Can be entered from at least three different locations.
The Forgotten Caves (Desert Section) – The rather large desert area doesn’t have its own name. I’m going to label it as such to distinguish it from the already bloated Forgotten Caves section.
The Floating Temple – Starting at the back end of the Forgotten Caves Desert, this is a collection of ruined buildings and the ascent up to the Cathedral.
The Tower of Babel – This is the Red Goddess’ Cathedral.
Forbidden Fruit and Skill Points
In the original Agony, there were two types of Forbidden Fruit. Those which give Skill Points and those which give Soul Points. In Agony Unrated, this distinction no longer exists, but some fruit still indicate that you got a Soul Point vs a Skill Point. Rather negligible distinction, but I’ve noted it.
Chapter 1:
1. (Skill Point). Automatically at the beginning of the Maze of Madness
2. (Skill Point) The Maze of Madness – After you burn the first martyr blocking your way, take the second door on the right. A hand is holding the forbidden fruit on the left side wall.
3. (Skill Point) The Maze of Madness – From the entrance, proceed through the left path. With the shrine immediately in front of you, look to the right; there should be a hole in the wall on the floor. It is initially blocked, but after you burn the Martyr, it will be open. Crawl through this tunnel, and in the following room, there is a shrine blocked by spinning blades. In the shrine is a skill point.
4. (Skill Point) The Maze of Madness – In the Golden Martyr Room.
5. (Skill Point) The Pit – From the entrance, go to the right path next to the stairs, and go into the crawlspace. There is a dead Chort baby with a Forbidden Fruit on its head.
6. (Skill Point) On the 3rd floor of the Pit, you will enter a blood filled banquet room. Immediately on the right side wall is a Onoskelis sculpture reaching out; it is holding the Forbidden Fruit
7. (Skill Point) In the Temple of Pleasure, right before walking on the wall to get up to the Baphomet boss room, a Forbidden Fruit is on a stone slab near some Martyrs, behind some spike traps.
8. (Possess Onoskelis) Immediately before the Baphomet boss room, you have to pick up a Fruit to enter the room.
9. (Soul Point) After beating the game, return to the beginning of Chapter 1. Once you drop down to the save point under the Judgement Chamber, take the first right turn you are able to. There you will find a Golden Chamber, which will be open. In it is a Forbidden Fruit.
Chapter 2:
1. (Skill Point) Dark Forest – From the start of the area, follow the left wall until you come back to the water. A Forbidden Fruit is on a small stone altar.
2. (Skill Point) In the Tower of the Goddess (after you possess an Onoskelis to break the door the first time), there is a Fruit on a table on the 2nd floor.
3. (Soul Vision) In the Tower of the Goddess (after you possess an Onoskelis to break the door the first time), there is a Fruit on a table on the 2nd floor. As soon as you approach this table, you spontaneously get a message about having Soul Vision.
4. (Skill Point) In the back of the Floating Forest, behind the screaming guy Baphomet is dunking, there is a raised platform that you have to use Soul Vision to access. On top of a table is a Forbidden Fruit.
5. (Skill Point) The Floating Forest – On the left side of this area, there is a path behind some cauldrons full of people, leading to a shrine. You have to use Soul Vision to get through it. There is a fruit on a podium here.
6. (Skill Point) As soon as you fall into the Fractal Forest, a Fruit is on the dark stone altar immediately in front of you.
7. (Skill Point) In the Mushroom Mind, if you take a left and follow the path straight (not taking any of the offshoot paths), you will come to a tree with one of the stretchy monsters guarding it. There is a glowing crucified baby with a fruit on its head.
8. (Skill Point) At the very end of Chapter 2, after the Chort fight, you enter an ice room. On the left side are some counters and tables; there is a Fruit on the Table by the model maze.
Chapter 3:
1. (Ifrit) Automatically given during the cutscene leading to the Fallen Kingdom.
2. (Skill Point) After finding the portrait the Goddess tells you to look for, you enter the Ishtar Gate. If you go right, the Fruit will be sitting on some ice in plain view.
3. (Skill Point) In the Ishtar Chamber, in the stairs section, there are some branches you must use Soul Vision to pass. Behind them, in the mouth of a petrified snake, is a fruit.
Chapter 4:
1. (Skill Point) After climbing up to the 2nd area with the Corpse Ball enemies, if you take the left route, there is a small shrine area with an Onoskelis. The Fruit is on the table.
2. (Skill Point) In the Plague Chamber, when you climb up the steps past the Chort, if you keep going straight (instead of turning onto the rafters to jump out the window), you will come to a small table with a Fruit on it.
3. (Skill Point) In the Forgotten Caves, there is a room with several tables, and some baby-eating hands as a barrier. Feed the hands, and in the room behind them, a fruit is on an altar.
4. (Skill Point) In the Forgotten Caves (Desert Section), there is an area with many spiky pillars and shines. From it, facing to the right, is a large cliff with some rubble and walls. In the back of the rubble is a fruit on the ground.
5. (Soul Point) In the Cathedral, proceed to walk straight up to the giant altar with the huge painting of the Goddess at the far end of the building. As you approach the top, there should be a bone/wood effigy with a baby on it, which may also have a Golden Martyr Head on top. The Forbidden Fruit should also be on it.
Gold and Red Rooms
There are four Gold Rooms and two Red Rooms. Each Chapter has 1 Gold Room, and Chapters 1 and 3 each have a Red Room.
Chapter 1:
Gold Room – The Gold Room is fairly easy to find, but it requires having beaten the game first. It is in the Abandoned Prison, very close to the first save point in the game. From the save point, just follow the tunnels until you can take a right, and the Gold Room will be right there, behind some flailing spinal columns. It contains a Forbidden Fruit and a lot of statuettes.
Red Room – This room requires the Succubus and Soul Vision to access. In the Maze of Madness, at the far left corner is a massive underwater tunnel. The Succubus is the only one who can swim through it, so you will need to be using her to enter it. Once you enter the entrance room, you must use Soul Vision so that the door will open for you.
Chapter 2:
Gold Room – This room is found in the area where you need to chase after the Onoskelis so that you can possess her. Its located in the room that you burn down with a torch. At the back of the room is a small tunnel that you need to crawl through. Like other Gold Rooms, you need to use Soul Vision to open the door.
Chapter 3:
Gold Room – This room is rather tricky. Its well hidden and in a very dark area. Go to the second big section of the Fallen Kingdom. As you exit the stone building, go towards the glowing purple spot, and look to your right. On the ceiling is a structure with a window:
Either possess an Ifrit and fly there, or enter Soul Form and attempt to fly the distance like that. Once you are inside, possess one of the Martyrs present.
On the upper left side of the room, there is a doorway which you can only open when you use Soul Vision. Its a little difficult to get to it, and its very dark. Once you are inside, it may be difficult to exit, but there is now a small fallen column that you can climb on to escape, although it is hard to see.
Red Room – While not required, this is easiest to do with the Succubus. Take the Succubus to the big outdoor area near the beginning of the chapter, and hug the left side wall. Eventually you will go down a slope into a room with an Onoskelis and a table. A bit behind the table, there is a wall which will vanish when you use Soul Vision. Go inside here, and eventually you will find a painting will, when inspected, changes a room elsewhere in the map.
Said room is found in the room with the giant crushing rock walls. This room is most easily found by following the Succubus area near the beginning of the stage, but an alternative method of accessing it is to go to the room with the Corpseball enemies rolling around on the ice. On the left side of that room is a small crevice that you can slip through. Once you are in the room, avoid the crushing rock walls, and you will find a door which is now open. This is the Red Room.
Chapter 4:
Gold Room – Probably the easiest Gold Room in the game to find, its near the save point/spawn point for the Floating Temple. Facing the save point, there is a doorway to the immediate left of the save point. Go through this door, and continue through the next door beyond it, and follow the path around the back. Jump over the poison liquid, and the Golden Door should be plainly visible. As usual, you must use Soul Vision to enter.
Golden Statuettes Overview
Golden Statuettes are useful, but ultimately, you don’t need to collect them all to unlock everything. You can find almost all of the content in-game, and a few hundred Knowledge points can round out the difference.
Even so, the stages keep track of how many you’ve found, so I’m trying to document as many locations as I can.
Due to a character limit, some chapters need to be divided into multiple parts.
Golden Statuettes Chapter 1
Chapter 1
1 & 2. The Gates of Hell – In the very first room, there is a hidden painting behind a pillar on the right side. If you examine it, it will open a hidden path ALL the way back at the start of the room. In this secret chamber, there are two statues.
3. The Judgement Chamber – On the left side behind the stairs, hidden behind a pillar
4. The Abandoned Prison – In the ravine like area, its on a small shrine on the left side. To access it, you have to deactivate some spinning blades with a switch elsewhere in the ravine area. Even then, you still have to crouch under it or you will die.
5. The Abandoned Prison – After you cross the ravine area, take the right-most path and you will find it on a stone in a room full of hanging bodies
6. The Abandoned Prison – In the ravine area at the sacrificial altar, there is a very well hidden statue behind it. You have to jump up on it and crouch to reach it.
7. The Abandoned Prison – In the cellblock area, you can burn down one cell door and walk behind it into another, where you will find this.
8. The Abandoned Prison – In the cellblock area, there is a cell with a burning corpse on a spike. On the left side of the cell, there is a pillar. The statue is on a nook in the back of the pillar.
9. The Abandoned Prison (Succubus Area) – From the cellblock entrance, there is a statue sticking out of the split stomach of a corpse on the wall
10. The Abandoned Prison (Succubus Area) – Immediately to the left of #9, there are prison bars. On a stone table there is a statue.
11. The Abandoned Prison (Succubus Area) – Continue further into the hall from #9 and #10, and you will find a statue on the left side
12. The Judgement Chamber (Succubus Area) – Immediately in front of you upon entering are some handholds. Use them and drop down into the next room; the statue is immediately to your right.
13. The Judgement Chamber (Succubus Area) – From the entrance, follow the path downward until you find a hallway to the left. Proceed past several revolving doors with skeletons, and in the next room, there will be a statue on the table on the right.
14. The Judgement Chamber (Succubus Area) – From the entrance, follow the path downward until you get to a cliff edge overlooking the Maze of Madness. Against the stone spikes is a statue.
15 & 16. The Maze of Madness – From the entrance, proceed through the left path. Go around the left side of the shrine in front of you, and there will be a large cracked door. A Succubus or Onoskelis must break it to enter. Inside are two statues.
17. The Maze of Madness – From the entrance, proceed through the left path. With the shrine immediately in front of you, look to the right; there should be a hole in the wall on the floor. It is initially blocked, but after you burn the Martyr, it will be open. Crawl through this to find a statue immediately to the right.
18. The Maze of Madness – From the entrance, proceed through the left path. With the shrine immediately in front of you, take a right and proceed down the hall. Take the first right, and there is a statue on the floor.
19. The Maze of Madness – From the shrine with the Forbidden Fruit and spinning blades, face away from the front of the shrine and walk down the hall. Follow the right side, and the statue will be on a podium to your right.
20. The Maze of Madness – Starting from the exit, hug the right wall and follow it through several hallways. Eventually you will come to a dead end with a statue on a pedestal.
21. The Maze of Madness – From the entrance, proceed through the right path (once its been opened). There will be a hole in the wall directly in front of you; through the hole is a statue on a podium.
22. The Maze of Madness – From the entrance, proceed through the right path (once its been opened). Take an immediate left, followed by a right. Straight ahead should be a crevasse in the wall. Go through the crevasse and follow the path to the left. After a turn, the statue should be visible on a nearby altar.
23. The Maze of Madness – From the Golden Martyr door, turn left, and take the first left. On the right-side wall, there will be a hole with a statuette in it.
24 & 25. The Pit – After exiting the Maze of Madness, take a left and proceed to the dead end beyond the exploding pregnant woman. Two statues are lying in the flesh.
26. The Pit – As soon as you drop into the Pit, go to the right side and there is a statue next to the stairs.
27. The Pit – Upon entering the first circular floor, look to the right. There is a landslide with a Martyr struggling inside of it. A statue is next to him.
28. The Pit – From 27, there is a chamber behind you that is blocked by a bone gate. Once you get through them, there is a well-lit stone ledge on the left side that extends outside. If you jump up here, dodging the spike ball, you can find a statue.
29. The Pit – From the entrance of the second circular floor, proceed all the way to the end. A statue is on the tongue of a “wall mouth”.
30. The Pit – From the entrance of the second circular floor, take the first right. Beneath a beam of light, a statue is under the hand of a “stone statue” of a Martyr.
31. The Pit – From the entrance of the second circular floor, take the second door on the right. This is a room with a large bone table. On the left side of the table, a statue is lying on the floor towards the back of the room.
32. The Pit – From the entrance of the third circular floor, take the first door. Once you are inside, turn around, and a statue will by lying in the door frame.
33. The Pit – From the entrance of the third circular floor, take the second door. Immediately to your left is a bone cage with a bone table in it, with a statue on it.
34. The Pit – From 33, this statue is just around the corner of the bone cage, next to the stomach of a dead pregnant woman.
35. The Pit (Martyr Only?) – From the entrance of the third circular floor, take the second door. Go straight, and take a right at the bone wall. There is a man hanging from the ceiling with a statue in his hand. If you swing a torch at him, he may drop it. Couldn’t get him to drop it as Succubus.
36. The Pit – On the third circular floor, follow the path all the way around to the end. There will be a candle podium with a statue on it.
37. The Pit – From the entrance of the third circular floor, take either the third or fourth door. They may have wooden bars over them. In this room, there is a sigil door with a statue in front of it.
38. The Pit – From 37, enter the Sigil door. Behind the first pillar on the left is a Golden Statue.
39, 40, & 41. The Pit (Succubus Area) – Halfway through this tunnel, there is a side tunnel with a large golden statue. The room contains 3 golden statuettes.
42. The Spider’s Lair – From the save point, look across the hall to the left of the statue. There is a room there containing the statue.
43. The Spider’s Lair – Across from where the Onoskelis drops down are some bushes. If you burn them, you can jump across to a stone island with a statue.
44. The Spider’s Lair – Not far from 43, there are more bushes which can be burned. Another statue is behind them on an altar.
45, 46, & 47. – The Spider’s Lair – In the Angel’s room, there are three statues. This room is only accessible once you beat the game, and is found just prior to the entrance to where the Chort is bound.
48. The Walls of Seduction – When you reach the room with the Onoskelis, take the left path until you can walk up the wall. When you come out on the overlook where the Onoskelis was, you will find this statue in a stone hand.
49. The Walls of Seduction – When you reach the room with the Onoskelis, take the left path. In the back are some steps carved into the stone that you can jump on, leading to a crawlspace. At the top of this is a statue on a small outcropping.
50 & 51. The Walls of Seduction – From 49, there are some bushes behind you which lead to a secret room. Follow the tunnel for a while, and you will find two golden statues.
52. The Walls of Seduction – When you reach the room with the Onoskelis, take the right path. The right-most door (which may have bushes in front of it) leads to a room where a statue is on a stone slab with a Martyr on it.
53. The Temple of Pleasure – Immediately to the right when entering this room, there is a very precarious ledge path, leading down to a hidden room. It contains one statue.
54 & 55. The Temple of Pleasure – Upon entering, hug the left wall until you come to a cliff. There is a precarious ledge on the left side you can crawl on. At the end are two statues.
56. The Temple of Pleasure – Right after using the gravity wall, you will end up on a stone walkway. If you face right, there will be a large stone outcropping a short distance to the right of the stone walkway, next to a swinging spike ball. The statue is on it.
57. The Temple of Pleasure – Right after using the gravity wall, you will end up on a stone walkway. If you look to the right, there is a Martyr; approach her and peer over the edge, there is a large circular stone “island” beneath it. Jump down to it. From here, look to the glowing reddish wall, and jump across to the stone there. You will find a statue.
58. The Temple of Pleasure – From 57, jump back to the first stone island. If you look down, you will see there are a few more bone covered islands you can jump to. From the first island, jump three more times, until you are on the lowest one. Hidden behind one of the rocks is a statue.
59-63. The Temple of Pleasure – (Requires Soul Sight) – Right after using the gravity wall, you will end up on a stone walkway. If you face right and follow this path as far as it goes, you will come out on the Walls of Seduction. If you use Soul Sight, you can see a path across the ravine to a small shrine with five statues.
64. The Temple of Pleasure – From 59-63, return to the main Temple of Pleasure room, and as soon as you are on the walkway again, look down to the left. There should be a small island roughly beneath of you (with no one on it). Jump to this island, there is a statue on it.
65-73. The Abandoned Prison (Golden Room) – After beating the game, go back to the Abandoned Prison. Starting from the first save point, travel through the caves and take the first right. This room should be open, and contains 9 Golden Statuettes.
74-78. The Maze of Madness (Red Room) – Once you’ve beaten the game and unlocked Soul Vision, take the Succubus to the Maze of Madness and go through the long underwater tunnel. Use Soul Vision to enter the Red Room. Once you’ve collected your loot, exit through one of the side doors. You will come back out into the Maze, with 5 Golden Statuettes in front of you as reward.
Golden Statuettes Chapter 2
1. Dark Forest – (Martyr Only) Right behind spawn, there is a small island in the water with a crucified Martyr on it. If you burn the bush under her, there is a Golden Statue in it.
2. Dark Forest – From the start of the area, follow the left wall until you come back to the water. A statue is on a small stone altar.
3. Dark Forest – From #2, look further along the wall to the left. There is a large stone altar with a statue in the center.
4. Dark Forest – In the center of the forest, there is a small clearing with an altar in the middle. In a small alcove underneath of it, there is a statue.
5. Dark Forest – From the start of the area, follow the right wall until you find a stone structure blocked with bushes. Burn the bushes to reveal a small altar with a statue on it.
6. Dark Forest – Continue on from #5, and you will come back out to another shore. Visible with be a large stone shrine with a T shape. A statue is laying on it.
7. Dark Forest – From #6, follow the wall to the left of the T-shrine (the wall will be on your right as you follow it). You will come to a small bone shack with a statue on the left side.
8. Dark Forest – At the end of the area, there are two drop-offs which lead to the next area. If you face away from these dropoffs, there is a C shaped alcove of trees directly opposite, with a statue on the ground.
9. Hills of Agony – At the pond you have to cross, there is an underwater tunnel leading to a Secret Chamber. There is a statue laying on the rocks.
10. Hills of Agony – At the far end of the pond, there is a statue underwater in some sort of pile of rocks. Its close to where statue 11 is.
11. Hills of Agony – If you swim across the pond to the right side, there is a statue at the edge of the cliff.
12, 13 & 14. Hills of Agony – This is an off the path area that can be gotten by going to the left instead of right when coming out at the big golden skull. However, you will probably need to go right first, to get a torch, and drop back down from the upper level. With the torch, cross the bridge, pass the squealing demon, and head to the left, until you reach an area with lots of spiders. In the back here is a raised section with some branches. Behind them is a small shrine with three statues.
15. Hills of Agony – From 12, 13 & 14, follow the left side to reach a small shrine with a statue.
16. Hills of Agony – From 15, continue to hug the left side until you reach a second shrine with another statue.
17. Hills of Agony – From 16, you can burn some bushes to your right. There is another shrine immediately visible with another statue.
18. Hills of Agony – Between 16 and 17 is a hidden area. Immediately ahead of you should be a stone altar with a golden statue on it.
19. Hills of Agony – From 18, if you take a left, there is another stone shrine with a golden statuette and a Mad Woman Statue.
20. Hills of Agony – From 19 again, if you look to your right, there is a large stone pile. On one side of this stone pile, there is a crawlspace leading to a tiny candlelit alcove, with another statue
21. Hills of Agony (Succubus Area) – After entering this area, move forward. To the left, behind a pile of a rubble, is a Golden Statuette.
22. Hills of Agony (Succubus Area) – At the back of this area, there is a Martyr Statue with a Golden Statuette next to it.
23. Eternal Fire – From the entrance, you drop down into a cave. Right next to the painting, there is a statue on some stones.
24. Eternal Fire – In the cave, right before the gravity wall, take a left turn into an alcove with a statue.
25. Eternal Fire – After climbing the gravity wall, there are some pillars. A statue is hidden behind one of the left-side pillars.
26. Eternal Fire – After passing through the room with the cages full of prisoners, drop down into the next room. A dead Onoskelis is holding a statue.
27. Tower of the Goddess – (BUGGED) A very tricky one to find; from the save point, look across the water, and there will be a stone outcropping. This statue is actually inside of the rocks, buried and invisible. You can’t actually see it, it looks like it was accidentally covered up. If you know exactly where to look, you can actually still grab it. There is a Soul perk that will let you see items while in soul mode, and that might help.
28. Tower of the Goddess – From the save point, go to the large main island with a small structure on it. If you walk through the “doorway” then immediately look left into the water, you can see the murky shape of a building underwater. There is a golden statue hidden in it.
29 & 30. Tower of the Goddess – When chasing down the Onoskelis, you will come to an area with several prisons with Martyrs inside. To the right side of this area is a hidden path blocked by bushes. It contains 2 statues.
31. Goddess Chamber – On the first floor, there are some Soul Vision branches that hide a cage. In the cage is a statue.
32. Goddess Chamber – When climbing the tower, on the 2nd floor, there is a table with a window. If you climb out of the window, you can find a statue on a rock.
33 & 34. Goddess Chamber – When climbing from the 3rd floor to the 4th floor, there are two statues on the railing of the staircase
35. Goddess Chamber – At the top of the flight of steps to the 4th floor, a statue is on the ground behind a pillar to the left of the door.
36. The Floating Forest – You start here on a multi-tiered structure. On the bottom floor, there is a statue on a pedestal.
37. The Floating Forest – If you jump across the islands sticking to the right side, after passing a group of 3 Martyrs, you will eventually get to a series of isolated islands leading away from the area to the right. On one of these islands is a plainly visible statue on the ground.
38. The Floating Forest – From 37, continue to follow the islands to the right, until you can jump to an area with a large stone structure (and probably some bushes, which you can walk around). Just through the structure, turn left to see a statue against one of the pillars.
39. The Floating Forest – From 38, there is a ramp-like pillar to the right. Using Soul Vision, the vines will vanish, and you can climb it to a second level that has a statue on a table.
40 & 41. The Floating Forest – (Succubus Only) On the left side of this area, there is a path behind some cauldrons full of people, leading to a shrine. There are two places where you can climb Handholds here. Once you climb up, there is another Handhold you can access to climb even higher. There are two statues on this level.
42. The Floating Forest – On the far left, past the large number of Martyrs worshipping a statue, there are two paths. If you take the path to the right of the statue, you will eventually come to another, smaller statue surrounded by fire, requiring Soul Vision to access. There is a statue in the fire.
43. The Floating Forest – From 42, you may notice some bushes right on the cliff face. If you burn them, it reveals a hidden path. If you take the left ledge, you will find a statue among bones and body parts.
44. The Floating Forest – After getting 43, turn around and continue along the cliff face. You will find a hidden cave with a note in it, and this statue on a chair.
45. The Floating Forest – While taking the cliff path up to the Fractal Forest, there is a small cave with a Martyr in it. You have to use Soul Vision to enter it. There is a statue amongst the gore.
46. The Fractal Forest – If you follow the left side, you will eventually reach a collection of floating golden bodies. From the wall, facing it, there should be a golden statue somewhere on the ground nearby.
47. The Fractal Forest – Go to the Dimensional Portal “on the stairs”. Going one direction down the stairs leads you directly to the Golden Martyr cave. If you turn around and go back through the Dimensional Portal, you can walk through a crevasse. Turn immediately left, and there will be a circular garden of sorts with a statue in it.
48. The Fractal Forest – (Martyr Only) When you open the Golden Martyr door, there is a Golden Statue inside.
49 & 50. The Fractal Forest – (Martyr Only) In the center of this area is an easy to miss area enclosed by rock. On several ends, there are entrances blocked by bushes that must be burned. Inside are even more bushes. Behind the bushes are two golden statuettes. You can only get two torches here; one if you bring it from the Floating Forest, and one by opening the Golden Martyr chamber, so use them sparingly.
51. The Fractal Forest – As you approach the exit, there are a series of stone spires. A golden statue is leaning against one on the right side.
52. The Fractal Forest – In the cave at the end, just prior to the Waterfalls of Blood, there is a golden statue on the far end of the table.
53. The Fractal Forest – In the cave at the end, just prior to the Waterfalls of Blood, there is a statue in the water on the far left corner.
54. The Waterfalls of Blood – You will enter a room full of caged babies. There is a bone ramp leading up to a small platform. There is a statue on the altar.
55. The Waterfalls of Blood – When you get to the area overlooking the waterfall, with babies around, there is a hidden path near the caged Chort. On a small stone are some dead babies and a statuette.
56. The Waterfalls of Blood – This statue is not available until you’ve been knocked into the water by the Chort, or on a subsequent playthrough. Once you are in the water, if you swim back, there is a way out of the water into a small cave which now connects to the rest of the Waterfalls of Blood through a crevasse. On the ground near the water is a statue.
57. Waterfalls of Blood (Succubus Area) – After entering this location from the Fractal Forest side, find the first spinning Martyr display. There is a statue on the ground next to it.
58. Waterfalls of Blood (Succubus Area) – Continue through the area until you cross the section with the Martyr Handholds. You will find another spinning Martyr display with another statue on the ground across from it.
59. The Mushroom Mind – If you take a hard right and follow the path to the end, the last tree has a statue laying on the ground.
60. The Mushroom Mind – If you take a left and follow the path straight (not taking any of the offshoot paths), you will come to a tree with one of the stretchy monsters guarding it. On the backside of the tree is a statue.
61. The Mushroom Mind – From the beginning, walk past the glowing cross and there will be a spiral ramp. Behind it is a dead Onoskelis holding a statue.
62. The Mushroom Mind – Towards the end of this area, to the right side is a tree island with a sigil display on it. There is a statue resting on the display.
63. The Tree of Life – Right after the save point at the beginning, there is a statue in a stone alcove.
64. The Tree of Life – To the right of the save point, there is a hidden crevasse in the wood that leads to a secret room. There is a statue in it.
65 & 66. The Tree of Life – Before dropping down into the Chort arena, there is a hallway and stairs to the left. One statue is at the top, one is at the bottom of the stairs by the door. You cannot access this room the first time you play through, due to a cutscene.
67. The Room of Joy – To the right, there is a dead pregnant woman. The statue appears to be coming out of her.
68-74. Tower of the Goddess (Gold Room) – This is hidden in the Onoskelis’ Lair, where you chased it and burned down an entire room to get it. In the back of the room is a small crawlspace which leads to a Gold Room. Use Soul Vision to open the door. You will find 8 Statuettes inside as reward.
Golden Statuettes Chapter 3
1 & 2. Frozen Spawn – To the left of the spawn location, there is a door which can be opened by viewing a painting. Inside are two statuettes.
3. The Upper Ice Caves – In the left-side cave system, after passing a burning woman, there is a squealing monster on the right side of the room. Just beyond it is a statue on the floor.
4. The Upper Ice Caves – If you continue to follow the wall on the right, you will find a pile of hovering items. One of them is a Golden Statuette.
5, 6 & 7. The Upper Ice Caves – Just beyond the hovering items is the Golden Martyr statue. Inside of this room are three statues.
[b8. The Upper Ice Caves[/b] – Further along the path past the floating pile of stuff, you will find a room exposed to the open air. There is a Golden Statuette on the floor. Warning: the air will freeze the Martyr if you take too long.
9 & 10. The Upper Ice Caves[/b] – Just past 5, there is another open air room, with a throne. If you walk behind this throne, you will find two statues.
11. The Ice Pit – Towards the back of the the Ice Pit area (easily visible from the Upper Ice Caves overlook) is a large pillar of meat and flesh. Embedded in the back of it is a statue.
2, 13, 14, & 15. The Ice Pit – From the pillar of meat and flesh, follow the right wall to a crevasse. Go through the crevasse to find a secret room with 4 statues.
16. The Ice Pit – In the back of this area is an open air area with snow and light falling in. In the back of this hall is an ice wall that can be broken by a Chort or Succubus. Inside is a statue.
17. The Ice Pit – On top of the walls in this area, there is a ice spike with a body stuck on it. Also on the spike is a statue.
18. The Ice Pit – Near the hallway with the red flames, there is a Demon-breakable ice wall on the left side. If you dodge past some of the spikes, you can find a statue just in front of a Succubus door.
19 & 20. Frozen Fire (Succubus Area) – From the entrance, go until you reach the Succubus Door. Go left, and then hug the right wall until you reach a room with two spinning Martyr displays. There are two gold statues beneath icy statues.
21. Frozen Fire (Succubus Area) – From the entrance, go until you reach the Succubus Door. Go left, and then hug the left wall until you find a dead Martyr with a statue by his body.
22, 23, 24, 25 & 26 – Frozen Fire (Succubus Area) – If you explore this area, you will find two entrances to a flooded mine tunnel. This area is extremely dark, but has several statues. At least one is floating freely in the water to the left of the Chort Statue. I’ve found an additional four more on the counters.
27, 28 & 29. The Frozen Wastes – Exploring to the left of this area, there are two paths; the left path goes into a cave, while an upper path further out, into a 2nd cave. If you enter this 2nd cave, you will find a pink-lit room with three statues. One of them is hard to see, in the eye of a large skull.
30. Frozen Fire – Before you enter The Great Rite, there is a sigil door. Underwater, there is a statue pointing you towards the sigil. It is holding this statue.
31 & 32. Frozen Fire – Before you enter The Great Rite, there is a sigil door. In the room where you find the X sigil, there are two statues on the ground.
33. The Great Rite – On the table near the teleporter
34. The Bridge of Melted Fire – On the steps leading up to the Painter
35 & 36. The Bridge of Melted Fire (Succubus Area) – On the left side of the room, there is a pile of body parts. Two statues are present on the ground near the pile.
37. The Bridge of Melted Fire – After the Giant Chort chase, you enter a destroyed village. On the left side of this, there is a breakable ice wall. Inside, the first altar has a Golden Statue.
38, 39, 40, 41 & 42. The Bridge of Melted Fire – After 37, move further into the hidden room. There are 5 more statues near two altars. This area requires viewing the painting at statue 58.
43. The Bridge of Melted Fire – After the Giant Chort chase, you enter a destroyed village. On the right side, there are some broken down buildings. In the last building, there is a large fleshy hand holding a statuette. Watch out, a frozen Onoskelis is right next to it.
44. The Bridge of Melted Fire – On the left side of the destroyed village, there is a ruined house with a fire burning on the first floor. The statue is laying against the fire.
45 & 46. The Bridge of Melted Fire – In the room where you view the Painting of Ishtar, where the Giant Chort originated in. There are two sigil plates with statues on them.
47. The Ishtar Gate – On the immediate right, there is a shelf with a statue.
48. The Fallen Kingdom – From the start, follow the path for as long as you can until you get to a choice. Go right, and continue to follow the circular path on the right side. When you reach another fork, go right again. At the end of this branch is a chunk of stone that you can jump to, with a statue.
49. The Fallen Kingdom – From the start, follow the path for as long as you can until you get to a choice. Go left, and jump down onto a chunk of chunk of ruined house. There will probably be an Onoskelis here. There is a statue laying in the rubble.
50. The Fallen Kingdom – After you enter the main building here, go up the stairs, but not all the way to the save point. You will find a wooden structure with a spiral staircase behind some Soul Vision vines. Climb up the stairs and you will find a statue.
51. The Ishtar Chamber – Facing right from the save point, head towards the area with the spiral staircase. Follow it to the back, past the Soul Vision branches, and take a right around wall; in the darkness, you will find a statue on the floor.
52 & 53. The Ishtar Chamber – In the back of Ishtar Chamber, there are Succubus Handholds leading to a hidden chamber. In the first room, two statues are hanging from spikes in a corpse.
54. The Ishtar Chamber – From 52 & 53, jump through the window on the right. On the wall is a corpse with a statue stuck into it.
55. The Ishtar Temple – When you leave the Ishtar Chamber, follow the wall on the left and you will find a hidden ledge snaking around the back. Before the jump, there is a statue on the ground. You will find this statue on the way to see the Angel, as well.
56. The Ishtar Temple – This statue is right in front of the Angel. She can be found on a very lengthy detour to the left side of the entrance to Ishtar Temple (see Angel section for more details)
57. The Ishtar Temple – As you leave the Ishtar Chamber and proceed down the tree branches, eventually there is a fork. If you take the right path, it will wrap around and lead back up into Ishtar Chamber. Along the way, there is a purple glowing spot with a statue near it.
58. The Ishtar Temple – Right after 57, you will turn a corner and there will be a statue on the left across from a painting on the ground.
59. The Ishtar Temple – Travel through this section as if you were going to leave the stage. In the middle of a long stretch of wood, there is a single chunk of building resting on the path. In the rubble is a statue.
60. The Ishtar Temple – At the very end, there is a walkway leading up to the waterfall. Right before the path turns around to face the waterfall again, there is a statue on the corner.
61-74. The Ishtar Temple (Gold Room) – This area can be accessed by turning into a soul at the first “soul jump” point when leaving the Ishtar Chamber, and flying to a distant room on the ceiling. Inside, you can enter a Martyr. Use the Soul Vision to open the door to the Gold Room. You can find 14 Golden Statuettes inside.
Golden Statuettes Chapter 4
1. The Rivers of Blood – At the very beginning of the stage, follow the path and jump to the path to the left of the walkway. A statue is under the bone floor.
2. The Rivers of Blood – At the very beginning of the stage, follow the path for a few seconds and you will see a large shrine across a narrow gap. A statue is in the shrine.
3. The Rivers of Blood – From the beginning of the stage, follow the path straight and take the first left, following it downwards. There is a statue at the end.
4. The Rivers of Blood – From the beginning, follow the path until you reach a Succubus Door. A statue is right in front of it.
5. The Rivers of Blood – From the beginning, follow the path straight and take the THIRD left. At the end of the outcropping is a statue.
6 & 7. The Rivers of Blood – From the beginning, follow the path straight and after the Succubus Door, you will see some bushes. In the hidden area behind them, there are two statuettes, one in front of the altar and one beside it. The one beside it is fairly hard to grab, try jumping on the side of the altar.
8. The Brazen Bull (Succubus Area 1) – When you enter, there is a spike with an impaled corpse on it a little further ahead. The statue is on the ground by its feet.
9. The Brazen Bull (Succubus Area 1) – When you enter, a few seconds in, there is a web-like window on the left side. A statue is on the ground in front of it.
10. The Brazen Bull (Succubus Area 1) – As you proceed through the hall, there is a large fleshy column in the middle. On the right side near the wall, there is a statue on the ground.
11 & 12. The Brazen Bull – After coming up from the gravity wall, follow the left side wall and you will see a stone shrine. It has two statues in it.
13. The Brazen Bull – Continue down the left side, and you will find a small temple-like area. There is a gravity wall in the middle, and in front of it, you can see a statue on the ground.
14. The Brazen Bull – Moving down the right side from the save point, you will find some bone cages. The 2nd one has a statue in it.
15. The Brazen Bull – If you continue down the right side path from the save point, past the rocks which require Soul Vision to pass, you will reach a wall of blood. To the left of this wall is a shrine with a statue on the ground.
16 & 17. The Brazen Bull – Entering the wall of blood from 15, you will swim through some tunnels. If you take the underwater door on the right side, you will enter a Secret Room. In the left corner of this room, there are two statues. You can also access this from above, in the furthest pool in the Chaos Temple.
18. The Chaos Temple – After taking the stairs up from the village in the Brazen Bull, enter the building on the left. If you climb up the stairs, there are a few boards left you can walk on. There is a statue on them.
19. The Chaos Temple – From 18, drop back down to the bottom floor and work your way around to the room in the back. You will come here automatically to progress due to a sigil, but there is also a statue on the ground in the same room as the sigil.
20 & 21. The Chaos Temple – On the far right side of the Chaos Temple, near the two pools, there is a two story house with a spiral staircase. Take the stairs outside to the 2nd floor, and you will find two statues; one on the floor and one on the table.
22 & 23. The Chaos Temple – At the end of this area, there is a pool of blood. In a room nearby, you will find a painting. In a pile of rubble are two statues.
24. The Chaos Temple – At the end of this area, there is a pool of blood. Next to it, there is a broken building with a Martyr on the floor. The statue is on the ground to the right of him.
25. The Chaos Temple – From 24, turn away from the Martyr and look back towards the pool. Walk towards the wall facing you, and in the left corner is a statue in a giant mouth.
26. The Plague Chamber – Immediately after walking through the door, look to your right. There is a statue lying along the wall.
27 & 28. The Plague Chamber – If you walk to the back right corner of the room, you will find a drop-off, a corpse, and two statues laying next to him.
29 & 30. The Plague Chamber – In the room on the left side, there are two statues on the long banquet table.
31. The Plague Chamber – When you go upstairs, stick to the left side and you will find a statue on a small podium.
32. The Plague Chamber – When you go upstairs, walk across the rafters to the left, where a Martyr is sitting. There is a statue near the edge.
33. The Desert of Light – At the save point, there is a stairway leading above you. Facing the stairs, there is a statue lying in the rubble to the left of those stairs.
34 & 35. The Desert of Light – From the save point, there is a glowing purple cave entrance clearly visible near you. If you go up to it, at the top of the steps, there are two golden statuettes.
36. The Desert of Light – From 34/35, if you are facing away from the save point, there is something that looks like a giant ribcage sticking out of the ground. If you climb onto it, there is a statue at the top.
37. The Desert of Light – Head back to the glowing purple cave entrance, and head down the steps a bit. There is a statue halfway down.
38. The Desert of Light – Back at the save point, look to the right and you will see a cage made of bone. Walk past it on the left, and you will see a second cage made of bone. There is a statue inside of the second cage.
39. The Desert of Light – From 38, look to the left of the cage, and there is a wooden post sticking out of the ground in the open. There is a statue at its base.
40. The Desert of Light – From the 2nd cage, you will have a broken down village nearby. If you navigate through it, you will come to a rocky path leading down into the Forgotten Caves. A statue is lying against the left side.
41. The Forgotten Caves – There are multiple entrances to the Forgotten Caves. Lets assume that you took the long path on the far right, which deposits you in a room full of crucified people. A statue is sticking out of the stomach of one of them.
42. The Forgotten Caves – From 41, turn around and look down the hall. On the left side is a small pond of blood surrounded by teeth. The statue is in the blood.
43. The Forgotten Caves – From 42, continue down the hall and take the right fork. In this room, a crucified woman will be right in front of you, with a statue hanging out of her stomach.
44 & 45. The Forgotten Caves – From 43, head further through this room, following the right wall. You will come to a wooden table with two statues on it.
46. The Forgotten Caves – Keep going from 44 & 45, and you will come to a room with several tables. A statue is on a table with an exploding dude.
47. The Forgotten Caves – In the same room as 46, there is a statue on a table with a Succubus Statue.
48. The Forgotten Caves – Proceed down the right side hall from the Baby Eating Door, until you find an area full of spiders. The statue is in a flesh altar full of blood.
49. The Forgotten Caves – From 48, ignore the door, and continue down the hall. You will come to a circular room with mouths on the walls. There is a statue in one of the mouths.
50. The Forgotten Caves – From 49, there is a mouth-door that will open when you walk into it. Immediately in front of you is a bridge, which has a statue on it.
51. The Forgotten Caves – If you cross the bridge and look right, there is a hanging stationary ball of corpses. In the ball is a statue.
52 & 53. The Forgotten Caves – To the left of where you walked onto the bridge, you will see a female Martyr with a well-lit altar behind her. There is a statues on the altar, and on the opposite wall, a statue on the ground inside of a mouth.
54 & 55. The Forgotten Caves – From 52/53, there are two ways to get to these. If you are using the Succubus or possess a Chort, you can break down the wall and continue further in. You can also run across the bridge, and then stay to the left side while avoiding the Chort. Either way, you end up in a room with a table and an altar, each of which has a golden statue. The Succubus area from the Plague Chamber will also drop you off here.
56. The Forgotten Caves – In the same room, and where the Succubus section drops you off, is a fence. Burn it down, and a statue is on the floor in an orifice.
57. The Forgotten Caves – You just passed an area with a burning crucifix and probably a Chort. Go back there, and look down the hall. You will see another burning crucifix. Begin walking towards it, but take the first left, and walk up the stairs to find a statue. Depending on where you entered the caves from, you may have actually come from this entrance, and found this already.
58. The Forgotten Caves – Keep walking down the crucifix hallway, but before you get too far, turn around and walk the rest of the way backwards. If you don’t, it will teleport you back. On the ground in front of the crucifix is a statue.
59. The Forgotten Caves – From the crucifix, return back the way you came, but this time, take a left. You will jump across a pit, and come out to find two Martyrs. On the wall behind them is a giant display of fingers with an eye between them. A statue is floating in front of the eye.
60. The Forgotten Caves – From 59, look along the left wall and you will find another statue on the ground.
61. The Forgotten Caves – With your back to the eye-fingers, take a left and walk through the door. Floating in the middle of this room is a statue.
62. The Forgotten Caves – From where you found the floating statue, look around on the walls to find two shiny Onoskelis swinging at each other. One of them has a statue on it.
63. The Forgotten Caves – There are four exits from this room; 3 of them are chomping mouths, but one looks like a rocky tunnel. Approach this exit, and you will find a statue floating in the air.
64. The Forgotten Caves – After getting 63, turn around and go back to the door leading in the opposite direction. You will come back out into the huge room with the giant ravine in the floor. Follow the path to the left, where you will probably see a Chort and some columns of flesh and gore. One of these columns has a statue on it.
65. The Forgotten Caves – Turn left from 64, and walk past two columns. You will see a flesh altar full of blood with a statue in it.
66. The Forgotten Caves – Next to the blood altar, there is a column. On the other side of it is a statue on the rocks.
67. The Forgotten Caves – From the flesh altar, you will see a man floating in a purple haze. He has a statue sticking out of his mouth.
68. The Forgotten Caves – From here, backtrack a bit and head around to the right path. Walk over some narrow bridges with Onoskelises underneath, digging. After that, you will find pillars with skinned women hanging from them. One of them has a statue lodged in her butt.
69. The Forgotten Caves – From the flayed people, turn left and you will find a sigil door. Once you’ve unlocked it, there is a statue inside.
70. The Forgotten Caves – After you reach the surface (by either exit), you’ll end up in the same area, an enclosed rocky chamber full of vines. Right beneath the drop-off at one end is a statue.
71. The Forgotten Caves – In the same area, walk with your back to the drop-off, and you will see a statue on the ground on the right side.
72. The Forgotten Caves (Desert Section) – At first glance, this section seems very intimidating due to its size. However, there are actually very few statues in this section. One exception to this can be found near the entrance. As you approach the floating Ifrits, there will be a low-lying area and upper walkways. Enter the low area and stick to the left. Along the left, you will see a shrine. From this shrine, there is a spiky pillar with a dead pregnant woman lying at its base. The statuette is between her legs, and is almost solid black and hard to see.
73. The Forgotten Caves (Desert Area) – From the entrance, to your right side is a massive fleshy pile of eyeballs. If you go to the lower area, at the base of this fleshy pile is a statue.
74 & 75. The Forgotten Caves (Desert Area) – If you look to the left, from where you picked up 73, you will eventually see a collection of pillars and shrines in the lower area. The closest shrine has two statues.
76. The Forgotten Caves (Desert Section) – From there, continue until you reach the spiky pillars. The 2nd pillar has a statue lying against it, but be wary of the teleporting enemy who will guard it and harass you.
77. The Forgotten Caves (Desert Section) – From the spiky pillars, you will see what appears to be a small out of place chunk of wall with a window. It has a statue in the corner.
78. The Forgotten Caves (Desert Section) – Keep hugging the wall after the out of place chunk of wall, and you will find more, with a statue on the ground.
79, 80, & 81. The Forgotten Caves (Desert Section) – Continue hugging the wall, and you will find a small room with 2 statues. Outside of this room, outside of the window, is a third on the floor.
82. The Forgotten Caves (Desert Section) – From the last statue, with your back to the corner, is a pile of rubble and a ramp of wooden logs. A statue is on the logs.
83. The Forgotten Caves (Desert Section) – Proceed to the nearby save point. To the savepoints right is a pool of red liquid. A statue is on the ground near it.
84. The Forgotten Caves (Desert Section) – Go in the door next to the save point. Behind the Martyr inside is a statue on the floor.
85-93. The Forgotten Caves (Desert Section) – From where that Martyr was, continue through the back door and follow the path around to the left. You will find the Gold Room for Chapter 4, which requires Soul Vision to open. Inside you will find 9 statues.
94. The Floating Temple – From the save point, follow the right side wall for a few seconds and you will find a statue in the rubble.
95. The Floating Temple – Continue following the right side wall and enter the temple like area. Near a fallen pillar is a statue.
96 & 97. The Floating Temple – At the far end of this area with the pillars is a Martyr. There are two statues on the floor to the right of him.
98. The Floating Temple – If you look out of the temple area to the left, there is a pile of stacked wood. A statue is under it.
99. The Floating Temple – Once you begin climbing the stairs to reach the Cathedral, you will reach an area with lots of people being tortured on pillars. Behind one, in a difficult to reach spot, is a statue. You likely have to jump.
100 – The Cathedral of the Goddess – As you take the bridge to approach the Cathedral, there is a golden statuette simply lying in plain sight, right in the middle of the bridge. Its very close to the beginning of the bridge.
101 & 102. The Tower of Babel – On the 2nd floor, once you open the Golden Martyr room, you will find two statues in the hands of statues.
Golden Martyr Statues
Golden Martyr Statues are found in 5 locations in the game. They appear as crucified torsos, and you need to collect their arms, legs, and head to re-attach them, after which they vanish and grant a small reward (usually a note or a golden statuette).
Chapter 1 – Maze of Madness Statue
Right Arm – It is lying on the floor by the Body, you can’t miss it.
Left Leg – From the exit, face back towards the maze. Take an immediate right, and it will be at the end of the hall.
Left Arm – From the entrance, proceed through the right path (once its been opened). Take an immediate left, followed by a right. Hug the left wall from here until you come to a large room with water on the floor. The arm is on an altar on the left side.
Head – From the entrance room, proceed through the right path (once its been opened). Take an immediate left, followed by a right. Straight ahead should be a crevasse in the wall. Go through the crevasse and follow the path to the right to find the head.
Body – From the exit, hug the left wall and follow it. Before long you will come to the Golden Martyr Statue.
Right Leg – From the first burning martyr, there is a hole in the wall to his left. Crawl through this and follow the right-side wall until you come to a door with a hallway. Down the left side of the hallway is a bone fence and a stone podium. The Right Leg is on that podium.
Chapter 2 – Fractal Forest Statue – NOTE: Cannot be completed as Succubus
Left Leg – If you take the left path from the entrance, there is a Dimensional Rift (looks like a green kneeling woman). In this rift, the leg is lying on the ground.
Left Arm – If you follow the left wall from the entrance (or from the Left Leg) and continue, eventually you will find a stone structure with an altar on the back of it. The arm is on the altar.
Right Leg – If you follow the right side of the map, you will eventually see a somewhat well lit cave. Near the entrance is the Right Leg, which is fairly visible on the floor. Its right next to the Torso.
Right Arm – From the Golden Martyr Cave, if you look out, you will see some curved steps immediately in front of you. Walk up them, and you will be warped into a different dimension. In the arms of a statue is the Right Arm.
Head – Fairly difficult to find. As you approach the exit to this area, you will pass a very large burning lake with a statue in it. To the left of this lake is a small area of land. You can get to it either by jumping across the burning water (you will take damage), or by closely examining the rock wall near that area, which has a crevasse. Inside is another Dimensional Rift, which contains the head.
Torso – If you follow the right side of the map, you will eventually see a somewhat well lit cave. This is where the torso can be found. If you find the right leg, you are right by the entrance.
Chapter 3 – Frozen Fire Statue
Head – In the Upper Ice Caves, if you continue to follow the wall on the right, you will find a pile of hovering items. One of these items is the Head.
Torso – The Torso is in the Upper Ice Caves, just around the corner from the floating pile of stuff that contains the Head.
Left Arm – Towards the back of the the Ice Pit area (easily visible from the Upper Ice Caves overlook) is a large pillar of meat and flesh. Embedded in the front of it is the Left Arm.
Left Leg – Towards the back of the Ice Pit area is an open air area with snow and light falling in. On the floor on the right side is the leg.
Right Leg – In the center of the Ice Pit is a picture frame with a baby hung in it. The Right Leg is clearly visible from this picture.
Right Arm – From the entrance to the Ice Pit (where the Chort is sitting at a table), follow the left wall until you come to a crevasse. Move through the Crevasse to find a flaming ice hallway. On the left side, the arm is embedded in the wall.
Chapter 4 – Tower of Babel Statue
Left Arm – Directly to the left of the entrance, in front of a cauldron
Right Leg – Directly to the right of the entrance, to the left of a cauldron
Head – From the entrance, walk straight ahead until you reach a giant altar. The head is on a crucified baby effigy most of the way up.
Right Arm – Take either staircase to the top. Between the two staircases, overlooking the first floor, is a balcony with the arm on the floor.
Left Leg – Facing towards the entrance from the Altar, take the right staircase. At the top, turn right and go towards the door. At the feet of one of the statues is the left leg.
Torso – On the upper floor, one of the doors has the torso embedded in the blood. Is actually a little hard to see unless you get very close.
Chapter 4 – Final Stage Statue
Head – Easily the hardest part to get, you should always get this first due to the risk of dying. After entering the city and walking down the center road for a while, you will eventually find a stairway leading to the left side. Take it, and look for a large flight of steps leading up to a higher area. Turn back towards the center road and climb up onto the wall. You will see a series of pillars over the central road. The Head is on top of one. This is a very difficult jump to make, but if you get a running start and make sure not to jump too soon, you will make it with a little room to spare. To avoid dying when jumping back down, try to jump down to the lower archway below you first, and then to the ground.
Right Leg – Walking down the central road, you will eventually find a collapsed pillar leading to the right side. Climb down, and looking to your right, you will see a building that is lit in pink light. Enter it, and you will find the leg on the table.
Left Leg – From the Right Leg’s location, go back outside and continue to walk. There will be a building with large golden bulls adorning it. Inside, the Left Leg is on a table.
Torso – Continue through the central road until you climb a large staircase. When the path forks, go to the left, where you will find the Golden Martyr Door.
Left Arm – The Left Arm is on the stairs next to the Torso.
Right Arm – At the top of the central stair case, go right, as if you were approaching the final fight. You will notice a stairway descending into the water. If you dive into it, you will see the Right Arm glowing down there.
Notes and Letters (Chapters 1 & 2)
Chapter 1:
The Djinn – Abandoned Prison – Found in the hidden right side path between the Gates of Hell and the Abandoned Prison.
The Spider – Abandoned Prison – Found in a hidden ledge underneath of the Ravine area
Onoskelis – Abandoned Prison – In the Ravine area, cross the Ravine and explore the caves until you find a pool of blood. Diving into it, one of the paths will take you above the pool, where you can find this note next to a dead standing Onoskelis.
The Great Rite: Part 1 – Abandoned Prison – In the Ravine area, there is a outcropping that can’t be reached just by jumping. If you use Soul Vision, it will reveal a path leading to it, where you can find this note.
Letter 2 – Abandoned Prison – Found in one of the cells. May need to be burned with a torch.
The Red Goddess II – Abandoned Prison (Succubus Area) – There is a note in plain view after entering from the Cellblock side
Madman’s Note 1 – Judgement Chamber – Found in plain view in the front on a table
Letter 1 – Judgement Chamber – (Martyr Only) Found in plain view once you open the door to head down to the Maze of Madness. This door does not open for the Succubus.
Backer Note – Judgement Chamber (Succubus Area), from the entrance, immediately in front of you upon entering are some handholds. Use them and drop down into the next room, and hug the left side wall (but do not change floors) for a while until you find a room with an iron maiden. The note is in this room.
The Beast – Judgement Chamber (Succubus Area) – From the entrance, follow the path downward until you find a hallway to the left. Proceed past several revolving doors with skeletons, and you will see a room with a purple glow. The note is on a table inside of it.
Chort– The Maze of Madness – From the entrance, proceed through the left path. When facing the shrine immediately ahead of you, there will be a glowing hallway to your left. The note is on a podium in this room.
Letter 3 – The Maze of Madness – From the entrance, proceed through the right path (once its been opened). Take an immediate left, followed by a right. Hug the left wall from here until you come to a large room with water on the floor. The letter is in front of the statue.
Madman’s Note 2 – The Maze of Madness – From the exit, face back towards the maze. The note should be right next to the exit on the left.
The Leviathan – The Maze of Madness – Found in the Golden Martyr Room. From the exit, hug the left wall and follow it. Before long you will find it.
Letter 4 – The Pit – After exiting the Maze of Madness, will be on the floor immediately in front of you.
Madman’s Note 2 – The Pit – After exiting the Maze of Madness, will be on a stone just to the left of the save point.
Succubus – The Pit – On the second circular floor, walk half way around the circle. The note will be on a tongue.
Madman’s Note 4 – The Pit – This is found in the room where you drop down after witnessing the man building a wall out of babies. Its connected to the second room on the right on the second floor.
Madman’s Note 5 – The Pit – On the third circular floor, there is a hallway from the blood table room which will result in a sequence of cutscenes. Once they are finished, the note should be readily visible in the hallway you end up standing in.
Red Goddess – The Pit – On the third floor, there is a sigil door. In the back of the room is a throne with this note on it.
The Mind Maze – The Pit (Succubus Area) – After entering, this note should be on the left side of the hallway.
Letter 6 – The Spider’s Lair – Right after dropping in, this note is on the back of the stone that the statue is on.
Letter 5 – The Spider’s Lair – In the hallway with the Onoskelis, there is a burnable bush. After it is gone, you can jump across to a small rock with this note.
The Angel – The Spider’s Lair – From the save point, there is a crevasse towards the back of the room behind the statue. Inside of it, you can find this note.
Madman’s Note 6 – The Spider’s Lair – In the room with the Iron Maidens, this is on the back of a stone slab which is facing the portal.
Madman’s Note 7 – The Walls of Seduction – Immediately visible to your right after you show up here for the first time.
Madman’s Note 8 – The Walls of Seduction – As soon as you enter the caves, there will be a alcove on the left with this note plainly visible.
Letter 7 – The Walls of Seduction – Just after Madman’s Note 8, there is a hallway on the left that leads to a secret room with this note.
Madman’s Note 9 – The Walls of Seduction – Continue down the hall from Madman’s Note 8, and there will be yet another note on the left side.
Red Goddess III – The Walls of Seduction – When you reach the room with the Onoskelis, take the left path until you can walk up the wall. When you come out on the overlook where the Onoskelis was, you will find this note.
Madman’s Note 10 – The Temple of Pleasure – Right before entering Baphomet’s chamber, you climb on some gravity walls. When you are finished with the walls, you end up right next to an altar with this note on it.
Chapter 2:
Letter 8 – Dark Forest – From the start of the area, follow the left wall until you come to a large stone shrine. A note is on a smaller pedestal in front of it.
Madman’s Note 11 – Hills of Agony – At the pond you have to cross, there is an underwater tunnel leading to a Secret Chamber. You can find a note in there.
The Floating Forest – Hills of Agony (Succubus Area) – After entering this hidden area, a note is visible on an altar to the right side.
Letter 9 – Eternal Fire – In the cave, right before the gravity wall, take a left turn into an alcove with a note on an altar.
Madman’s Note 12 – Tower of the Goddess – This is on the back side of the big island in the center of the lake, where the Onoskelis was standing before you chased her.
Letter 10 – Tower of the Goddess – When you get to the section where you jump across a gap and finally control the Onoskelis, there is a large pool of water to your right. In that pool of water is a small building with this note.
Madman’s Note 13 – Goddess Chamber – On a writing desk fairly visible on the second floor
Letter 11 – The Floating Forest – On the left side of this area, there is a path behind some cauldrons full of people, leading to a shrine. You have to use Soul Vision to get through it. There is a note on a podium there.
Madman’s Note 14 – The Floating Forest – If you follow to the left, towards the cliffs that lead to the Fractal Forest, there are a large number of Martyrs worshipping a statue. The note is on the ground to the left of it.
Letter 12 – The Floating Forest – If you follow to the left, towards the cliffs that lead to the Fractal Forest, there are a large number of Martyrs worshipping a statue. If you travel down the path on the right, you come to a dead end, but if you use Soul Vision, you can pass the branches, and there is a hidden path with some bushes. Burn them, and go down the path to find a hidden crevasse with this note.
Letter 13 – The Fractal Forest – This note is plainly visible on a stone as soon as you reach this location.
Madman’s Note 15 – The Fractal Forest – On the right side from the entrance, there is a Dimensional Portal (looks like a green kneeling woman). In this rift is a note on a stone block.
Letter 14 – The Fractal Forest – Near some stairs towards the back of this area, there is another Dimensional Portal. This note is found in the rift on a stone slab.
Madman’s Note 16 – The Room of Joy – This note is on the desk on the left side of the room
Notes and Letters (Chapters 3 & 4)
Chapter 3:
Ifrit – Frozen Spawn – On the right side before heading down into the cave, there is a note on a podium.
Letter 15 – Frozen Spawn – To the left of the spawn location, there is a door which can be opened by viewing a painting. On the ground in front of it is this note.
Letter 17 – Frozen Spawn – To the left of the spawn location, there is a door which can be opened by viewing a painting. Inside of the room is this note.
Madman’s Note 17 – The Upper Ice Caves – In the left-side cave system, after passing a burning woman, there is a note in front of a large burning chunk of ice.
Madman’s Note 18 – The Upper Ice Caves – From spawn, if you travel up the left side path leading out into the open, there is a small hole on the left side wall you can enter. You will fall down to a location overlooking a Chort at a table, and you can grab this note.
Madman’s Note 20 – The Upper Ice Caves – When you pass the floating pile of stuff, next to the Golden Martyr Statue, there is a pedestal with a note on it.
Madman’s Note 19 – The Upper Ice Caves – Towards the far end of the area overlooking the Ice Pit, there is a room with a throne. If you walk behind this throne, you will find the note.
Madman’s Note 21 – The Ice Pit – Right before you enter the hallway with the flaming walls, if you turn around and look back, the note is on a stone slab.
The Frozen Fire – Frozen Fire (Succubus Area) – After entering, follow until the first fork in the road. The right side is Succubus Door leading out. If you go left and then continue straight, you will enter a brightly lit room with the note on a rock.
Letter 16 – The Frozen Wastes – Upon entering this outdoor area, head to the left. There will be a path leading into a cave with a table and an Onoskelis. Before the table, this note will be on a stone.
Madman’s Note 22 – In the Great Rite – On the table near the teleporter
Madman’s Note 23 – The Bridge of Melted Fire – On a stone slab near the save point
Letter 18 – The Bridge of Melted Fire – After the Giant Chort chase, you enter a destroyed village. On the left side of this, there is a breakable ice wall. The Succubus can break it, but you may also be able to possess a Chort here as well. Inside, this note is posted on an altar.
Madman’s Note 24 – The Ishtar Gate – If you take either path, you will see this on a shelf after turning a corner
Chapter 4:
The Forgotten Desert – The Brazen Bull (Succubus Area 2) – In the center of this chamber, there are some large statues. To the left of the statues is this note.
Madman’s Note 25 – The Chaos Temple – This is sitting on a stone slab directly beneath the wooden structure where people are hanging.
Madman’s Note 26 – The Forgotten Caves – This is found behind a cracked door near where the Chorts are roaming. Its right next to the Golden Martyr Head.
The Great Rite: Part 2 – The Forgotten Caves – Along one of the exits for the caves, you can find a small chamber with an Angel in it. This note is behind her.
Letter 19 – The Forgotten Caves – Near the other exit to the cave, there are a row of pillars with flayed people hanging from them. Nearby is a sigil door, and this note is behind it.
Madman’s Note 27 – The Forgotten Caves – From the sigil door where Letter 19 is located, there is a large golden statue resting at one end of the pillars. This note is at its feet.
The Great Rite: Part 3 – The Tower of Babel – You have to open the Golden Martyr room upstairs and examine the painting. This will open up the door to the right on the first floor. The note is in a chair inside.
Final Stage:
Letter 20 – After entering the city and walking down the center road for a while, you will eventually find collapsed pillar leading to the right side. Climb down it, and looking to your right, you will see a building that is lit in pink light. Enter it, and go out the back door into a room full of statues. Turn right, and it will be behind a corner on a stone slab.
Letter 21 – At the top of the central stairway, there is a Golden Martyr Door on the left side. Once you’ve opened it, go upstairs and you will find this note.
Madman’s Note 28 – As you head up the central stairway, on the right side, there are some open windows in the stone. You can jump across to these. Once inside, there is a stairway leading up to a writing desk with this letter.
Paintings
Paintings, as defined by the game, are distinct from the actual “Gallery” Paintings. There are a number of paintings you need to scan to open up a door or change a room. Only a few of these actually end up in the Gallery, but the game still counts them as “Paintings” in the list at the end.
So with that said, I’m attempting to detail paintings as listed per stage, rather than as far as the Gallery is concerned.
Chapter 1:
The Gates of Hell – In the VERY first room of the game, there is a well hidden painting behind on of the pillars on the right side. It opens a secret chamber in this room.
2. The Pit – Required for progression, found to the left after climbing out of the Maze of Madness.
3. The Pit – Once you enter the first circular floor, there is a door to your right. You need to burn a door to enter it. Follow the path, dodging under a swinging spikeball, and continue to find a painting that uncovers a hidden room in the first section of the Pit.
4. The Pit – Once you enter the first circular floor, go left and enter the first door. You may need to burn bars to enter it. Inside is a painting.
5. The Pit – On the third floor, the first room on the right is full of blood and has a large table. In the back corner, there is a painting.
6. The Pit – On the third floor, there is a sigil door. Inside is a painting.
7. The Spider’s Lair – At the end of the hall with the Onoskelis is this painting.
8. The Spider’s Lair – There are some bushes in the hallway with the Onoskelis. Behind them is a gravity wall; on the wall, you can view this painting.
9. The Walls of Seduction (Succubus Only) – Right before entering the caves, there are some Succubus Handholds that will allow you to see this painting.
10. The Walls of Seduction – When you reach the room with the Onoskelis, take the right path. The right-most door (which may have bushes in front of it) leads to a room where this painting can be found
11. The Temple of Pleasure – Right before you climb on the gravity walls, there is a small room full of Martyrs to the left. It contains this painting.
Chapter 2:
1. Dark Forest – In the back of the Dark Forest area is a small bone shack with a painting on the wall.
2. Eternal Fire – From the entrance, there are some burnable bushes. You may need to get a torch in the upper area and drop back down. Behind the bushes, there is a painting.
3. Eternal Fire – When you drop down into the cave, there is a mandatory painting to progress through the area.
4. Eternal Fire – After climbing the gravity wall, there will be a painting on the left side as you progress through the area.
5. The Floating Forest – Hidden towards the back of this area is a series of islands leading to an isolated area with a stone structure. After walking through the structure, one of the paintings is leaning against the pillars.
6. The Floating Forest – From 5, continue to explore the hidden area. In the back, very close to the poisonous sea, there is another painting. This painting is required to unlock the Baphomet ending later in the stage.
7. The Floating Forest – In the center of the floating islands is a large island with an Onoskelis on it. There is a painting to view here as well.
8. The Floating Forest – As you approach the area there half a dozen Martyrs are worshipping a statue, you cross a precarious bridge made of rocks and tree branches. To the left, there is a small gap in the stone wall behind some bushes. Inside is a painting, one that is required to unlock the Baphomet ending later in the Fractal Forest.
9. The Tree of Life – To the right of the save point, there is a hidden crevasse in the wood that leads to a secret room. There is a painting in here.
10. The Room of Joy – This painting is required to progress. Its in the water, next to the glowing lung-shaped object.
Chapter 3:
1. Frozen Spawn – Near the spawn area, on the right side before heading down into the cave, there is a painting. Viewing it opens a door.
2. The Upper Ice Caves – Towards the far end of the area overlooking the Ice Pit, there is a room with a throne. If you walk behind this throne, you will find the painting.
3. The Ice Pit [- In the back of this area is an open air area with snow and light falling in. In the back of this hall is an ice wall that can be broken by a Chort or Succubus. Inside is a painting.
4. The Frozen Wastes – Upon entering this outdoor area, head to the left. There will be a path leading into a cave with a table and an Onoskelis. Behind the table, there is an odd looking wall that will vanish if you use Soul Vision. Proceed down the gravity wall and you will find a painting that opens a door elsewhere on the map.
5. The Great Rite – Towards the back of this room, near the portal, there is a painting.
6. The Bridge of Melted Fire – The first painting here is required to make the bridge available
7. The Bridge of Melted Fire – A required painting for progression, you view it after the Giant Chort chase.
8. The Bridge of Melted Fire – WARNING, MAY BE BUGGED! This is the painting that the Painter is working on when you meet him. It seems to no longer be scannable in most recent versions of the game, and will not be unlocked in your gallery.
9. The Ishtar Temple – As you leave the Ishtar Chamber and proceed down the tree branches, eventually there is a fork, with the left path leading to the end of the stage. If you take the right path, it will wrap around and lead back up into Ishtar Chamber. On the way is a painting.
Chapter 4:
1. The Rivers of Blood – From the beginning, follow the path straight and after the Succubus Door, you will see some bushes. In the hidden area behind them, there is a painting.
2. The Chaos Temple – At the furthest end of this area, there is a pool of blood. In the building next to it, there is a painting.
3. The Forgotten Caves – This is found behind a cracked door near where the Chorts are roaming. Its right next to the Golden Martyr Head.
4. The Forgotten Caves – In one of the rooms with the repeatedly exploding men, there is a painting in the back near a well lit wooden desk.
5. The Floating Temple – Right before you walk across the massive bridge leading to the Cathedral, there is a painting which is facing the bridge.
6, 7, 8 & 9. The Tower of Babel – On the left and right sides of the Cathedral, there are giant spinning portals. On both sides of each of these portals are paintings, four in total.
10. The Tower of Babel – This painting is on the 2nd floor in the Golden Martyr Room. It opens one of the downstairs rooms as well.
Final Stage:
1. After entering the city and walking down the center road for a while, you will eventually find a stairway leading to the left side. Take it, and look for a large flight of steps leading up to a higher area. There is a painting up here.
2. After entering the city and walking down the center road for a while, you will eventually find collapsed pillar leading to the right side. Climb down it, and head to your right until you find a building adorned with golden bull heads. Inside is a painting.
3. At the top of the central stairway, there is a Golden Martyr Door on the left side. Once you’ve opened it, there is a painting inside. This painting is rather unusual, in that you can examine it, but it looks like its mostly blank and ruined (normally paintings like this can’t be examined).
3D Viewer Statues (Chapters 1 & 2)
Chapter 1:
1. Onoskelis Statue – The Abandoned Prison (Succubus Area) – Immediately to the right of the Succubus Handhold near the cellblock
2. Damned Woman Statue – The Judgement Chamber (Succubus Area) – From the entrance, immediately in front of you upon entering are some handholds. Use them and drop down into the next room; from here, hug the right wall until you find Martyrs worshipping a golden statue. A Damned Woman Statue is on the ground next to it.
3. Spider Statue – The Judgement Chamber (Succubus Area) – From the entrance, immediately in front of you upon entering are some handholds. Use them and drop down into the next room, and hug the left side wall (but do not change floors) for a while until you find a room with an iron maiden. The statue is found here.
4-7. Succubus Statues 1-4 – The Maze of Madness (Red Room) – Once you’ve beaten the game and unlocked Soul Vision, take the Succubus to the Maze of Madness and go through the long underwater tunnel. Use Soul Vision to enter the Red Room. On the left and right sides of the area are 2 statues each.
8. Damned Woman Statue 2 – The Walls of Seduction – When you reach the room with the Onoskelis, take the left path. In the back are some steps carved into the stone that you can jump on, leading to a crawlspace. In this room is a statue.
9. Snake Statue – The Temple of Pleasure – When you enter this area, proceed until you reach the broken bridge. Turn around and you will see Succubus Handholds behind you. In the area above them, you will find a Snake Statue.
10. Martyr Statue – Guardian of Light – After defeating Baphomet, a stairway appears where he had been sitting. Follow it, and you will find the statue in the chamber.
Chapter 1:
1. Mad Man Statue – Hills of Agony (Succubus Area) – After entering this hidden area, the statue is easily visible to the right side.
2. Martyr Statue – Hills of Agony (Succubus Area) – After entering this hidden area, move to the back. Hidden in a corner is Martyr statue next to a Golden Statuette.
3. Damned Woman Statue – Hills of Agony – Towards the back of the spider-filled area, there is an area surrounded by bushes. If you clear it, you will find several shrines with golden statues, and towards the cliff side, a Damned Woman Statue.
4. Martyr Statue – The Tower of the Goddess – In the area where you are tasked to chase down the Onoskelis, there is a large island in the middle with a small shrine. If you look into the water from the back of the shrine, there is an underwater structure. There are two entrances; one of them has a golden statuette, the other has a Martyr Statue.
5. Chort Statue – The Tower of the Goddess – (Succubus Only) Towards the back of this area, near where you chase the Onoskelis, there is a T-shaped portal that only the succubus can enter. Inside is a Chort statue.
6. Small Spider Statue – The Floating Forest – From the starting area, jump to the islands on the left. One of these islands is covered with spiders, and has a plainly visible Spider Statue on a table.
7. Onoskelis Statue – The Floating Forest – (Succubus Only) On the left side of this area, there is a path behind some cauldrons full of people, leading to a shrine. There are two places where you can climb Handholds here. Once you climb up, there is another Handhold you can access to climb even higher. The statue is on the top floor.
8. Small Spider Statue 2 – The Fractal Forest – (Martyr Only) In the center of this area is an easy to miss area enclosed by rock. On several ends, there are entrances blocked by bushes that must be burned. Inside are even more bushes. Behind the bushes is the statue. You can only get two torches here; one if you bring it from the Floating Forest, and one by opening the Golden Martyr chamber, so use them sparingly.
9. Baphomet Statue – The Fractal Forest – (Martyr Only) This one is actually like its own side quest. In the Floating Forest, there are two specific paintings in well hidden locations which must be examined. Upon doing so, Hearts will spawn in the Fractal Forest, one in the same location as the Golden Martyr Head, and one in the same location as the Golden Martyr Right Arm. Back at the beginning of the Fractal Forest, there is a dimensional rift with some scales that you must balance with these hearts. Once you have done so, proceed to the end of the area and enter the cave. There is a chamber in this room which will now be open, containing the statue. This statue is required to get the Baphomet ending as well.
10. Onoskelis Statue 2 – Waterfalls of Blood (Succubus Area) – Can be easy to miss. Progress until you reach the Succubus handholds. Once you are on them, look downwards to see a few more handholds leading to a small cave below. The statue is in this cave.
3D Viewer Statues (Chapters 3 & 4)
Chapter 3:
1. Mad Man Statue – Frozen Fire (Succubus Area) – From the entrance, go until you reach the Succubus Door. Go left, and follow the right wall until you reach a room with revolving displays and ice statues. Go down the hall to the right, and the statue will be in an alcove on the left.
2. Chort Statue – Frozen Fire (Succubus Area) – If you explore this area, you will find two entrances to a flooded mine tunnel. Hidden in this underwater room is a Chort statue.
3. Leviathan Statue – Frozen Fire (Succubus Area) – This is also in the flooded tunnel, and is EXTREMELY hard to see. This entire room is roughly a square shape, with the two entrances at two adjacent corners. This statue is on the far side from the entrances, on a shelf in severe darkness. There is also a golden statuette on that shelf, if it helps you identify the location.
4. Red Goddess Statue 1 – Frozen Fire (Red Room) – The hardest part of this is unlocking the actual room itself, which is found in the area with the spiked crushing walls. Check the Red Room section for those instructions. The statue is plainly visible inside of the room.
5. Red Goddess Statue 2 – Frozen Fire (Red Room) – The hardest part of this is unlocking the actual room itself, which is found in the area with the spiked crushing walls. Check the Red Room section for those instructions. The statue is plainly visible inside of the room.
6. Beast Statue – Frozen Fire (Red Room) – The hardest part of this is unlocking the actual room itself, which is found in the area with the spiked crushing walls. Check the Red Room section for those instructions. The statue is plainly visible inside of the room.
7. Onoskelis Statue – The Bridge of Melted Fire (Succubus Area) – On the left side after entering the room, this statue is on the floor.
8. Onoskelis Statue 2 – The Bridge of Melted Fire (Succubus Area) – A little further in from the first one, this is also on the floor on the left side
9. Chort Statue 2 – The Bridge of Melted Fire – After the Giant Chort chase, you enter a destroyed village. On the left side of this, there is a breakable ice wall. The Succubus can break it, but you may also be able to possess a Chort here as well. Inside, this statue is on an altar.
10. Onoskelis Statue 3 – The Ishtar Chamber (Succubus Area) – There is a hidden Succubus area behind the Ishtar Chamber (near the altar). In the top, jump into the room on the right to find an Onoskelis statue.
11. Onoskelis Statue 4 – The Ishtar Chamber (Succubus Area) – In the same area, go back to the first room and jump through the window on the far wall. Another Onoskelis statue will be in the corner.
12. Ifrit Statue – Ishtar Temple (Gold Room) – This area can be accessed by turning into a soul at the first “soul jump” point when leaving the Ishtar Chamber, and flying to a distant room on the ceiling. Inside, you can enter a Martyr. Use the Soul Vision to open the door to the Gold Room, and the Ifrit Statue can be found on an altar inside.
Chapter 4:
1 & 2. Angel Statues 1 and 2 – The Brazen Bull (Succubus Area 1) – When you enter this area through the Succubus Door, on the right side, there is a T-Shaped portal. Inside this room, there are two Angel statues.
3. Angel Statue 3 – The Brazen Bull (Succubus Area 2) – After you enter, take an immediate right and you will find the statue.
4. Angel Statue 4 – The Plague Chamber (Succubus Area) – After dropping down, the statue is immediately visible in a window
5. Madman Statue – The Plague Chamber (Succubus Area) – After dropping down, go through the door right in front of you. On your right will be a stone altar with the statue on it.
6. Onoskelis Statue – The Forgotten Caves (Gold Room) – Near the save point for the Floating Temple, you can find the entrance to a Gold Room hidden behind the buildings. Open it with Soul Vision to find this statue.
7. The Forgotten Caves (Gold Room) – Can be found in the same place as the Onoskelis Statue.7. Martyr Statue – The Forgotten Caves (Gold Room) – Can be found in the same place as the Onoskelis Statue.
8. Spider Statue – The Forgotten Caves (Gold Room) – Can be found in the same place as the Onoskelis Statue.
9. Chort Statue – The Tower of Babel – In the Golden Martyr Room on the 2nd floor, this statue is on a table.
“Its A Secret” Achievement Location
This achievement is unlocked by entering a certain room in Chapter 3.
So, to find this room, you want to go to Chapter 3: The Fallen Kingdom. This will spawn you in the Ishtar Chamber, and you will want to proceed through the stage until you enter the 2nd large open room with Ifrits (The Ishtar Temple).
Pass the first glowing purple spot, and you will see that to your left is a twisting tree branch that leads to an isolated platform with another glowing purple spot.
If you climb to it, and look out the back towards the ceiling, you will be able to see this building:
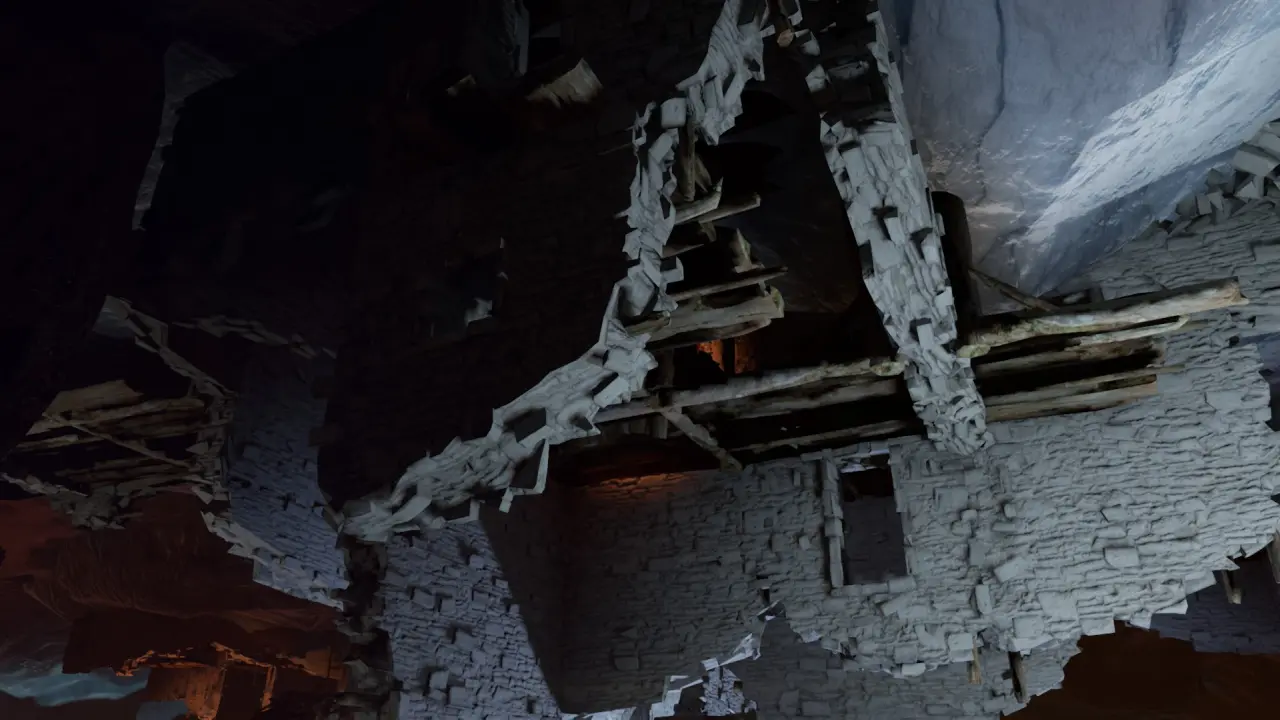
The glowing light is a hidden room within this structure. From the glowing purple spot, leave your body and possess an Ifrit. Use the Ifrit to fly up into the structure and enter the room. This will unlock the achievement, and reward you with quite a sight!