A full walkthrough of the Alternate DiMansion Diary game and how to solve all the puzzles and get all the endings.
Introduction
The story begins with Sae and her friends on a class trip. While her friends goof off, Sae discovers a dirty magazine, only to be surprised by her friend Yuuki wanting to know what she found. Sae will try to hide the magazine but in the struggle ends up toppling off a cliff.
Sae comes to and tries to make her way back to the group, only to discover a creepy mansion in the woods. At this point, you’ll now have full control of Sae as she tries to find help.
Entering and Exploring the Mansion
With no place else to go, take Sae inside to explore the house.
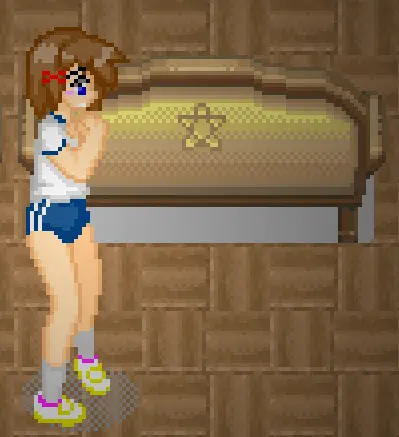
You’ll start in the main hall, where you can wander around. Ahead of you are two sets of stairs that are not currently functional. Exploring the right hallway will find some sort of balance beam over a gaping chasm that Sae will have no desire to cross. Exploring the left hallway will find a locked dining room, a room with strange symbols on the wall, and a room containing four statues. Below the stairs is a stage. Trying to leave the house will reveal that the door has locked behind you.
First things first, you’ll need to find a way to explore the house further. Head down the left hallway and examine the paintings on the wall until you find a peculiar one.
Note the red mark in the upper left corner. Return to the main hall and check the large rug before the stage doors. Lift up the rug to find the Dining Room Key.
Now, check out the Dining Room. Inside, you’ll find a large table, a fireplace, and another door to the Kitchen. In the Kitchen, you’ll find a switch on the wall next to the sink. Pull the switch. Sae will hear a noise coming from elsewhere in the house. Returning to the main hall will reveal that the stairs are now functional. Head upstairs.
At the top of the stairs, head along the left hallway until you run across a shadowy figure. Sae will try to follow him only to find a dead end. On the floor near the end of the hallway is the Guest Room 1 Key.
Note the dusty mirror on the wall as you head down the left hallway towards the front of the house. One door will be locked, but the other door will lead to Guest Room #1. Inside the room, you’ll find a large pattern on the floor. This is actually a puzzle. You’ll need to travel across the pattern, stepping on each tile only once. Start from one of the two single tiles sticking off of the pattern.
Solution:
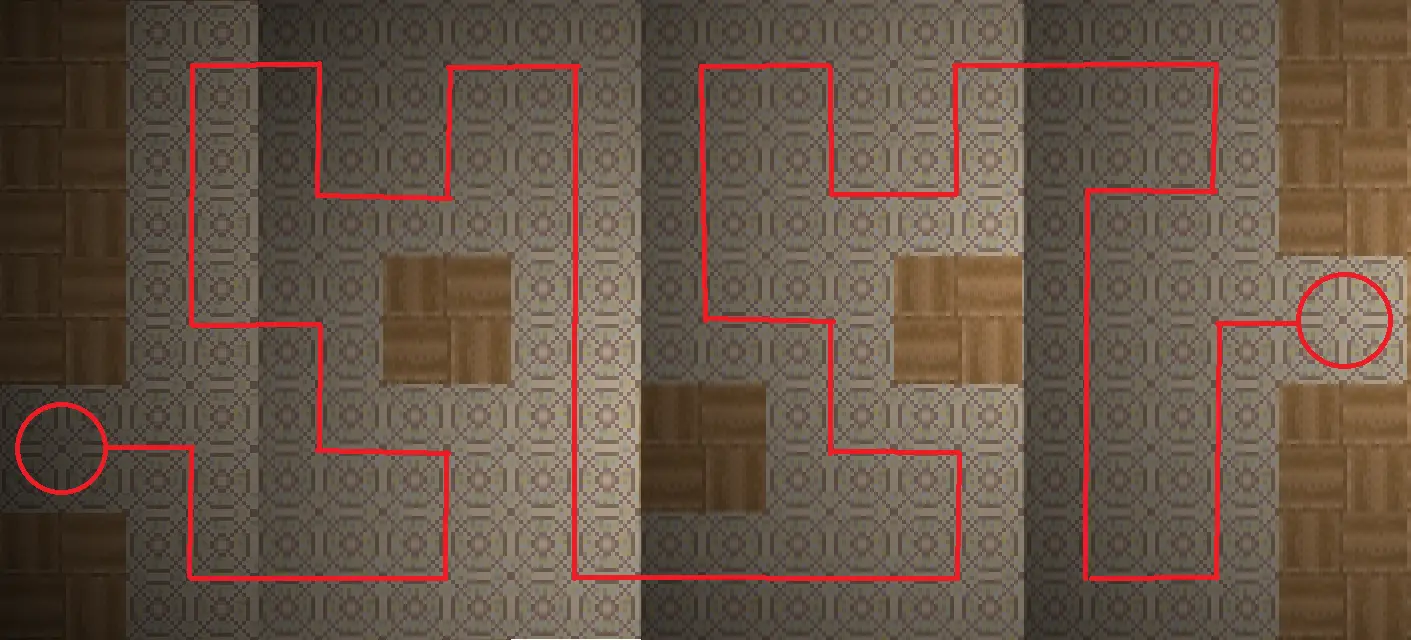
Once you’ve walked the entire path, Sae will hear a noise nearby. Searching the nearby nightstand will yield you the Guest Room 2 Key.
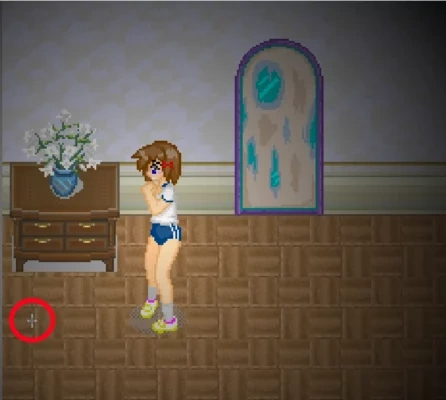
Head back up the hallway and check the next door, leading to Guest Room #2. Inside you’ll find a table and chair. Sae will be tired from her trek and decide to take a rest. She’ll sit down and start thumbing through the magazine she found when something odd happens with the chair.
After the encounter, Sae will wake up, wondering what happened. She’ll now be free to search the room. A couple things of note, there’s a mask on the wall, matching one you may have noticed in the 1st guest room, except this one is missing eyes. Also of note is another odd painting.
With nothing else to do in this room, search the rest of the upstairs. You’ll find a nice painting at the top of the stairs. Also of note, you’ll find a library and another locked door on the right hallway. With nothing else to do, head back downstairs.
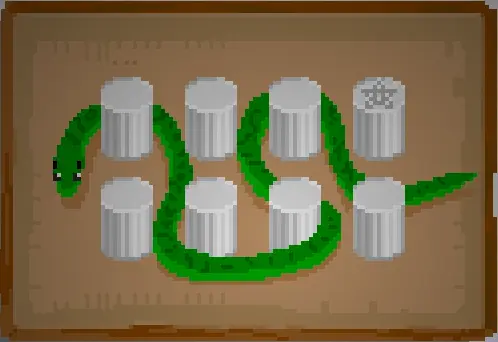
Now, its time to explore the Stage room. Inside, you’ll find a seat with an interesting design on the back.
If this symbol looks familiar, it’s because you saw it on the snake painting from before. This is another puzzle you’ll need to solve.
Solution:
The snake painting shows you the path you must take through this room to solve the puzzle, winding your way through the seats towards the stage. Starting from the door, head Up, Right, Up, Left, Down, Left, Up, Up, Right, Right, Up, Left.
Once you solve the puzzle, something will drop from the ceiling and land on the stage. Search the stage to find the Guest Room 3 Key. Head back upstairs to the last locked door you found and enter Guest Room #3.
Inside the room, you’ll find quite a mess. The only thing of interest in the room is a cupboard that is locked. You’ll have to find a way to unlock it.
Solution:
To solve this puzzle, simply pick up the items and place them in the appropriate locations in the room. The bird goes in the bird cage, the flower in the vase, the teacup on the table with the teapot, and the doll on the small table.
Once you’ve unlocked the cupboard, take a look inside, you’ll be startled to find an amorphous blob that pours out into the room and forms into the shape of the shadowy figure you saw before.
Sae, suitably alarmed, will try to flee the house.
Searching for a Way Out
A near panicked Sae will want to leave, so head back downstairs and try to open the front door. Sae will still be unable to leave, and will try to throw a chair through the window instead, which also fails. She’ll collapse to the floor in tears.
Once calm, Sae will note that the shadowy figure did not give chase. She’ll now be determined to find a way out of the mansion. First, head to the statue room on the first floor. In the upper left corner of the room, you’ll see something shining on the floor. Search to find a Blue Key. Next, head back upstairs to search the 3rd guest room. In the now empty cupboard, you’ll find a Yellow Key.
Now is a good time to check the Library. Inside are four color coded shelves, each with a book locked in place. To open these locks, use the corresponding colored key, of which you should now have two.
Unsure of what to make of these hints, head back downstairs and explore the right hallway again. Before, Sae was unwilling to cross the balance beam, but with a growing urge to leave, she’ll carefully make her way across. On the other side is a continuation of the hallway with two doors. Check out the paintings on the wall to discover another odd painting.
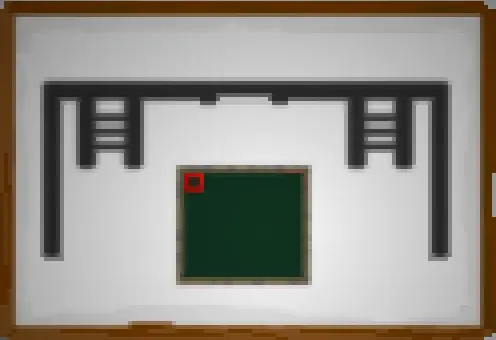
The mascot’s head should look familiar. Next, enter the far right door. On the floor is a design that resembles a set of scales. On the back wall are three monitors showing different amounts of balls of different colors. This is another puzzle that needs to be solved.
Solution:
Completing the puzzle will unlock the other door in the room. Unfortunately, it is dark in the room beyond, making it impassable for now.
Check the other door in the right hallway to discover a Bathroom. Checking the door inside will find a nice hot bath waiting for you. Sae will consider her current condition and decide a bath might be nice. Head back into the Bathroom and check the basket on the shelf to disrobe before settling into the bath. As Sae ponders her situation, she’ll discover a Blue Fish Token in the water.
After the bath, check on the shelf next to where you stored your clothes to find a Dry Dust Cloth. Take this cloth to the sink nearby to create a Wet Dust Cloth. Now, leave the Bathroom. Back out in the hallway, Sae will announce that she is hungry.
Head back to the main hall, crossing the balance beam once again. The trip back will not go as smoothly as the trip over. Back in the main hall, head to the Dining Room to find food waiting for you. Sae will sit down to eat, again pondering who prepared the food in much the same way as she questioned who prepared the bath. Once she’s finished eating, she’ll discover that something is written on the plate.
Sae will be unsure what this means, but when you consider the colors traditionally associated with these elements (brown, green, blue, and red), it may remind you of something you saw nearby. Head to the statue room.
Solution:
The color of the statues eyes correspond with the different elements in the clue. To solve the puzzle, use the handles on the statues’ eyes to have them face the one they love.
- Red faces Blue
- Blue faces Red
- Brown faces Green
- Green faces Blue
Once you solve the puzzle, the door in the back of the room will unlock, revealing a Storage Room. Inside the room, you’ll be able to find a Red Key on the empty shelf and a Ladder on the floor. Leaving the Storage Room, Sae will ponder the red eyes on the nearby statue. They do look familiar, don’t they?
With your new ladder, head back to the Kitchen and search the refrigerator to climb the ladder to grab a Screwdriver. Now, head back to the statue room. Use the screwdriver on the statue with red to steal the Red Stones. Now, head upstairs. Return to Guest Room #1 and look at the floor, which bears a strong resemblance to the mascot painting you saw earlier. Check the rightmost brown tile to find a Green Key.
Next, enter Guest Room #2 and check out the mask on the wall. Every other mask you’ve seen has had red eyes, but not this one. Placing the red stones on the mask will reveal a Flashlight.
Now, return to the Library with the two new colored keys and search the corresponding bookshelves.
With these two new clues, go back to the dusty mirror. Use the wet cloth on the mirror to clean it. Staring at the clean mirror will have it fade into a portal to somewhere else. You’ll need to enter the portal.
Appearing on the other side, you’ll find yourself facing five mirrors. Approaching any of these mirrors will cause Sae to discover that the mirrors teleport you to corresponding mirrors elsewhere in this maze. In order to leave, you’ll need to make your way to the heart of the maze.
Solution:
The fastest way to solve the maze is to enter the mirror on the far left of the first room. Next, head up the hallway and choose the mirror on the far left again. Now, head all the way to the right, then head up, left, then up and enter the mirror at the end of the hallway. From here, head left and up to find a Hammer on the floor. Pick it up, then head back in the mirror you came from. This will not take you back to the mirror you entered before, but will put you at a different mirror in that room. Turn around and enter the mirror you just emerged from. From this room, walk to the right until you find three mirrors on the wall. Approach the middle mirror. Sae will use a hammer on the mirror, revealing a hallway beyond. Walk up this hallway to enter a final mirror.
Once you’ve successfully navigated the maze, you’ll find yourself in a room facing a single mirror. Approaching the mirror will find a dark reflection of yourself looking back, who will pull you into the mirror for a little chat.
Afterwards, you’ll wake up back in the hallway, with a Blue Ball on the floor next to you. Grab that, then head back to the painting at the top of the stairs. Search the painting to find the Red Bird Token. Now, head back downstairs and return to the room with the pit. Sae will discover a walkway has appeared, allowing her to bypass the balance beam. Cross the pit and return to the room with the ball puzzle. Use the screwdriver on the vent on the wall to reveal a round hole. You can insert the blue ball into the hole, which adds it to the ball puzzle, creating a new puzzle. Much like before, you’ll need to find a way to balance the two sides of the scale.
Solution:
Solving this puzzle a second time will cause the nearby mask to fall off the wall, revealing a Battery. Now, with a working flashlight, Sae will be able to explore the Dark room. Inside, walk all the way to the far side of the room to find another nightstand. Inside this one is an Extinguishing Agent. With nothing else to do, try to leave the room. Sae will be startled by something in the room, causing her to lose her flashlight. She’ll wake up outside the room.
Time to Escape?
Make your way back to the main hall. With the extinguishing agent, consider where in the house you’ve seen fire. Head back to the Dining Room. Use the extinguishing agent on the fireplace to put out the flames, then search inside, where you’ll find the Front Door Key. Sae will be delighted to finally have hope of an escape. As she considers this, she peers down to notice she’s covered in soot. Head back to the main hall again.
Now, you’ll reach a crossroad: do you leave while you can, or do you continue exploring the house?
SAVE YOUR GAME HERE
ENDING 1
With everything that has happened, Sae will be happy to leave. Use the key on the front door to escape the mansion. The epilogue will speak of Sae finding her way back to her friends and discovering that not much time has passed in the outside world. Sae talks of trying to find the mansion again, but failing to do so.
ENDING 2
Continue from your previous save. Given her current condition, Sae will want to cleanup before leaving the house. Head back to the Bathroom for another bath. Sae will enjoy the warm water once again, before discovering that she is not alone in the Bathroom.
After her bath, Sae will notice that her clothes have been stolen. With no choice, she’ll have to leave without clothing. Making her way back to the pit, she’ll discover that the walkway is missing, leaving only the balance beam to cross. With memories of her last crossing, Sae will cautiously attempt another crossing. As before, things get rough.
Sae comes to on the other side of the pit. She’ll be startled to see the walkway has returned, as have her clothes. Heading back into the main hall, Sae will make another startling discovery: a series of candles are leading the way to the Stage. Following the candles, Sae will be very hesitant to enter. Inside, she’ll worry about her decision to continue. Making her way to the stage, the lights will return and she’ll find herself surrounded by shadowy figures who quickly close in on her.
After the encounter, Sae will sit and cry before carefully making her way to the front door.
SAVE YOUR GAME HERE
Exit the house and make your way down the front steps. Walk across the courtyard and exit the front gate. The epilogue will speak of Sae finding her way back to her friends and discovering that not much time has passed in the outside world. Sae talks of never wanting to find the mansion again and never trying to do so.
ENDING 3
Continue from your previous save. Sae will recall the clue she got from the yellow book, leading to one last puzzle.
Solution:
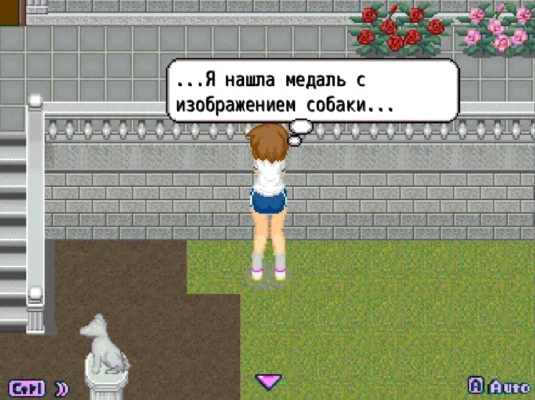
Starting from the bottom left side of the courtyard, find the fallen dog statue. Follow the direction it is facing until you find another dog statue. Follow this one’s gaze to find another fallen dog statue facing towards the house. Walk up to the house and search the wall to find a hiding spot.
After solving the puzzle, you’ll find a Yellow Dog Token.
Head back to the front door. Sae will try to talk herself into leaving before admitting she wants to return to the house, using the Tokens as an excuse to continue exploring.
Back inside, Sae can return to the chair in Guest Room #2, the mirror in the upstairs hallway, the bath in the Bathroom, and the Stage for new encounters. Once finished, she should look under the right stairwell in the main hall, where she’ll find a Green Turtle Token.
With four tokens, Sae should return to the room with the strange symbols on the wall. Inserting the four tokens into the symbols on the wall will unlock the door, leading to a stairwell heading down to the basement. Entering the basement will allow Sae to discover the secret history of the house. This will also unlock the ability to enter the Memory Room, represented by a floating orb in the main hall, as well as the After Story.
After Story
If you opted for the 3rd ending, you’ll have the ability to choose the After Story from the main menu.
The After Story picks up where the 3rd ending leaves off, with Sae in the secret room in the basement. Her friends Yuuki and Tomoe have found the mansion while searching for her. Sae decides to have fun with her friends by hiding in the house and allowing them the same experiences she had exploring herself. Her friends will split up, searching various rooms of the house, with Sae following along behind them to see what happens. You’ll have to wander the house to find each encounter. Or just search the following places in order:
- Guest Room #2
- Kitchen
- Mirror
- Kitchen
- Dark Room
- Stage
As her friends make their way to the Stage, Sae will reveal herself to be the mastermind behind their exploration. Using the control device she gained earlier, she’ll reveal one last surprise, dumping them all into the room under the pit.