A guide on how to get all ending the WORLD OF HORROR has to offer.
You also may like:
WORLD OF HORROR – Tips for Beginners
ALARMING ACCOUNT OF ABNORMAL ARMS
ENDING A – PERVERT
Just play through the mystery.
ENDING B – CENTIPEDE
YOU MUST BE IN A RUN USING TIMELINE B AS THE TIMELINE TO GET THIS ENDING.
Play through the mystery as normal, at the end of the mystery, you will be forced to fight and defeat ‘VENT CRAWLER’.
BIZARRE BRUIT OF THE BLOOD-CURDLING BOTANIST
ENDING A – CLEANSED WITH FIRE
THIS WILL REQUIRE THE ‘FIRE AXE’ FROM DEFEATING THE MAD JANITOR IN THE MERMAID MYSTERY.
Start off by completing the side quest ‘MYCOLOGY MANIAC’ by investigating the school twice. Make sure to equip the ‘FIRE AXE’ before getting into the Shiro-San encounter. In the Shiro-san encounter actions panel, there will be a button called ‘W-WHAT’S THAT?’ in the bottom left, click that to go into the ‘FUNGUS-CONTROLLED SHIRO-SAN’ fight. (TIP: reducing Shiro-san’s health before entering the fight by letting the plants attack him will reduce the Fungus-controlled Shiro-san health as well) Then the actions panel will return to normal and there will be an additional option in the Offensive Actions panel to the left called ‘CHOP YOUR WAY OUT’, use it and it will reveal another action right below it called ‘BREAK INTO MINIVAN’, use that, it will reward you with the ‘DIY FLAMETHROWER’. Proceed with killing Shiro-san.
ENDING B – FUNGICIDE
You will need to complete the side quest ‘MYCOLOGY MANIAC’ by investigating the school twice. In the Shiro-san encounter actions panel, there will be a button called ‘W-WHAT’S THAT?’ in the bottom left, click that to go into the ‘FUNGUS-CONTROLLED SHIRO-SAN’ fight. (TIP: reducing Shiro-san’s health before entering the fight by letting the plants attack him will reduce the Fungus-controlled Shiro-san health as well) Then the actions panel will return to normal and you must fight and defeat Shrio-san like any regular enemy.
ENDING C – STILL MISSING
There are two options to complete this ending. The first is to just play through the mystery as normal. Upon getting into the Shiro-san encounter, normal combat actions are replaced with special actions. You must use the option ‘LEAD THE GARDENER’ a total of 11 times to escape with him.
The second option requires the ‘FIRE AXE’ from defeating the Mad Janitor in the Mermaid mystery. Make sure to equip the ‘FIRE AXE’ before getting into the Shiro-San encounter. Upon reaching the Shiro-san encounter, there will be an option in the bottom middle of the actions panel called ‘CHOP YOU WAY OUT’, simply use that action.
ENDING D – LACERATIONS
Play the mystery as straight forwards as possible, simply let Shriro-san die. This ending will result in a +3% DOOM penalty.
BLOODY BRIEF OF A BECKONING BULLETIN
ENDING A – LOUD AND CLEAR
Start by doing the side quest ‘FOREST SUICIDES’ by investigating the forest twice. When you get to the computer screen option of yes or no, select yes. On the next screen select the ‘REMEMBER THE NOTE’ option. On the 3 choice option screen, pick ‘YOU CAN’T SAVE EVERYONE’.
ENDING B – CONNECTION TROUBLE
There are two main methods to get this ending. The first way is when you get to the computer screen option of yes or no, select yes. On the next screen select the ‘PICK UP THE PHONE’ option, you will then fight and must defeat ‘TOGETHER’.
The second way requires doing the side quest ‘FOREST SUICIDES’ by investigating the forest twice. When you get to the computer screen option of yes or no, select yes. On the next screen select the ‘REMEMBER THE NOTE’ option. On the 3 choice option screen, selecting ‘SUFFERING IS HUMAN’ will result in -5 STAMINA and +15% MAX STAMINA, and then that starts the fight with ‘TOGETHER’. Selecting ‘I DON’T WANT TO DIE’ will result in -5 REASON and +15% MAX REASON and will also start the fight with ‘TOGETHER’.
ENDING C – DISCONNECTED
Play through the mystery as normal and when you get to the computer screen option of yes or no, select no. This ending will give -3 REASON, +5% DOOM, and +3 FUNDS.
CHILLING CHRONICLE OF A CRIMSON CAPE
ENDING A – RED COAT (THING)
You must do the side quest ‘THE MAN IN A RED CAPE’ by going to the schoolyard and asking the students for the ‘LATEST GOSSIP’, until you get the response ‘…when AKA MANTO asks which paper do you want – you must refuse anything!’. When you encounter Aka Manto, chose ‘I don’t want anything from you!’. You will then have to fight Aka Manto (True Form).
ENDING B – RED COAT (MAN)
Play the mystery normally and select either of the Red or Blue paper when prompted (You will always lose 5 Stamina). You will then have to fight Aka Manto, killing him drops his ‘CRESTFALLEN MASK”.
CURIOUS CASE OF A CONTAGIOUS COMA
ENDING A – DREAM DEVOURER
Do the side quest ‘PATIENT ZERO’ by investigating the village twice, giving you ‘DUST OF SEEING’, use it when prompted to at the quarantine wing, making you fight the ‘DREAM DEVOURER’. (TIP: Under offensive actions there will be a button to the side of the main panel called ‘UNPLUG LIFE SUPPORT’, allowing you to to deal 15 damage to the DREAM DEVOURER at the cost of 3 REASON.)
ENDING B – SATED… FOR NOW
Do the mystery as straightforward as possible and choose to Investigate when prompted at the quarantine wing. This ending results in a -3 REASON penalty.
EERIE EPISODE OF EVOLVING EELS
ENDING A – EYE SURGERY
Play through the mystery as normal and once you get back to Kana’s apartment use the ‘check the bedroom’ button. Then select ‘we must puncture her eye now!’ at the cost of -3 REASON, and proceed to puncture Kana’s eye out. This ending allows you to keep Kana as an ally.
ENDING B – MISSING FRIEND
Play through the mystery as normal and once you get back to Kana’s apartment use the ‘check the bedroom’ button. Then select ‘we must go to a hospital!’. This ending will make you lose Kana as an ally.
ENDING C – LEFT BEHIND
Play through the mystery as normal and once you get back to Kana’s apartment, immediately use the ‘ESCAPE!’ button to leave immediately. This ending will make you lose Kana as an ally.
FAR-OUT FABLE OF A FEAR FESTIVAL
ENDING A – POLICE RAID
On the second day of the mystery, another location, the forest, will open up near the bottom right of the map. You must investigate it a total of 5 times, with at least 2 times being before the end of day 3. Once the Overgrown Factory is available in the final part of the map, go to it and end the mystery.
ENDING B – TOO LATE
Do whatever you want to with the exception that you cannot go to the forest location that opens up on the second day more than once. Once you go to the second part of the map, you will be forced to investigate the forest until the Overgrown Factory location is available, then simply proceed into it. This ending results in a -2 STAMINA penalty.
ENDING C – THE RITUAL
YOU MUST BE IN A RUN USING TIMELINE B AS THE TIMELINE TO GET THIS ENDING.
On the second day of the mystery, another location, the forest, will open up near the bottom right of the map. You must investigate it a total of 5 times, with at least 2 times being before the end of day 3. Once the Overgrown Factory is available in the final part of the map, go to it and start the fight with ‘NAMELESS HORROR’. There will be an additional option in the Offensive Actions panel to the left called ‘ATTACK THE MASTER CULTIST’, use it for a total of 20 damage to win. This ending rewards you with the ‘SPIRAL HOOD’.
FREAKY FEATURE OF FOUND FOOTAGE
ENDING A – SHUNNED HOUSE
YOU MUST HAVE THE CAN OF ACID TO GET THIS ENDING (obtainable from the hardware store at the seaside).
Play the mystery like normal and at the end chose ‘PEEK INSIDE’, you will then get another option to ‘POUR ACID INSIDE’ afterwards, choose it, it will also award you with the ‘FOREST TAPES’ item (currently doesn’t do anything)
ENDING B – WISHING WELL
Play the mystery like normal and at the end chose the ‘PEEK INSIDE’ option at the ending of the mystery.
ENDING C – TAPES
Play the mystery like normal and at the end chose the ‘TAKE CASSETTES AND RUN’ option at the ending of the mystery, it will reward you the ‘FOREST TAPES’ item (currently doesn’t do anything).
HORRIBLE HISTORY OF HOUSEHOLD HELL
ENDING A – INNER COIL
YOU MUST HAVE AN ALLY AND A SOURCE OF LIGHT TO DO THIS ENDING.
Do the side quest ‘BUILDING HISTORY’ by investigating the seaside location twice, it will give you the Architect’s Journal and Shiokawa Herald (A). Click on the Shokawa Herald and then inspect it, it will mentioning a clue written on a cavern wall: ‘4XXHz’. When you get to the Underground Chamber, click on ‘EXPLORE SOME MORE’, you will find speakers that allow you to put in the 4XXHz. It will awaken OETARU, a monster that cannot be defeated by normal combat. Then under the Offensive Actions panel, there will be a button to the side of the main panel called ‘SACRIFICE YOUR ALLY’, click it to randomly sacrifice an ally and take -3 REASON, ending the fight.
ENDING B – BEAST AWAKENED
YOU MUST HAVE A SOURCE OF LIGHT TO DO THIS ENDING.
Do the side quest ‘BUILDING HISTORY’ by investigating the seaside location, it will give you the Architect’s Journal and Shiokawa Herald (A). Click on the Shokawa Herald and then inspect it, it will mentioning a clue written on a cavern wall: ‘4XXHz’. When you get to the Underground Chamber, click on ‘EXPLORE SOME MORE’, you will find speakers that allow you to put in the 4XXHz. It will awaken OETARU, a monster that cannot be defeated by normal combat. Then under the Offensive Actions panel, there will be a button to the side of the main panel called ‘NO HOPE!’, click it to end the fight. (Note, you still take doom damage as you would running from a normal enemy. And having CHTAC-ATORASU as your Old God does not effect your ability to get this ending)
ENDING C – MYSTERY BURIED DEE
Play through as straightforwards as possible.
MACABRE MEMOIR OF MORBID MERMAIDS
ENDING A – MORBID DISCOVERY
Play through the mystery as straightforwards as possible and kill the Mad Janitor, doing so will reward you with his Fire Axe.
ENDING B – MERMAID IN A MANHOLE
When you go to fight the mad Janitor, under Defensive Actions panel there will be a button to the side of the main panel called ‘FORCE MANHOLE OPEN’. It will take you a couple of tries to pry it open. TIP: Getting the Crowbar or the Monkey Wrench (obtainable in the hardware store at the seaside location) is highly recommended to make the process faster.
ENDING C – FIRE AND WATER
When you go to fight the mad Janitor, under Defensive Actions panel there will be a button to the side of the main panel called ‘TOPPLE A LAMP’, use it to instantly end the fight. It will make it so that people no longer show up at the schoolyard; and if you play Spine-Chilling Story of School Scissors after this mystery, the school will be burned, resulting in a fight with a special version of the Scissor Woman. This ending will result in you getting the ‘BURN’ Injury.
ENDING D – INSMASU CURSE
THIS ENDING REQUIRES THE ‘INSMASU LOOK’ CURSE AND FOR YOU NOT TO BE USING USING TIMELINE B.
Proceed through the mystery and upon initially encountering the Mad Janitor (before the fight), there will be an additional prompt called ‘DISTRACT HIM’, press it.
ENDING E – LONELY FISHMAN
YOU MUST BE IN A RUN USING TIMELINE B AS THE TIMELINE TO GET THIS ENDING.
There are two main ways to get this ending, for the first one, proceed through the mystery and upon initially encountering the Mad Janitor (before the fight), there will be an additional prompt called ‘NOTICE HIS FACE’, press it, then press the additional ‘AGREE’ prompt. This version of the ending results in a +4% DOOM penalty.
The second way requires an ally to get. Proceed through the mystery and upon initially encountering the Mad Janitor (before the fight), there will be an additional prompt called ‘NOTICE HIS FACE’, press it, then press the additional ‘SEND AN ALLY INSTEAD’ prompt. This version of the ending results in you loosing a random ally and a -2 REASON penalty.
PERILOUS PARABLE OF THE PECULIAR PAINTING
This mystery is not part of the base set of mysteries and requires an achievement in order to unlock the card pack required to play it. Achievement: PAINTED HOSPITAL: win your fifth playthrough. UNLOCKS EXTENDED D.
ENDING A – DOOMED ARTIST
Always choose to investigate the locations with Eimi. When you go to investigate the Private Rooms and Ichiro-san tells you to leave Eimi and himself alone, continue to investigate the Private Rooms again. This will force you into ‘THE PAINTING’ fight. Successfully killing The Painting will reward you with Eimi as an ally.
ENDING B – GRAND VERNISSAGE
Always choose to investigate the locations with Eimi. When you go to investigate the Private Rooms and Ichiro-san tells you to leave Eimi and himself alone, leave and investigate the Mansion Foyer. Afterwards, go back and investigate the Private Rooms to complete the mystery.
ENDING C – SHOW MUST GO ON
Play through the mystery by advancing it as fast as possible and ignore Eimi. At the end of the mystery you will be forced to fight ‘ICHIRO-SAN’.
ROTTEN REPORT OF RANCID RAMEN
ENDING A – LAB RESULTS (FULL)
Do the side quest ‘DUMPSTER DIVE’ by discarding two items and you will be rewarded with ‘SMELLY MEAT’. At the end of the mystery select the option to turn in the “VIAL + MEAT”.
ENDING B – LAB RESULTS (PARTIAL)
Play the mystery straightforward and select the option to turn in the “JUST THE VIAL OF RAMEN SOUP” at the end of the mystery when prompted to.
SORROWFUL SAGA OF MOONLIGHT SAILORS
ENDING A – FISHING SEASON’S END
Do the side quest ‘HOOKS AND NETS’ by discarding two items, it will say that you found a huge pile of hooks and nets and threw them out to sea to stop the sailors, then just complete the mystery.
ENDING B – REAL CATCH
Just complete the mystery as straightforward as possible.
ENDING C – BURNING COAST
YOU MUST BE IN A RUN USING TIMELINE B AS THE TIMELINE TO GET THIS ENDING.
There are two main ways to get this ending, the first is you play through the mystery as normal. At the ending of the mystery, there will be the option to ‘PREPARE FOR COMBAT’, click it and then procced to fight and defeat ‘THE SEEPING APSOTLE’.
For the second way, do the side quest ‘HOOKS AND NETS’ by discarding two items, rewarding you with the ‘TORCH’. At the ending of the mystery, there will be the option to ‘THROW YOUR TORCH’, click it to end the mystery.
SPINE-CHILLING STORY OF SCHOOL SCISSORS
ENDING A – SAVED FRIEND
Go through the mystery like normal, when you find the Blessed Chalk access your storage and take out the ‘FRIEND’S DIARY’, click on it and you will see a symbol under the ’18’ entry. Make the correct sigil with the chalk by using the ‘1’ and ‘2’ redraw sigil buttons until it looks the same as the one shown in the diary, proceed through the rest of the investigation.
ENDING B – LEGEND CONTINUES
Mess up the ritual by getting the incorrect sigil, you will then fight the (horror) version of the scissor woman and will get her scissors upon killing her.
ENDING C – SLIT MOUTH
Die to any Timeline A version of the Scissor Woman.
ENDING D – AMBULANCE RIDE
YOU MUST BE IN A RUN USING TIMELINE B AS THE TIMELINE TO GET THIS ENDING.
Play through the mystery however you’d like, you will always get this ending. At the ending of the mystery, there will be special buttons to input a ritual, the same ritual you would use to banish ghost type enemies (TIP: In your ‘FRIEND’S DIARY’, there will be the first two steps to it at the edge of the to left). For every right response, you will be rewarded with +5 EXPERIENCE, for every wrong response, there will be a -2 ALL penalty.
Notable change you can do to this mystery: If you get Ending C in the MERMAIDS mystery, it will result in the school being burned. The locker containing the ‘WOODEN BAT’ now contains the ‘TORCH’. You fight the SCISSOR WOMAN (BURNED), which has +1 attack but -6 hp in comparison to the HORROR version. You also get locked into the B ending for doing this.
VICIOUS VERSES OF A VIOLENT VIGIL
ENDING A – NEW DAWN
At 10 P.M. when you automatically to to the Master Bedroom, before doing any praying actions, immediately go out into the dilapidated corridor and talk to someone, they will give you the Vigil Pamphlet which will tell you what to do, MAKE SURE YOU HAVE ENOUGH SPACE IN YOUR INVENTORY TO GET IT. Go back to the bedroom and preform the proper prey and then inspect his foot, it will copy the symbol down into the pamphlet. Then explore and come back and do whatever optional event it has (E.X. eat dinner, light the fireplace). You will be forced to go back to the Master Bedroom afterwards where the body will be missing, don’t worry, it always happens. Continue exploring until 2 A.M. then go to the study and feed the plant (always -1 STAMINA)/burn the envelope (always -1 REASON). You can’t cover the mirror (at least currently) so you can skip that step. You will then be teleported into another dimension Dilapidated Corridor where you get the option to sacrifice two guests or carve the cursed symbol, carve the symbol which will then start a fight with the Horrible Old Man and kill him.
ENDING B – SOAKED IN BLOOD
At 10 P.M. when you automatically to to the Master Bedroom, before doing any praying actions, immediately go out into the dilapidated corridor and talk to someone, they will give you the Vigil Pamphlet which will tell you what to do, MAKE SURE YOU HAVE ENOUGH SPACE IN YOUR INVENTORY TO GET IT. Go back to the bedroom and preform the proper prey and then inspect his foot, it will copy the symbol down into the pamphlet. Then explore and come back and do whatever optional event it has (E.X. eat dinner, light the fireplace). You will be forced to go back to the Master Bedroom afterwards where the body will be missing, don’t worry, it always happens. Continue exploring until 2 A.M. then go to the study and feed the plant (always -1 STAMINA)/burn the envelope (always -1 REASON). You can’t cover the mirror (at least currently) so you can skip that step. You will then be teleported into another dimension Dilapidated Corridor where you get the option to sacrifice two guests or carve the cursed symbol, carve the symbol which will then start a fight with the Horrible Old Man. Under the attack options panel, there will be a button to the left called ‘SACRIFICE THE OTHER GUEST’, you must sacrifice one guest and then kill him.
ENDING C – DEATH, CHEATED
You can just play through as fast as possible, choosing only to investigate the mansion to progress the time. You will be forced to kill the guest as they come and then be forced to sacrifice them at the end.
WORRYING WRITE-UP OF A WORDLESS WARD
This mystery is not part of the base set of mysteries and requires an achievement in order to unlock the card pack required to play it. Achievement: PAINTED HOSPITAL: win your fifth playthrough. UNLOCKS EXTENDED D.
ENDING A – HORROR WARD
Play thorough the mystery as normal. At the end of the mystery when you fight ‘your friend’, kill them.
ENDING B – SUCCESSFUL SURGERY
Play thorough the mystery as normal. At the end of the mystery when you fight ‘your friend’, use the special button located to the right of the offensive actions menu called ‘THIS IS TOO MUCH!’ to instantly escape the fight (this action results in a +5 DOOM penalty).
ENDINGS ENCYCLOPEDIA
Ending 1 – STAMINA loss – Die by stamina loss.
Ending 2 – REASON loss – Die by reason loss.
Ending 3 – Earth devoured by ATH-YOLASTH – Lose by doom with ATH-YOLASTH, THE TOWERING EYE as your old god.
Ending 4 – Snatched by GOIZO – Lose by doom with GOIZO, THE THING FORSAKEN BY GOD as your old god.
Ending 5 – Perished in the hecatomb – Lose by doom with ITHOTU, THE DEVOURING FLAME as your old god.
Ending 6 – Organs liquified by CTHAC-ATORASU’s web – Lose by doom with CTHAC-ATORASU, THE SPIDER GOD as your old god.
Ending 7 – Mouth slit – Die to the SCISSOR WOMAN during the SPINE-CHILLING STORY OF SCHOOL SCISSORS mystery.
Ending 8 – Lost in the OTHERWORLD – Die to AKA MANTO (TRUE FORM) during the CHILLING CHRONICLE OF A CRIMSON CAPE mystery.
Ending 9 – Inner ear bursted – Die to OETARU during the HORRIBLE HISTORY OF HOUSEHOLD HELL mystery.
Ending 10 – Survived (rioter) – Beat the game as Miku.
Ending 11 – Survived (generic) – Beat the game.
Ending 12 – Kidnapped by aliens – Go to the dog’s store and choose to buy a random discount item, and sooner or later you’ll end up with the Blue Gem. With this item in your inventory, explore the Seaside until you’ve see an event called LIGHTHOUSE RUMOR. Pay very close attention to the words “Blue Gem” in your inventory; they should be shaking very, very slightly. After this, explore the School and pay very close attention (if you’re like me and have seen every event, you may be clicking through very quickly): you’ll find an event called EMPTY CORRIDOR (OR IS IT?), and the words “Blue Gem” in your inventory will begin to vibrate again. Once this event is over, explore the Forest, noticing that the words “Blue Gem” are vibrating with every event you see, and eventually you’ll get your secret ending.
Ending 13 – Minced and cooked – Re-roll the downtown dog shop to get over 100% doom.
Ending 14 – Lost in YGOTHAEG’s gaze – Lose by doom with YGOTHAEG, THE IRRESISTIBLE GAZE as your old god.
Ending 15 – Body melted – YOU MUST HAVE AN EMPTY BOTTLE. In the other-world event ‘UPPER KINGDOM’ select the third option ‘fill an empty bottle with blood’ to get ‘BOTTLE [BLOOD]’, then simply use the item.
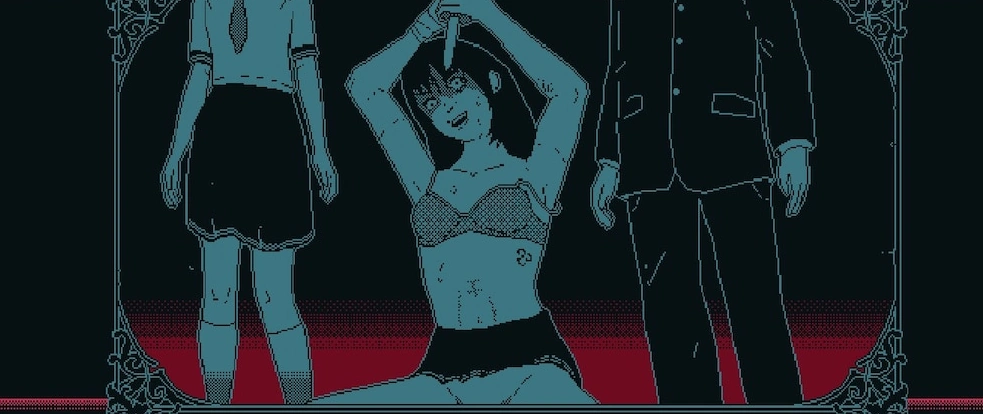
Ending 16 – Stabbed to death – Go to the HISTORY CLUB at the school location and simply buy four items.
Ending 17 – Kidnapped by the Court – Lose by doom with HERALD OF THE SHATTERED COURT as your old god.
Have fun ❤