A complete walkthrough for Apostle game. Features a guide for the story, romance interactions, quests, and a scene list. All are listed within the guide as well as a separate section afterwards. If there is anything you would like for me to included, let me know.
Introduction
This guide does have a walkthrough, quest list, scene list, romance guide, some simplistic maps. I have also added some photos to best show certain moments of the game to help. I’m still working on a short guide of the contents for dates/endings for each main girl just for curiosity. (It’s tedious because you have to do six walkthroughs to get the endings.)
Content warning
For new players, this game has few scenes or rape, one pixel scene of demonic orgy, and a debauchery scene involving people on drugs. There are also minor scenes with anal, rubber suit, bondage, bridal orgy, public themes, and virgin sex. If you do not wish to proceed with this game with the adult patch for the previously stated content, I strongly discourage getting it.
Characters
Rei – (You can name this character) He is the male lead of the game. Rei comes from an unknown past about his family.
Akari – She is your childhood friend that lives next door to you. She’s very caring and compassionate.
Satsuki – A very rich girl that acts like a typical selfish person at first. She is also a twin, and doesn’t like her sister.
Konoha – An up-and-coming martial artist that comes from a family of professional martial artists.
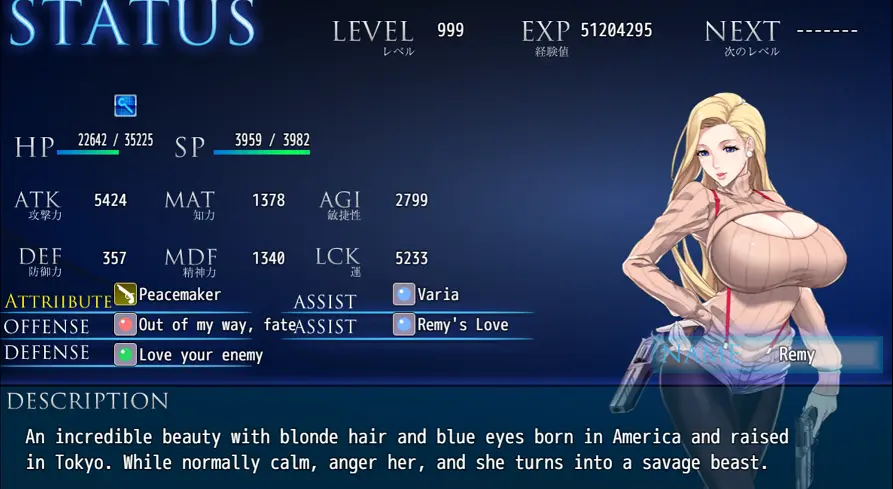
Remy – Extremely affectionate and a sexual icon that loves to tease the PLAYER. She also has a hidden past.
Kenshin – The captain of Squad Six and believes in discipline. Her dark past in Squad Six has given her a name she tries to escape.
Nana – Scientist who spends a lot of time experimenting in her lab. She is also not afraid to do sexual acts for science.
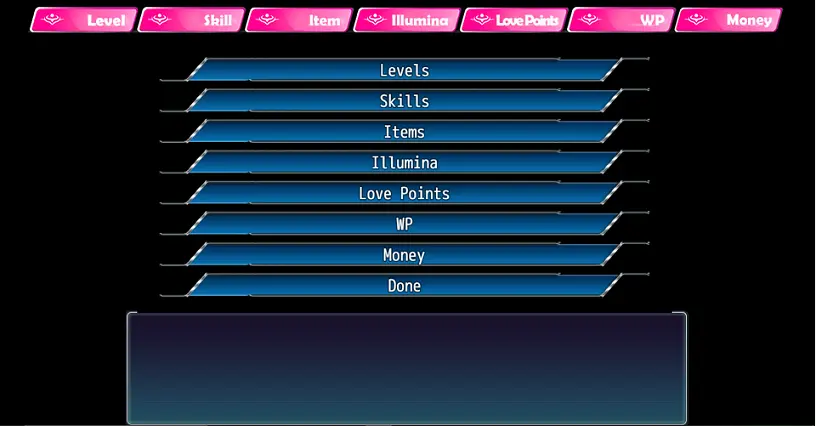
Levels
The level cap is confirmed to be level 999. That is a very high level, and beneficial for taking on the secret boss. Best way to get there is the Megiddo simulator. After reaching a certain level, increase the difficulty of the Megiddo. Repeat the process until you are at the highest difficulty and in the last Megiddo. The lowest recommended level for the secret boss would be around 100, although, a few hundred does make the entire game a breeze when enemies can barely damage you.
Illuminas:
Illuminas are your equipment for the game. There is attack, defense, and assist illumina throughout the game. Most are found in dungeons, some through quests, some can be crafted, and some only obtained through romance storylines.
Megiddos (or Megidos)
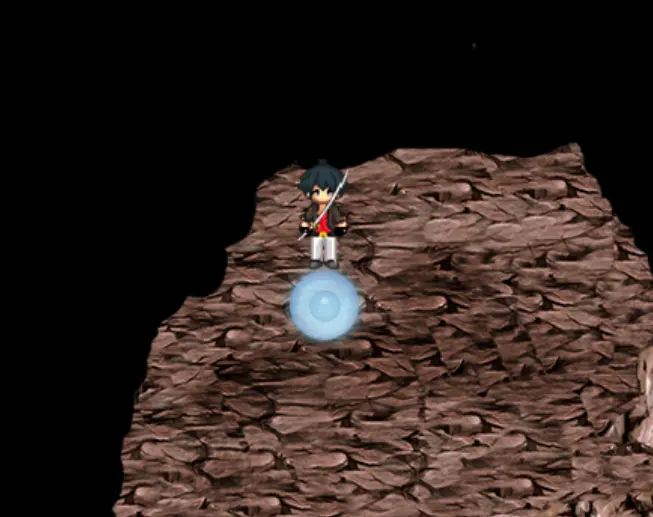
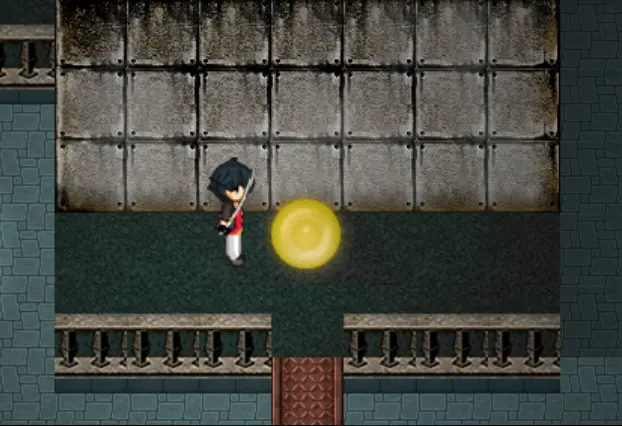
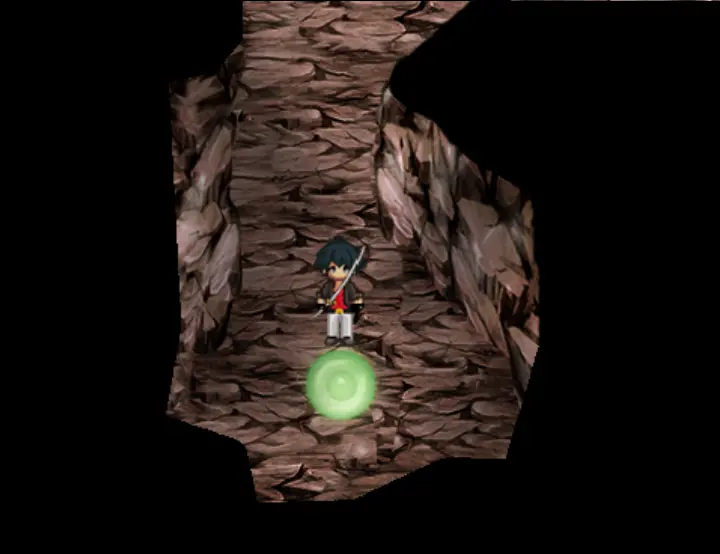
These are dungeons that appear when tears from another dimension occur. In every dungeon, there will also be a merchant there to sell you items to help you along the way. You will also notice colored orbs throughout. Green orbs are items, Blue orbs is money, Yellow orbs contain illumina, and Purple contain a tough battle with an item after.
The Megiddo Simulator is also the best place to farm Word Fragments for crafting illuminas. After reaching 99 any color, exit the simulator to craft illumina and then go back to repeat the process. This is best for players who are trying to level up and making use of the items. Crafting the items carry over into future game plays, so you can make the quests end faster.
New Game Plus
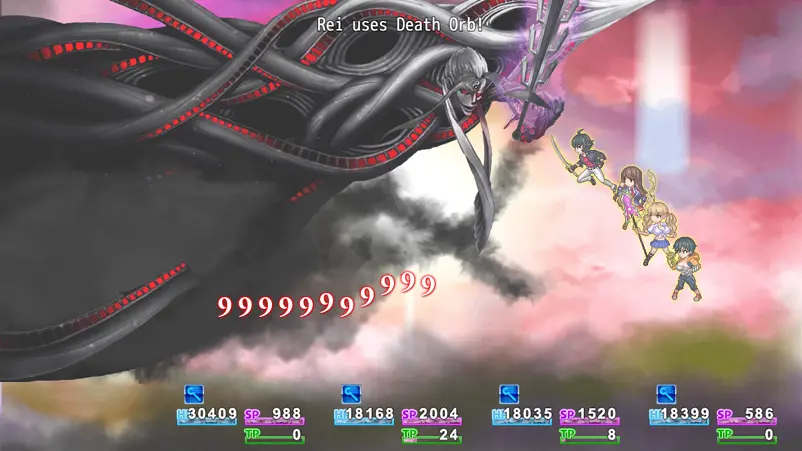
There is an option to start a new game plus. What carries over is character levels, skills (AP), most items (minus main quest given), illumina, love points (main girls), Walking Points (WP), and your money. You will also be given an illumina called “Hide!” which allows you to prevent random encounters. You will also be given an item called “Death Orb” which allows you to do more damage, even the final boss. The damage is 99,999,999,999!!! Essentially, instantly killing anything.
– To use the “Death Orb” simply use it like an item during any battle, except with the Secret Boss. The secret boss is at the end of all the Megiddo simulations. Beating them unlocks all the scenes.
You will also be allowed to skip all Megiddos, Trials, and dungeons. The only parts you can’t skip are select bosses of the story.
Romancing
– To romance a character, you need what are called WP (or Walking Points). These are obtained by ending a day, completing quests, or choosing to “do nothing” during lessons. Romance options cost either 1 or 2 WPs. There are seventeen moments during lessons to obtain a WP, and most of the quests will give you a single WP. Each main girls (see characters above) can receive up to ten hearts; these hearts are needed to date and receive an ending.
– Six hearts are needed to begin the first of three dates. There is also a beach date with a scene for each girl. After going on three dates with the same girl, you receive a follow-up scene near the end of the game.
– There are also ten other characters you can have sex with. There are moments that are timed sensitive to activating the romance options for six of the girls. Eight of the girls (not the Prologue ones) are able to have repeated pixel sex for “Word Fragments”.
– On the first playthrough, you can only romance one girl and get her ending. However, through new game plus, all of the other girls’ hearts carry over. So, you can either romance each of the six girls through six separate playthroughs, or unlock the scenes with the secret boss. Alternatively, you can make a save point on the day of the first date. Then make multiple files for a different girl that you romance. You would have to play the game all the way through to the end for the ending. The best way to do this is on new game plus so you can skip the dungeons.
Harem Route
Once all girls have all ten hearts, a message box appears with the option to choose this ending on day 8/7 in Chapter Six. However, choosing this ending will override the ending you were trying to receive from a specific girl; this means that you will miss out on individual scenes you would have received. If you said yes, there will be a scene with all the girls in your room. Then a follow-up scene at the end of the game.
Trouble Quests (or Side quests)
There is a total of 15 quests and 2 quizzes. One quest can only be obtained during the prologue of the game. The remaining quests will remain available until the last “free roam” period of the game once activated. Some quests can’t be started until a certain chapter or a previous quest has been completed. There is also two quests that are only accessible through romancing a specific woman. If you miss out on romancing her, you will be unable to access those two quests.
Prologue
As you start the game, you will be asked if you want to skip the introduction to the first Megiddo with Akari. Doing this, you miss three scenes, a side quest, and the introduction to how the PLAYER obtains their personal weapon and the story events.
(There are also various hidden items throughout the game that can be obtained by examining objects. I’m not sure if I want to include them since they are minor and insignificant items.)
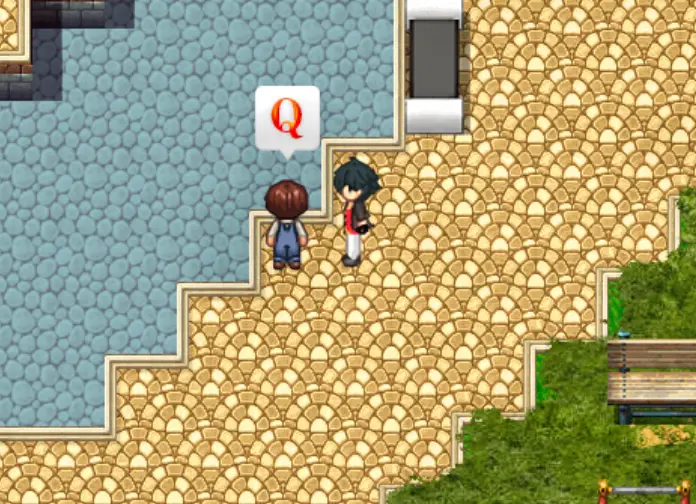
As the game starts, you are in a battle. This one you can’t win, and end up waking up from your nightmare. You awake in your room at home. Akari knocks on your door to make sure you are ready for school. Exit your bedroom and talk to Akari. Head outside and to the elevator. Follow the path down and to the right to meet some classmates. The group heads to class where you are told there will be a ceremony for Judgement Day 50th anniversary where some students will participate in it.
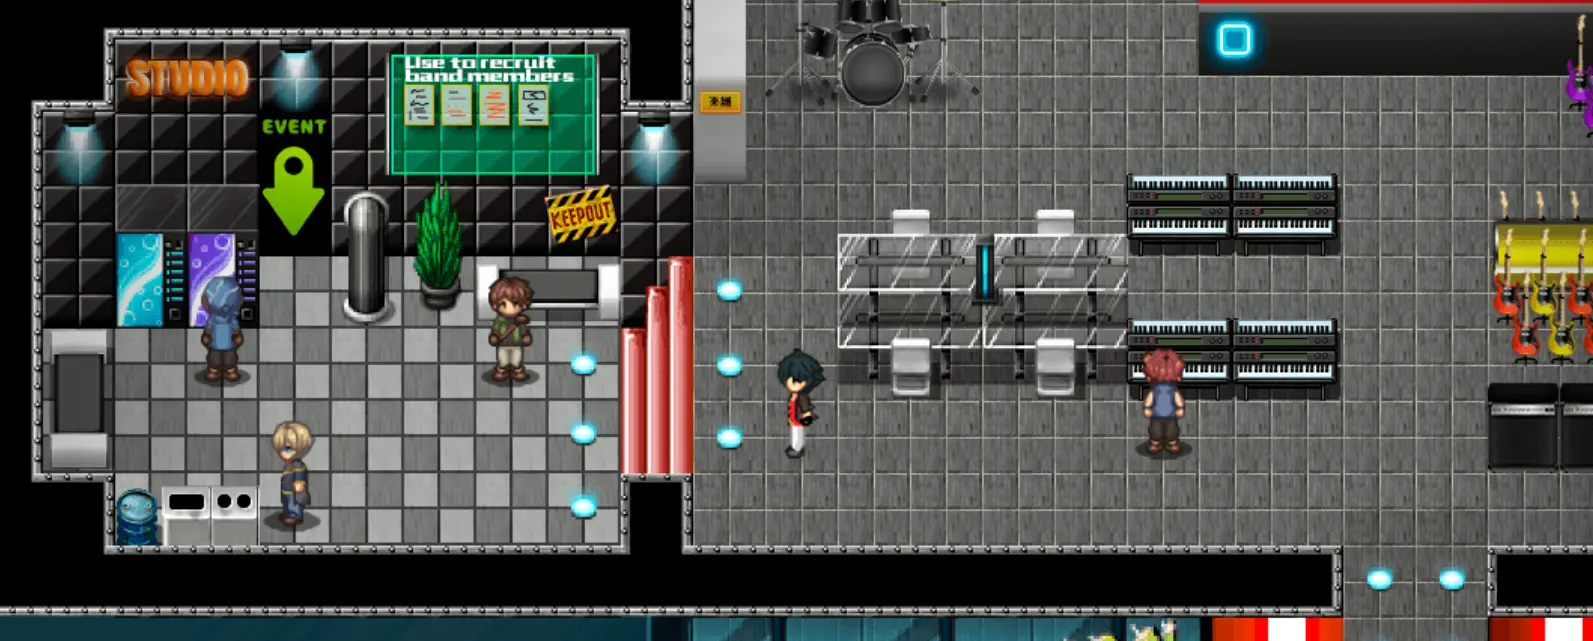
As you gain control in the classroom, head to the left side of the room. This is the first Trouble Quest of the game.
Quest # 1:
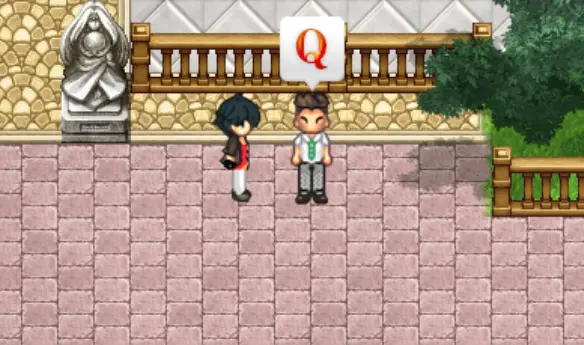
Asuka wants you to deliver a letter for her. Head outside the classroom and one screen to the left. Hand the letter to the first person; they are wearing a grey-blue outfit. Once you do that, return to the quest giver to end the quest. You receive an “Energy Drink”. [END]
Walk around the hallways, either direction to the north, and head downstairs.
|SAVE THE GAME|
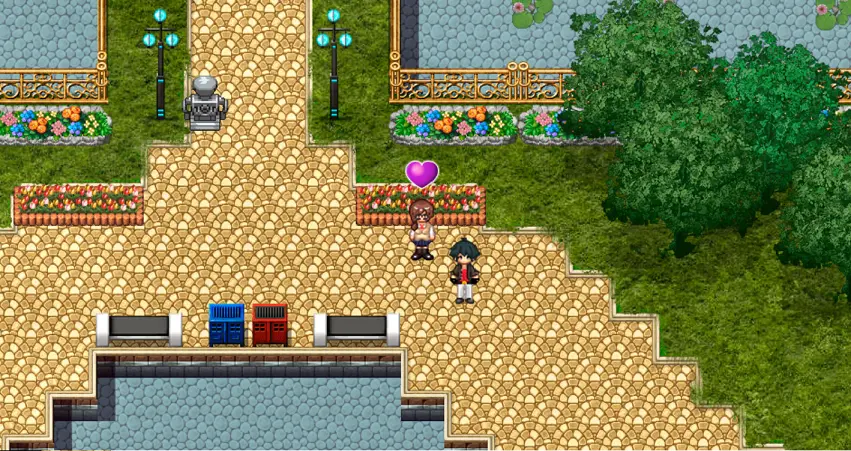
Create two save files. The reason being is that you have an option on which of two girls will be your first scene. Going inside the Teacher’s Lounge activates Mikoto’s scene, the vending machine activates Izumi’s scene. To receive Izumi’s scene, you must lose the fight with the bullies.
Scene # 1 “With Mikoto in the locker…”
Make sure to follow up with “Um…see you tomorrow” answer for a follow-up scene later.
Scene # 2 “Gang Rape Behind the Gym…”
After witnessing the Izumi scene, save the game after to save the scene, and then reload the save point to win the fight or view Mikoto’s scene. (Izumi’s follow-up scene in Chapter Seven is only available if you won the fight; lose, you don’t get her.)
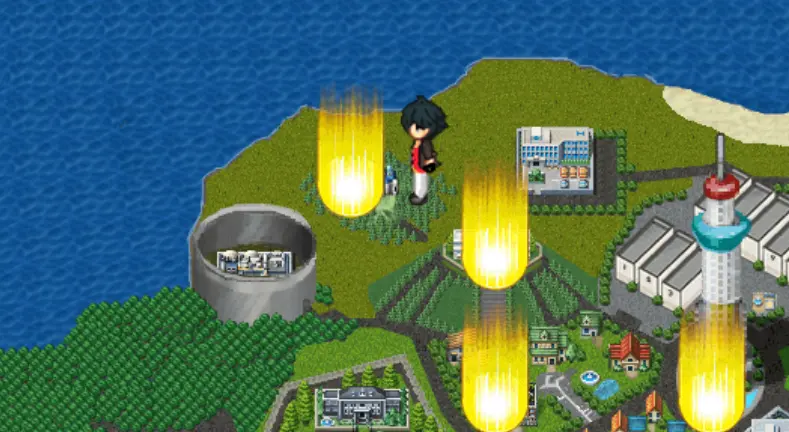
After either scene, the game progresses to the ceremony. A dimensional tear appears over the crowd letting out the Magna. The Magna start to kill and take people. Akari reveals that she is an Apostle and fights the Magna.
(Battle): Mythical Bird
(Battle): Dark Reaper
After he second battle, she is wounded and lying on the ground. The PLAYER cries out wanting to fight them, but can’t. A voice starts telling him that if he wants power, to accept. The PLAYER’s personal weapon appears. After the two battles, you collapse.
(Battle): Dark Reaper
(Battle): Huge Enemy (forced loss)
|Save option|
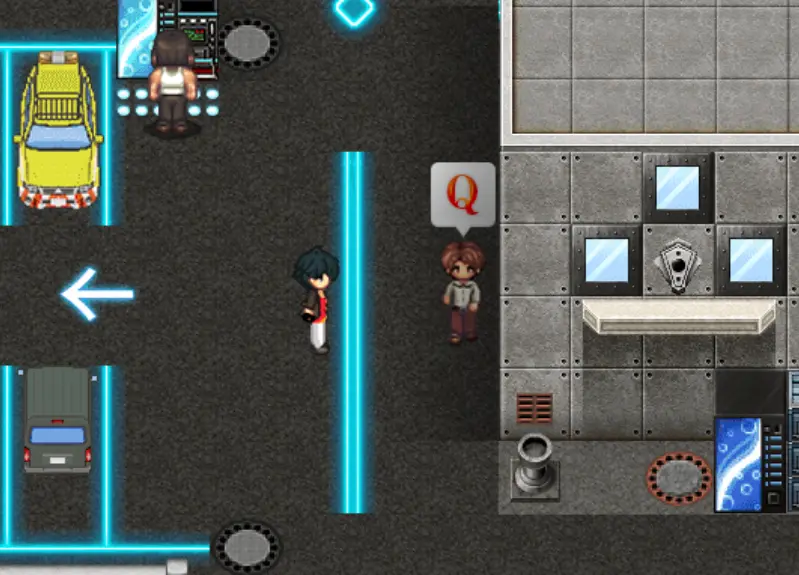
[Exodus HQ]
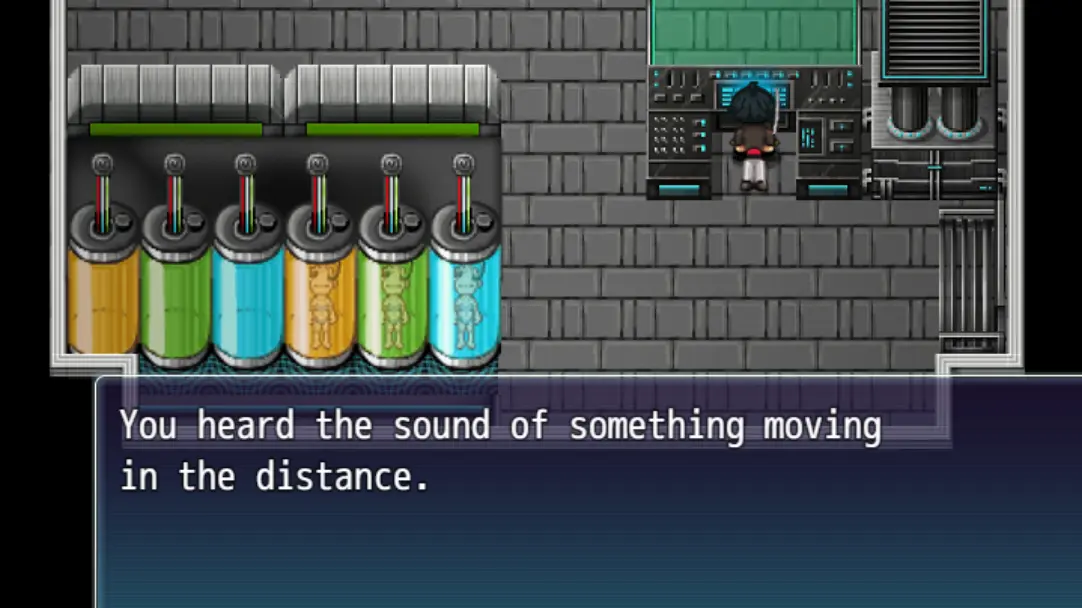
You awake in a recovery room. There is an explanation about what Exodus is. Nana states that she wants to understand why you were able to use a weapon, so she wants to harvest some semen from you.
Scene # 3 “Nana’s Examination”
After the scene, Akari walks in and wants to know why you are shirtless. “Be honest” with her and exit the room. Head to the [Control Room] in the center of the room.
[Control Room]
Enter for dialogue about the situation. Then you will be notified that a Megiddo appeared nearby, so they want you and Akari to investigate it.
(This is where the game skip leads to. END OF PROLOGUE.)
Chapter One (Part 1) – Megiddo (Alef)
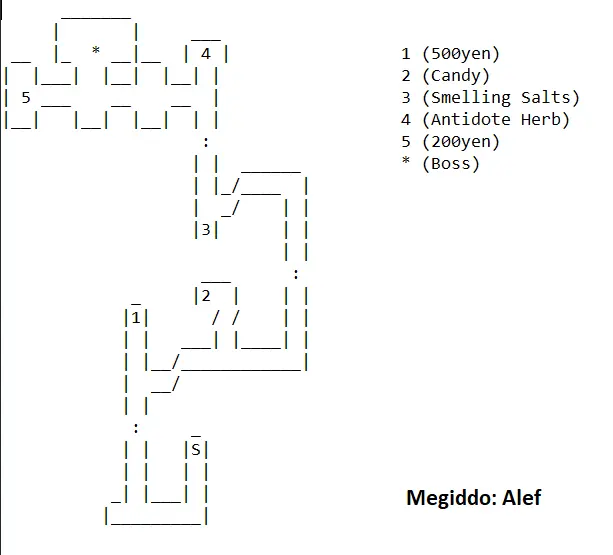
[Megiddo: Alef]
As you begin, you will be taught about battles and how to use your “attribute” (or personal weapon).
(Battle): Tezcatlipoca
Items:
(Blue) (500yen)
(Green) (Candy)
(Green) (Smelling Salts)
(Green) (Antidote Herb)
(Blue) (200yen)
Head down and follow the path to the next area. Head up at the intersection to see your first orb, the blue orb contains “500yen”. Head back to the intersection and go right, then up again for a green orb that contains a “Candy”. Head right to the next screen. Follow the bath around and head down at the intersection for a green orb that has “Smelling Salts”. Head up to the next area. Straight up is a green orb for “Antidote Herb”. Take a left at the intersection and another left at the next one; there is a blue orb for “200yen”. Take the path up for the boss.
(Boss) (Arwassa)
Chapter One (Part 2)
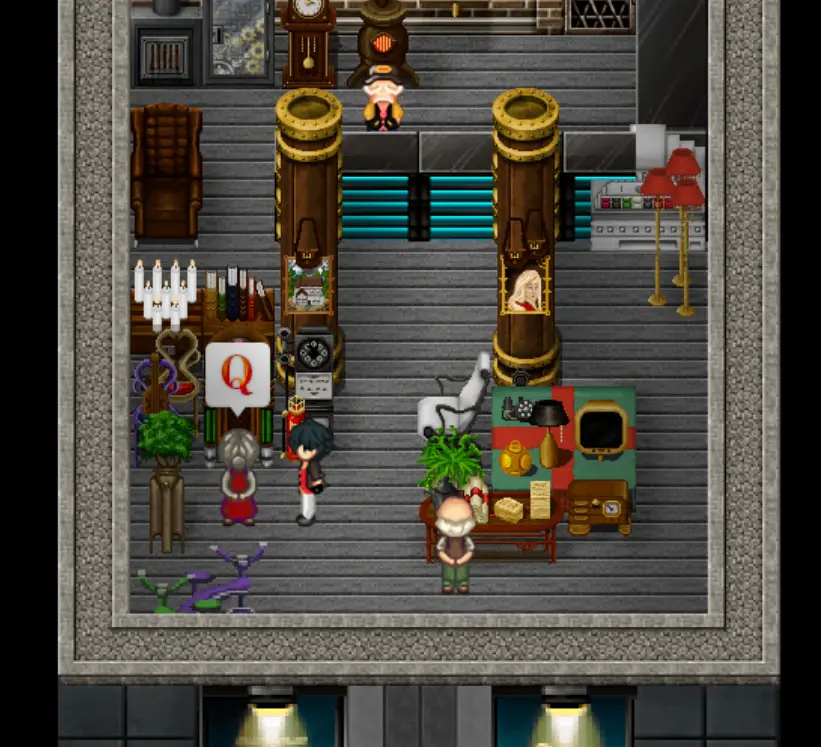
After completing your first Megiddo, Ritsuka escorts the group back to [Exodus HQ]. You will be explained your weapons (or attributes). Ritsuka then tells you to wait in a room with the other members of Squad Six. Upon entering, you see Satsuki in a state of undress.
Scene # 4 “Satsuki Changing Clothes”
When you finish meeting the rest of the team, you’ll be told to head to the Squad Six house.
[Squad Six House]
In your room, you are given the introduction to Walking Points (WP). You can read the note above to better understand how to obtain more.
You can talk to one of the six girls around the house or simply go to sleep.
Akari (Her room) (2 WP) – “I think so too”
Satsuki (Outside near pool) (2 WP) – “Getting so angry all the time will ruin your cute face”
Konoha (Her room) (2 WP) – “You’re amazing too, Konoha”
Remy (Living room couch) (2 WP) – “I’ll drink”
Scene # 5 “Titf.uck Blowjob from Remy”
Kenshin (Outside; between bushes) (2 WP) – “Hell yeah! Let’s do this!”
Attack and Defense +3
Nana (Her room) (2 WP) – “Give up”
“Blessing of Endurance” illumina
Whichever you choose, your day will come to an end.
DAY ENDS
[5/20]
[Squad Six House]
Upon waking up, you are headed downstairs. Kenshin will ask if you slept well. Answer “Yes” to gain Max HP+10. It will be then time for the new recruits to head to school.
[Academy: Teacher’s Lounge]
You will meet with your teacher, Mika Kudou. A choice appears that asks if you know about the events of the past. Either option has no significance. From there, you will be in your homeroom.
[Academy: 3-B]
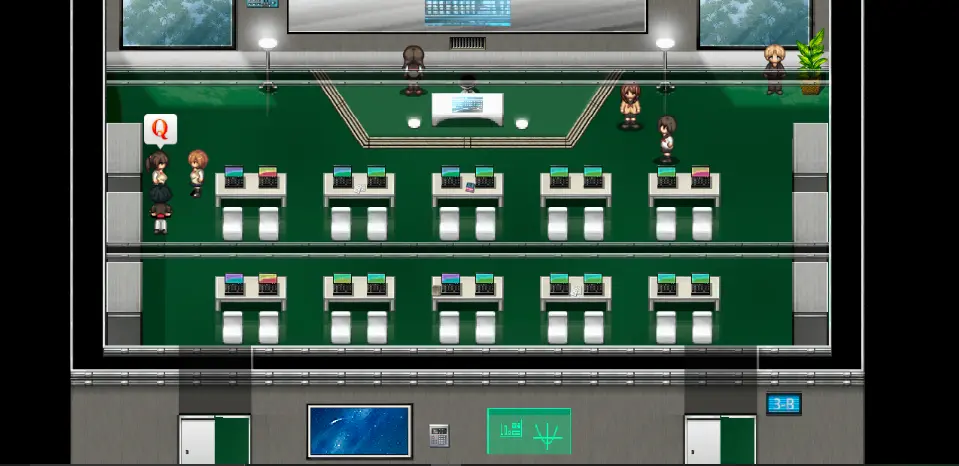
Mika wants Akari and PLAYER to introduce themselves to the class. When Akari looks to you for advice, tell her “Talk about your hobbies and stuff” to gain affection. Your choice has no significance; either be serious or a clown. After introduction begin, you start your first lesson.
Lessons vary on subjects and the rewards for the subject. You have seventeen lessons in the game. You can choose to increase your stats, but it will reset on a new game. So, “Don’t do anything” to gain 1 WP.
After class, the group will walk into town.
[Canaan Paradise: Main Street]
As the group breaks off, Satsuki will sense that a Megiddo is nearby. You arrive in a back alley and find the tear.
Chapter One (Part 3 ) – Megiddo (Bet)
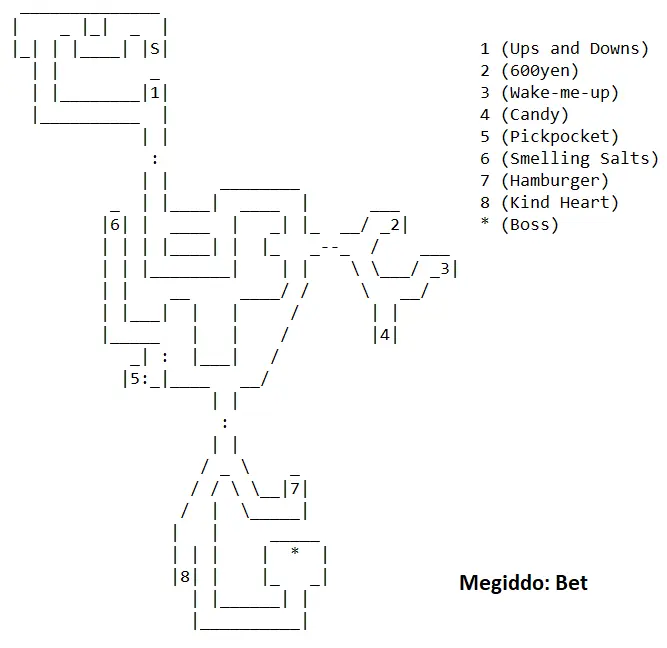
[Megiddo: Bet]
Items:
(Yellow) (Ups and Downs)
(Blue) (600yen)
(Green) (Wake-me-up)
(Green) (Candy)
(Yellow) (Pickpocket)
(Green) (Smelling Salts)
(Green) (Hamburger)
(Yellow) (Kind Heart)
Follow the path around the small bridges. Head up before the next section for a yellow orb “Ups and Downs” illumina. Head down to the next section. Follow either path around to the right. Head to the section on the right first. The top path leads to a blue orb “600yen, the middle path leads to a green orb “Wake-me-up”, and the bottom path leads to a green orb “Candy”. Return to the previous section. Head down and to the left, but not to the next section yet.
You’ll see a yellow orb “Pickpocket” in a separate area; to get here, there is a hidden wall on the right side. Then head up from there for a green orb “Smelling Salts”. Head down to the next section. From here, head right to grab a green orb “Hamburger”. Then head down and take the left path for a yellow orb “Kind Heart”. The path just to the right of this leads to the boss.
(Boss) (Vohu Manah)
After you finish the Megiddo, the day ends.
DAY ENDS
Chapter One (Part 4)
[5/21]
[Academy: 3-B]
You can pick your next lessons. After your lesson, this is your first free roam of the game. Approach the girl at her desk for a quest.
Quest # 2:
The quest giver wants diet pills. She tells you that one teacher knows in the lounge knowsт where to get them.
QUEST
[Academy: Teacher’s Lounge]
Talk to Mister Macho Man. He tells you that you can get them from a black market dealer in [Canaan Paradise: Red Light Section]. We will get to that later. Head to the cafeteria.
[Academy: Cafeteria]
In the upper-left section, you can speak to a boy who wants to test your knowledge with Satsuki.
QUIZ №1
Quiz # 1:
“Red”
“Cross”
“Saijou”
Answering correctly gives you “Medicine x 3”
Nothing else in the school, so head out via [Main Gate].
[Academy: Main Gate]
Just head south to leave the school.
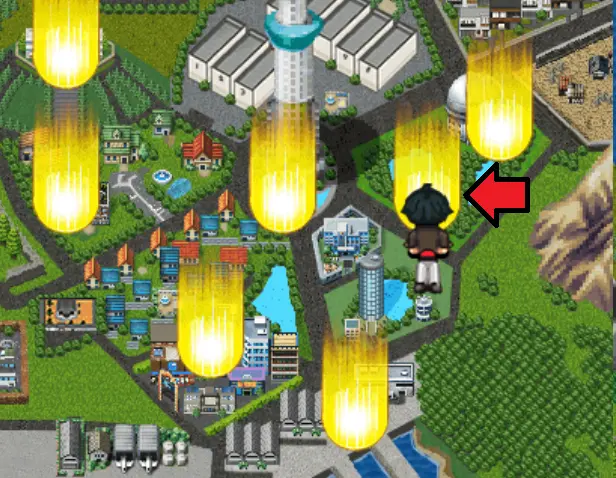
[World Map]
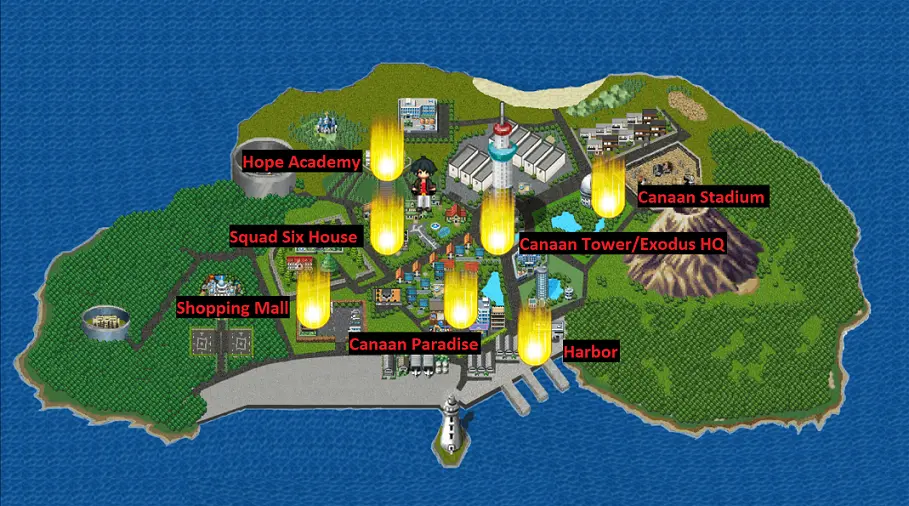
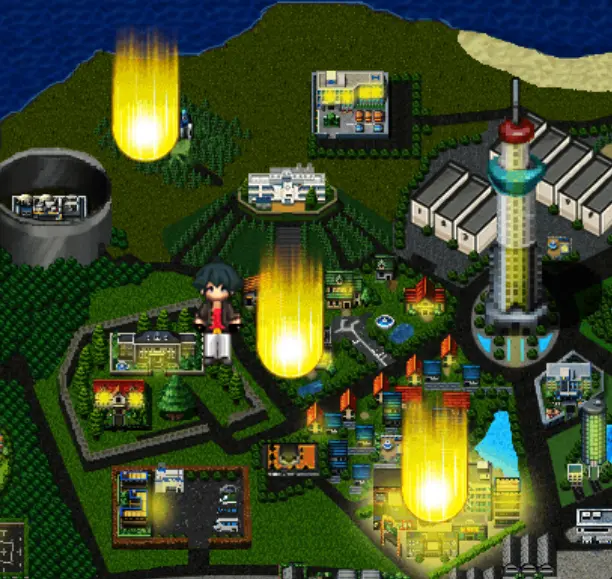
As you can see, you have access to a few locations. There is the [Hope Academy], [Squad Six Home], [Shopping Mall], [Canaan Paradise], [Canaan Tower] and [Exodus HQ], [Harbor], and [Canaan Stadium]. Head to the [Shopping Mall] first.
[Shopping Mall]
In the last stall on the end, there is an old man with a quest.
QUEST
Quest # 13:
This man wants three specific charms found only inside Megiddos. Currently, you have none. Worry not, you will get them later.
QUEST
Head to [Canaan Tower].
[Canaan Tower]
Head up the steps and enter the tower. At the top of the tower, speak to the man for a quest.
QUEST
Quest # 8:
This man wants an item to make him feel “hotter”. You don’t have the item yet, but can
be found in Megiddos or purchased later.
QUEST
Head to [Canaan Paradise].
[Canaan Paradise: Entrance]
The buildings you can enter are the Cult Shop, Flower Shop, and Garage (craft illumina here). There are three fortune tellers to the right. Red is for “lovers” locations which will be the main girls, White is for the next main event, and Blue allows you to change your name. Nothing relevant in the area, so head up to the next section.
[Canaan Paradise: Main Street]
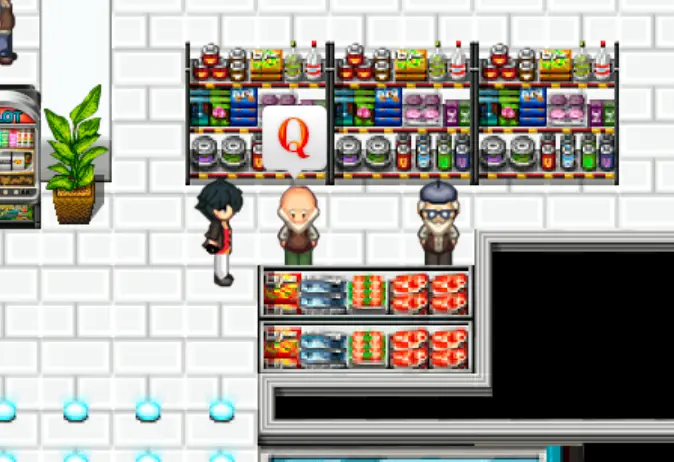
The buildings here are the Music Store, Seven Mart, Café, Arcade, and Otaku Store. In the Seven Mart, you can buy some items, but most of what you get is from the Megiddos. Nothing here, so head up another section.
| First Vendor |
Price |
|---|---|
| Band-aid |
80 |
| Salve |
320 |
| Medicine |
1500 |
| Back Scratcher |
2500 |
| French Fries |
250 |
| Cake | 3500 |
| Candy |
250 |
| Energy Bar |
1500 |
| Smoothie |
3000 |
| Second Vendor |
Price |
|---|---|
| Antidote Herb |
30 |
| Blueberries |
50 |
| Spiritus | 60 |
| Concentrated Milk |
100 |
| Paper Fan |
110 |
| Wake-me-up |
110 |
| Liniment | 250 |
| Foot Warmer |
250 |
| Fever Killer |
250 |
| Smilling Salts |
1500 |
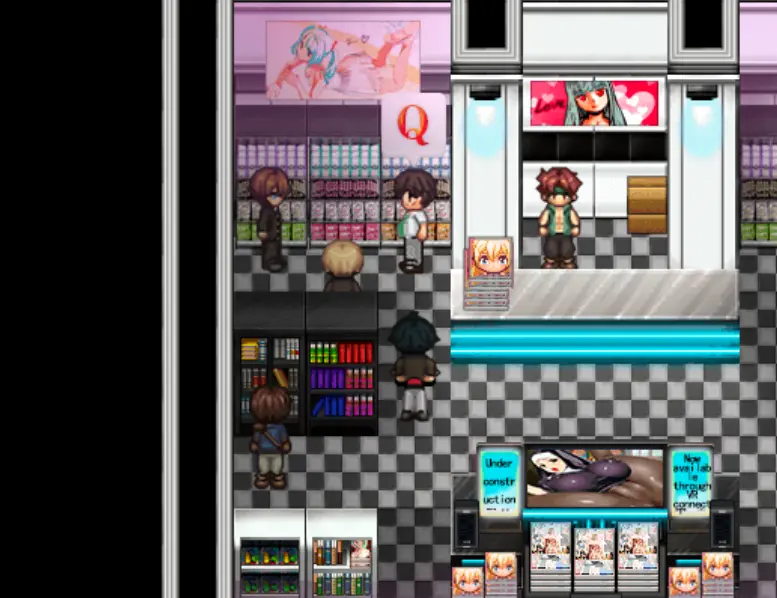
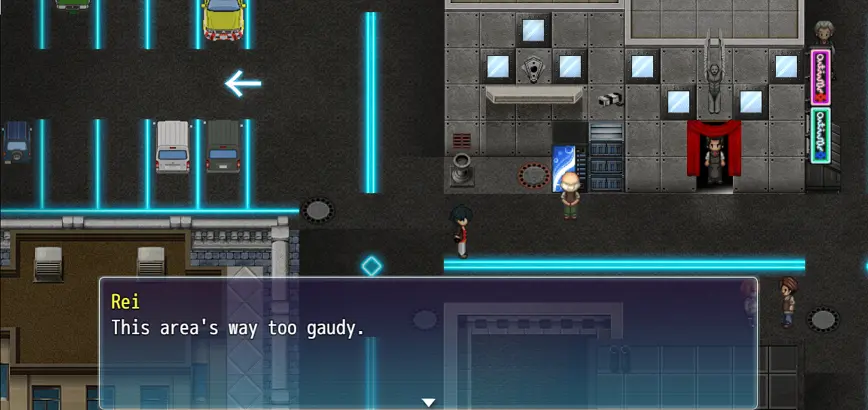
[Canaan Paradise: Red Light Section]
There is another quest here at the bottom of the stairs.
QUEST
Quest # 7
The man is a bit drunk and needs help. Hand him “Smelling Salts”.
You receive 10,000yen and 1 WP [END]
QUEST
There is a building with a man blocking the doorway. To the left of him is the peddler that has the diet pills.
QUEST
Quest # 2: Update
Purchase the diet pills from the peddler for 1,000yen.
QUEST
There are other sections here, but not worth exploring right now. Head back to the school to finish up.
[Academy: 3-B]
QUEST
Quest # 2: Update
Hand the quest giver the pills. You can choose to tell her how much they cost, but I
chose “Give them for free”. 1 WP. [END]
QUEST
Make sure you complete Konoha’s third romance here. This is the only way to open the “Martial arts club clubroom” in the Academy. Here, you can talk to her after every romance and date to permanently increase your stats.
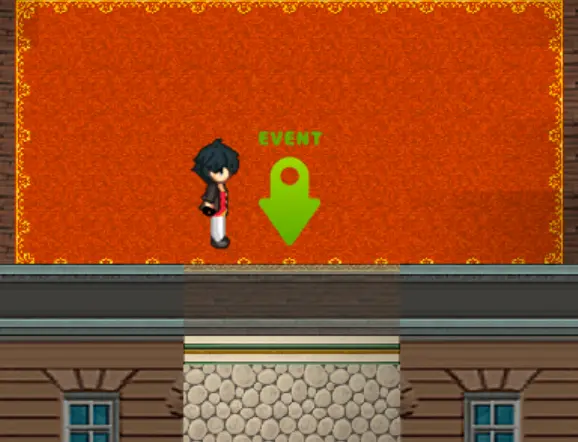
There is nothing else to do, so find the main event in [Canaan Paradise].
[Canaan Paradise: Main Street]
Inside the Arcade, there are three biker gang members picking on another student. You can choose to either fight or flee. Choose “To take them on.” If you chose to flee, you will miss out on a quest. You will also receive the “Delinquent” illumina.
After the event, head back to the house.
[Squad Six House]
Upon arriving, Satsuki stops you and lets your know she senses another Megiddo. Respond to her with “That’s what I was going to say!” to earn affection. Afterwards, head to the [World Map].
[World Map]
There is an area marker to the northwest of the school. This is the [Church], so head here.
[Church]
Approach the tear and enter.
Chapter One (Final) – Megiddo (Gimel) and Megiddo (Dalet)
[Megiddo: Gimel]
Items:
(Blue) (1,000yen)
(Yellow) (Round and Round)
(Green) (Smelling Salts)
(Green) (Spotlight)
(Blue) (800yen)
(Blue) (900yen)
(Yellow) (Bitter Medicine)
(Yellow) (Scoop Scope)
(Yellow) (Well-mannered)
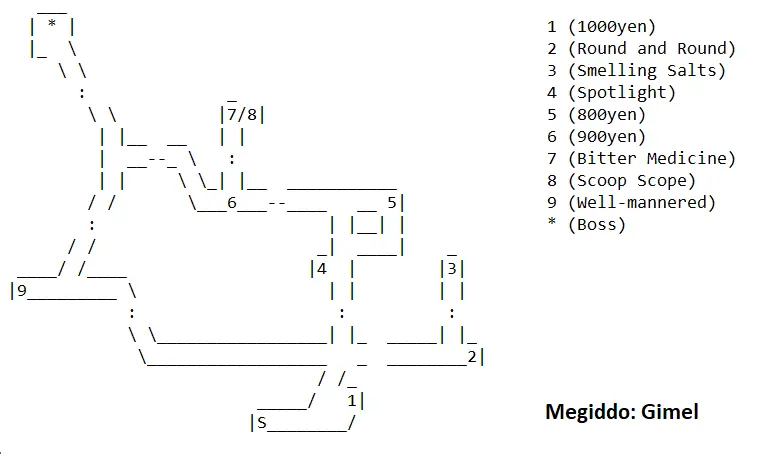
[Megiddo: Gimel]
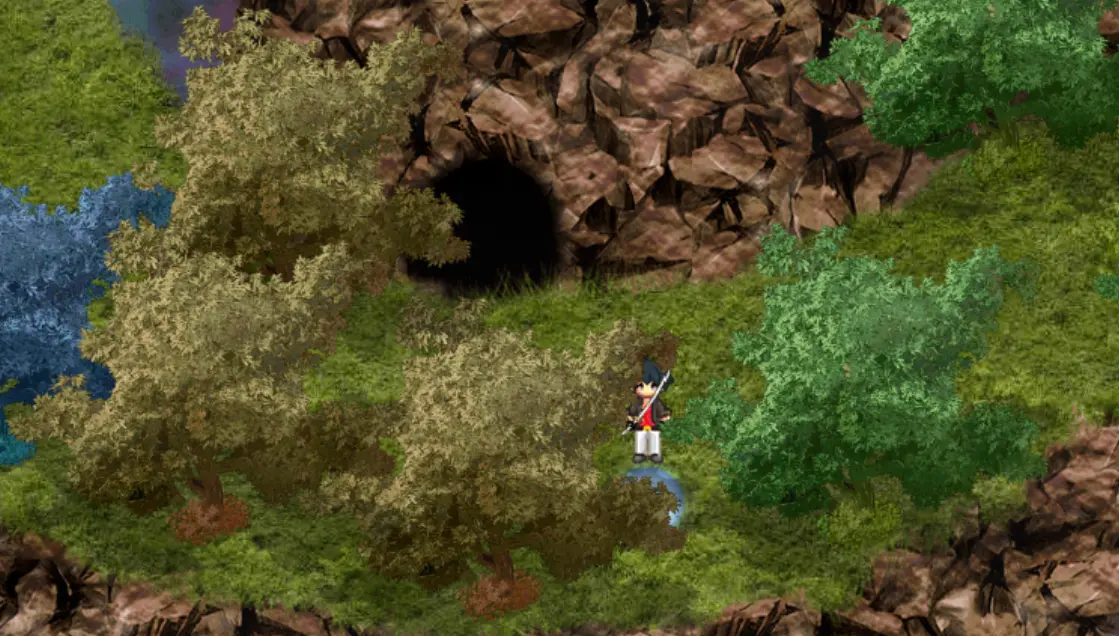
At the start, head to the right for a blue orb for “1,000yen”. Follow the path up the hill. Take a right at the crossroads to the next area. To the right of the cave entrance is a yellow orb for “Round and Round” illumina. Head inside for a green orb for “Smelling Salts”. Return to the crossroads and head up. Just to the left is a green orb for “Spotlight” and a blue orb for “800yen” in the northeast. Exit to the northwest. Outside the next cave, hidden in the trees, is a blue orb for “900yen”.
Inside the cave has two yellow orbs for “Bitter Medicine” and “Scoop Scope” illuminas. Exit and head west of the cave. In the next area, head south. To the west, there is a green yellow orb for “Well-mannered” illumina. Now, continue heading north for the boss.
(Boss) (Uvlthoom)
After the Megiddo, the day moves into night.
[Squad Six House]
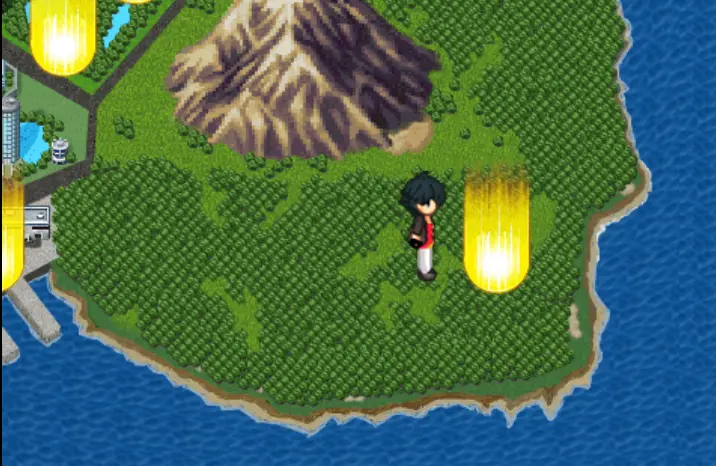
The group sense that another Megiddo has been discovered at the harbor. Leave and head to the [World Map].
[World Map]
The only other marker on the map is the harbor, so choose to go there.
[Harbor]
You’ll arrive to find the biker gang from earlier hurt on the ground and a Magna is attacking others. You will rush inside the only accessible warehouse for a battle.
(Battle) (Netherworld Gate)
After the battle, you find the tear and enter it.
[Megiddo: Dalet]
Items:
(Yellow) (I won’t make it)
(Green) (Smelling Salts)
(Yellow) (Fight Picker)
(Green) (Foot-Warmer)
(Green) (Charm of Guan Yu)
(Yellow) (Navigation System)
(Green) (Hamburger)
(Yellow) (Navigation System)
(Blue) (800yen)
(Blue) (600yen)
(Yellow) (Speedster)
(Green) (Medicinal Guidebook)
(Yellow) (I only love you)
(Yellow) (Heartbeat’s End)
(Green) (Medicine)
(Green) (Military Scope)
(Green) (French Fries)
Right away, you see a green orb for “Smelling Salts”. Enter the building to the left of it for a yellow orb for “I won’t make it” illumina. Exit and enter the building to the right for a yellow orb for “Fight Picker” illumina. Exit this building and enter the one on the right for a green orb for “Foot Warmer”. Exit the building and follow the path to the right and up. Outside of the next building has a green orb for “Charm of Guan Yu”. Head inside the building for a yellow orb for “Navigation System” illumina. Exit the building and head left. Between the buildings is a green orb for “Hamburger”. Inside the next building has a yellow orb for “Navigation System” illumina and a blue orb for “800yen”. Head up and to the left for a blue orb for “600yen” which is left of the stairs. Head right of the stairs into the room for a yellow orb “Speedster” illumina. Exit and head up the stairs to the next area.
Up ahead is a green orb for “Medicinal Guidebook”. Follow the warped stairs to the next floor.
It’s a bit of a maze here. Follow the path and head up first chance for a yellow orb “I only love you” illumina. Head back to the intersection and head down and to the left to reach a yellow orb for “Heartbeat’s End” illumina. Walk back and down to follow the path around for a green orb “Medicine”. You see a green orb nearby, head there for “Military Scope”. Head back to the intersection and work your way to the far right side. In the bottom right corner of the path is a green orb for “French Fries”. Head to the left here for the boss.
(Boss) (Quachil Uttaus)
After the gate closes, you will be at [Exodus HQ] for more events. You will see the famous Squad One showing interest in you. The chapter will then end.
Chapter Two (Part 1)
[5/25]
[Hope Academy: Cafeteria]
The group is in enjoying lunch. Masakari appears and requests your help with his older brother. You will head to [Canaan Paradise].
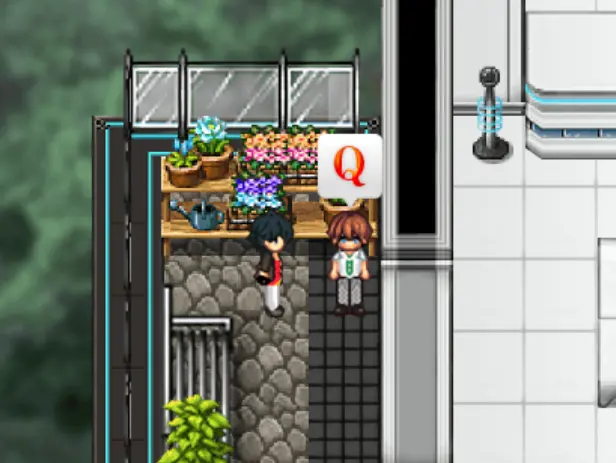
[Canaan Paradise: Entrance]
The goal is to ask around for Masakari’s brother. Head inside the Flower Shop and talk to the clerk. You will purchase a “Pretty Flower” for 500yen. This will be used for a later quest. Talk to the cab driver nearby to learn that the brother was seen in the Red Light Section. Head north.
[Canaan Paradise: Main Street]
Head inside the Seven Mart and talk to the old man to start a quest, but can’t finish until Chapter Three.
QUEST #3
The old man wants an alcoholic drink called “Exorcism”. You can’t get this right now.
Head north to the Red Light Section.
[Canaan Paradise: Red Light Section]
Talk to the crepe vendor here; you learn that the brother was seen in the back section of the Red Light Section. In the back section, there is an old man guarding the door. If you see this old man, return to the crepe vendor and speak to him two or three more times until the old man leaves. (In total, you need five conversations with people.) Once he leaves, head inside the building. Inside, you try to inquire about Masakari’s brother, but denied help. As the character walks around the outside of the building, he peeks inside.
Scene # 6: “Debauchery”
[5/26]
You report back to Masakari about what he saw and takes off. You follow him to help out. You charge past the staff and into the room covered in pink cloud of drugs. Walk down to progress. You will be captured and tied to a chair. Eventually your team shows up and says that a Megiddo appeared in the building. They will free you, so head south.
Chapter Two (Part 2) – Megiddo (He)
[Megiddo: He]
Items:
(Blue) (1,000yen)
(Yellow) (Love and Pain)
(Green) (Foot Warmer)
(Green) (Charm of Tokugawa)
(Green) (Concentrated Milk)
(Yellow) (20 Shots)
(Green) (Shock Injection)
(Green) (Panacea)
(Yellow) (Gender-Free)
(Yellow) (Valued Spirit)
(Green) (Smelling Salts)
(Blue) (1,200yen)
(Yellow) (Lovely Charm)
(Yellow) (Dirty Words)
(Green) (Charm of Houjou)
(Blue) (1,200yen)
(Green) (Fever Killer)
(Green) (Smelling Salts)
(Blue) (1,200yen)
(Yellow) (Natural Airhead)
(Green) (Liniment)
(Green) (Molotov Cocktail)
(Yellow) (Social Anxiety)
(Yellow) (Overflowing Vigor)
(Yellow) (Sacred Love)
Just to the right is a blue orb for “1,000yen”. Head down and to the left to see a yellow orb for “Love and Pain” illumina. Follow the path south and enter the first room on the left; two green orbs for “Foot Warmer” and “Charm of Tokugawa”. Exit this room and head down for a green orb for “Concentrated Milk”. Head back to the previous room, and then right and down for another room. In here for a yellow orb for “20 Shots” illumina. Exit the room and head toward the right for another room. In here is a green orb for “Shock Injection”. Exit the room and head right and behind the room for a green orb for “Panacea”. Head back and to the left for another room for a yellow orb for “Gender-Free” illumina. Exit the room and head down for a yellow orb for “Valued Spirit” illumina. Head to the left and through the partially hidden wall for a green orb for “Smelling Salts”.
Head back to the entrance. Head right and down for a blue orb for “1,200yen”. Before going for the next blue orb, head up and continue to the right. Head through the partially hidden wall for a yellow orb for “Lovely Charm” illumina. Head back and take the first down. Continue down for a yellow orb for “Dirty Words” illumina. Head to the right for a room for a green orb for “Charm of Houjou”. Now you can head back to that previous blue orb, this will give you “1,200yen”. Follow the path down and keep going down for a green orb for “Fever Killer”. Head up a bit and then head right. Head all the way up for a green orb for “Smelling Salts”. Head down, ignoring the first dead end below the previous orb, and follow this path; it leads to a blue orb for “1,200yen”. Back track and take the last path. Along the way, you’ll see a yellow orb; head through the partially hidden wall for “Natural Airhead” illumina. Head down and to the left. Go past the room for a green orb for “Liniment”. Head inside the room for a green orb “Molotov Cocktail” and a yellow orb for “Social Anxiety” illumina. Continue through the door for a yellow orb “Overflowing Anxiety” illumina.
Back track a bit and head up the stairs. Along the way, you will pass a yellow orb for “Sacred Love” illumina. Continue further for the boss. The boss is a human that turns into a Magna.
(Boss) (Rlim Shailzorth)
After the battle, you will be forced to head to the roof due to the building trying to collapse on you. Remy helps the party escape. The day will end.
Chapter Two (Part 3)
[5/27]
You will call Masakari the next day to receive thanks and an update on his brother. Afterwards, you will head in for class.
[Academy: 3-B]
You can pick your next lesson. After the lesson, you will hear voices of pain and then be taken to the infirmary.
[Academy: Infirmary]
During your sleep, you get a choice on who you want to save; either option is up to you and no significance. Upon waking up, Nurse Wakana will help you relieve your stress.
Scene # 7: “In the Infirmary with Wakana…”
Exit the infirmary to head home.
[Squad Six House]
The squad speculates the reason for the visions and ask to see your weapon. They learn the weapon was crying out in pain from being damaged. They recommend getting it fixed, so they will take you.
[Canaan Paradise: Garage]
Inside, you will meet Ikujin. He will repair your weapon at no cost. Receive “If I put this here…” illumina. The day will end again.
[5/28]
[Academy: 3-B]
Today’s class is going to be different. You will be doing a VR cooking class. For this class, you pick one of the three girls to cook with for affection points.
Akari – “Not really. If anything, it’s Akari-ish”
Satsuki – “Because I wanted to do it with you.”
Konoha – “In that case, make some for me as well”
After your choice, you will share a meal with that girl. Then you will get a scene about three girls being bullied. Afterwards, you will have a free roam period. Let’s handle some new quests and finish previous ones. Head back to the classroom.
[Academy: 3-B]
In the hallway to the left is your next quest.
Quest #11
She will want you to find her wallet. After finding two wallets, she learns hers is in her
pockets. You get “Melon Bread” and 1 WP.
Exit the school and head to Exodus HQ Control Room.
[Exodus HQ: Section B: Control Room]
You can now start your romance with Ritsuka. Talk to her with these specific answers, or you won’t be allowed to progress.
– “I came to see you”
– “Do you have a lover”
– “What sort of men do you like?”
Head to the Shopping Mall to finish a quest.
[Shopping Mall]
Head to the old man to turn in your charms.
Quest # 13: Update
Turn in one of the three charms. You get 10,000yen and 1 WP.
Head to Canaan Paradise for some new quests.
[Canaan Paradise: Main Street]
There is a quest in the Arcade and in the Otaku Store. Head into the Arcade first.
Quest # 4:
The biker group wants you to look for their girl. She’s in the Academy: Courtyard. After
talking to her, head to the Harbor. You’ll get the “Red Dragon Explosion” illumina after.
Head inside the Otaku Store now.
Quest # 5:
Speak to Mitsuo. He needs help speaking. Head to the Garage to learn you need to craft
an illumina to help. However, you don’t have the items yet.
| Garage Crafts |
||||
| Fire Cook |
10 White |
|||
| Thunder Cook |
10 White |
|||
| Wind Cook |
10 White | |||
| Water Cook |
10 White | |||
| I will always protect you |
5 White | |||
| Carried Spirit |
10 White | 3 Black | ||
| Pickpocket |
10 White | |||
| In for a penny, in for a pound |
5 White | |||
| Glasses Lover |
5 White | |||
| No Stiff Shoulders |
5 White | 1 Black | ||
| Pilgrimage |
5 White | |||
| Silence is Golden |
5 White | |||
| Invincible |
5 White | 5 Black | 5 Red | 5 Gold |
| Bigfoot | 15 White | 5 Black | ||
| Not Dead Yet |
20 White | 15 Black | ||
| Me, Myself and I |
20 White | 15 Black | ||
| Varia |
20 White | 15 Black | ||
| My power returns… |
15 White | 15 Black | 2 Red | 2 Gold |
| Little Snowflake |
– | – | 12 Red | |
| Legendary Sniper |
– | 5 Black | 5 Red | |
| Muscle Power |
– | – | – | 5 Gold |
| I’m not like you |
– | – | 15 Red | 15 Gold |
| The most important |
– | – | 15 Red | 15 Gold |
| Fool and Straight Man |
15 White | 15 Black | 5 Red | 5 Gold |
| Faster than Light |
– | – | 30 Red | 30 Gold |
| Let it go, Let it go |
– | – | 50 Red | 50 Gold |
| Buried Gold |
– | – | 50 Red | 50 Gold |
| What I do for you |
– | – | 30 Red | 50 Gold |
| Hide! |
– | – | 50 Red | 50 Gold |
| Watch your back! |
15 White | 15 Black | 5 Red | 5 Gold |
| I’ve got the power |
20 White | 15 Black | ||
| Debate Knowledge |
15 White | |||
| Skillful Hands |
15 White | |||
| 100% Courage |
– | – | 15 Red | 15 Gold |
At this point, use your points to romance the girls, or head back home.
[Squad Six Home]
The marker here on the carpet is your common way or advancing the story. If you have nothing else to do, come here and advance. So, advance the story. You watch a scene during dinner that states about a body being found. Day ends afterwards.
Chapter Two (Part 4)
[5/29]
[Academy: 3-B]
You can pick your next lesson. Afterwards, the story progresses to the cafeteria.
[Academy: Cafeteria]
During lunch, two of the girls from earlier enter and you see they are still being bullied. Then you will head home.
[Squad Six House]
There isn’t anything else to do right now, unless you want to romance. Advance the story when done.
[5/30]
[Squad Six House]
You will be informed that they found two more dismembered bodies at the park. The squad wants you to go check it out.
[Canaan Park]
At the park, you see the blocked off crime scene and a suspicious priest nearby. Afterwards, you get a phone call to go to Exodus HQ. Head over there to be debriefed.
[Exodus HQ: Control Room]
Talk to Ritsuka to learn that a Megiddo appeared and time for you to advance a rank. Exit to the World Map and select the marker to the southeast. Examine the tear to enter.
Chapter Two (Part 5) – Megiddo (Vav)
[Megiddo: Vav]
You get an option about the dungeon. Choosing the first option shows the completed design of the area, or choosing the second option shows the basic format for those having problems loading the first.
As you are falling, you will have two battles.
(Battle) (Mi-Go x 3)
(Battle) (Byakhee x 3)
As you land, you see that you are on a bunch of floating islands. The islands have multiple paths to take and require multiple trips to get all the items. At the end of the dungeon, there is a blue portal near the boss that teleports you back to the beginning so you can get all the items.
Items:
(Yellow) (What I do for you)
(Green) (Energy Bar)
(Green) (Whooper)
(Green) (Hot Injection)
(Yellow) (My Spirit)
(Yellow) (Spirt Ball)
(Yellow) (Biblical Word)
(Blue) (1,800yen)
(Green) (Back Scratcher)
(Blue) (2,500yen)
(Green) (Portable Tent)
(Green) (Spiritus)
(Yellow) (Baby’s Cry)
We will start with the left path. Jump to the platform to the left for a yellow orb “What I do for you” illumina and then a green orb for “Energy Bar”. Jump down to the next on, but head up and to the right for a green orb for “Whooper”. Head back down and take the left route. Grab the green orb along the way for “Hot Injection”. Jump again for a yellow orb “My Spirit” illumina. In the next area, jump to the left for a yellow orb for “Spirit Ball” illumina, then jump back. Follow the platforms down to the next area. At the intersection, take the left path again. Follow for a yellow orb for “Biblical Word” illumina, and then in the next area a blue orb for “1,800yen”. Jump down to see the boss. To his right is a green orb for “Back Scratcher”. Just the transporter to the left to get the rest of the items.
This time, go the right path. Jump down and continue to the next area. Keeping to the right, you will pass a blue orb for “2,500yen”. Continue to the next area and take the right path again. Alone the way is a green orb for “Portable Tent”, a green orb for “Spiritus”, and a yellow orb for “Baby’s Cry” illumina. Jump down and fight the boss.
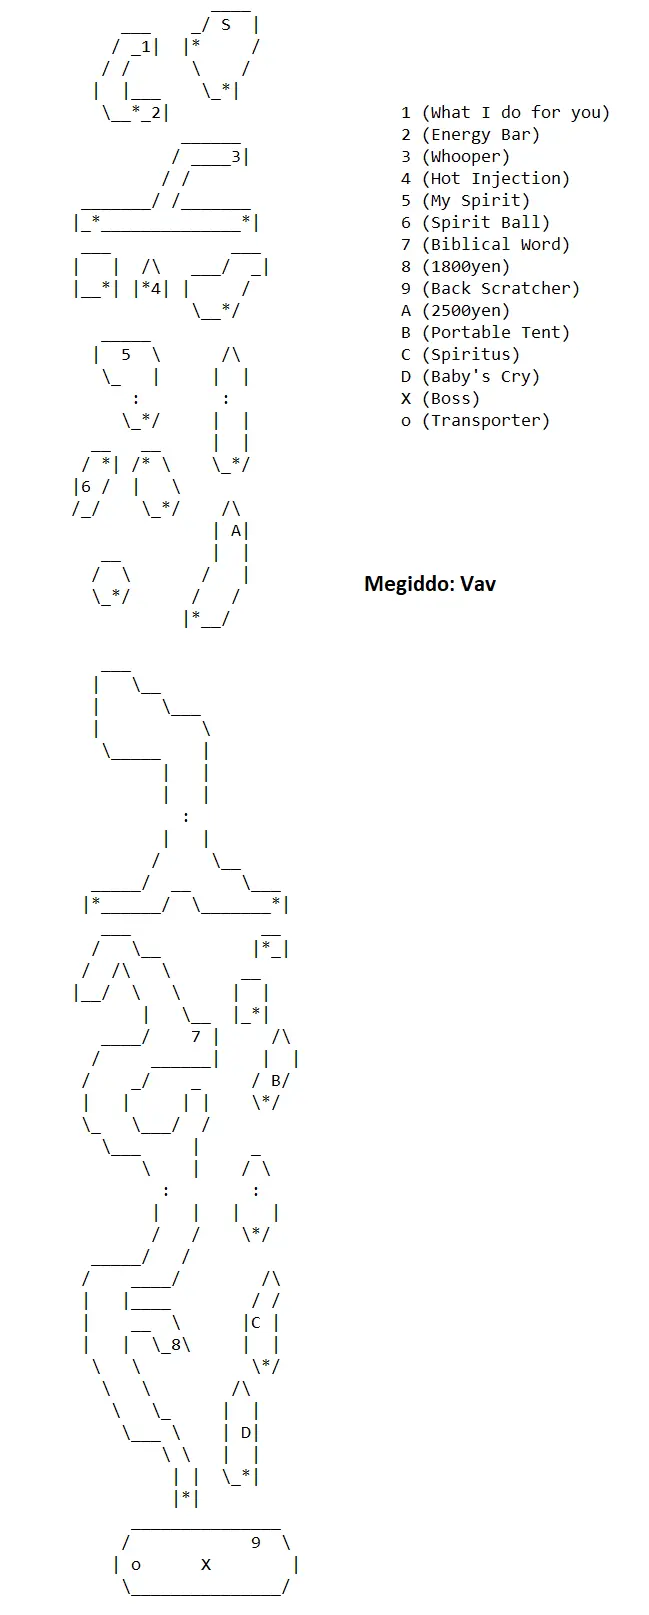
(Boss) (Gyasgaelo x 2) (Dark Wanderer)
After the Megiddo, you will rank up and receive the “GATE key” to access another area in Exodus HQ. Head over there now.
Chapter Two (Final)
[Exodus HQ: Section B]
Head back inside the elevator and select “???” This will become [Hall of Baphtus].
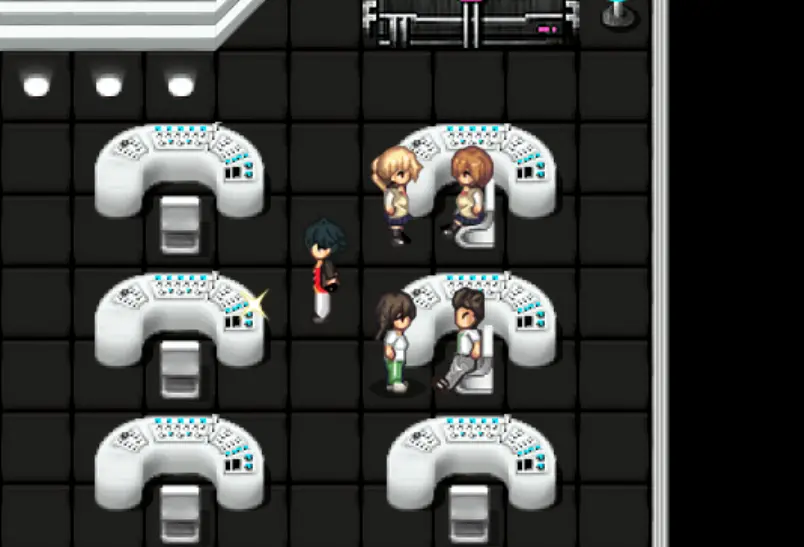
[Hall of Baphtus]
You will meet Ikujin’s twin, Soushin. In this room, you can talk to Soushin to start a Megiddo simulation of previously beaten dungeons. The left drone sells you items. The right drone just explains how the simulation works. The platform behind them allows to also play previous Megiddos, but also later to increase your rank. In the simulated Megiddos: the items orbs are now chests and most cases different areas, you can increase the difficulty for better rewards, and this is a good place to farm Word Fragments.
| Left Drone: Drinks |
|
|---|---|
| Energy Drink |
80 |
| Soda |
200 |
| Iced Tea |
350 |
| SP-rite |
100 |
| Latorade |
350 |
| Blue Bull |
500 |
| Left Drone: Items | |
|---|---|
| Antidote Herb |
30 |
| Blueberries | 50 |
| Spiritus |
60 |
| Band-aid |
80 |
| Concentrated Milk |
100 |
| Paper Fan |
110 |
| Wake-me-up |
110 |
| Liniment |
250 |
| Foot Warmer |
250 |
| Fever Killer |
250 |
| Salve | 320 |
| Medicine | 1.500 |
| Back Scratcher |
2.500 |
| French Fries |
250 |
| Cake | 3.500 |
| Candy | 250 |
| Energy Bar |
1.500 |
| Smoothie |
3.000 |
| Smelling Salts |
1.500 |
| Left Drone: Other Items | |
|---|---|
| Holy Water | 500 |
| Hot Injection | 3,000 |
| Cold Injection | 3,000 |
| Shock Injection | 3,000 |
| Aqua Injection | 3,000 |
| Mud Injection | 3,000 |
| Wind Injection | 3,000 |
| Divine Injection | 3,000 |
| Shadown Injection | 3,000 |
| Molotov Cocktail | 3,000 |
| Shaved Ice | 3,000 |
You can either test out the simulation or leave to end the day. Now would be time to get those Word Fragments to craft items for current and future missions. You will need White x 30, Red x 15, and Gold x 15; I find red to be the hardest to collect.
[6/4]
[Academy: Gate]
Nothing to do here, so head to class.
[Academy: 3-B]
Head in the classroom and talk to Keiji. Everyone starts suspecting the bodies are the work of a demon.
You can pick your lesson. Exit the school to receive another scene with the three bullied girls in the gym mentioning a ritual. The day ends.
[6/5]
[Academy: 3-B]
Nothing to do here. Exit to finish up some quests.
[Canaan Tower: Inside the tower]
You can turn in your quest item.
Quest # 8: Update
Hand over the “Hot Injection”. Receive 1 WP.
[Canaan Paradise: Entrance]
Head to the Garage to craft some items, if you managed to collect enough Word Fragments. You’ll want to craft “Debate Knowledge”, “Skillful Hands”, and “100% Courage” illuminas. Talk to Ikujin again to have him turn “Debate Knowledge” into a charm. Turn in the charm to Mitsuo.
[Canaan Paradise: Main Street]
Head inside the Otaku Store and talk to Mitsuo.
Quest # 5: Update
Hand over the charm to Mitsuo. Receive 1 WP.
Now that you have access to Canaan Park, head over there.
[Canaan Park]
Equip the “Skillful Hands” illumina. Head up to speak to the boy near the fountain.
Quest # 6
The boy will want you to build him a model. “Skillful Hands” will help. Receive 1 WP.
Note: This quest only becomes accessible after completing Quest # 5.
You are done for the day. You can spend your new WPs to romance the girls. Afterwards, head home.
[Squad Six House]
Advance to the next day.
[6/7]
It is the weekend and time for the first date!
You can pick one of the six girls to take on a date. There are three dates in the game, and you get a scene after date three. So pick one girl for those three dates. Saving the game here on New Game Plus makes it easier to go on three dates, acquire their scene, then load and choose another girl. After the date, the day ends.
[6/8]
[Academy: Gate]
Upon showing up, you see there is a covered body on the stairs. You will get another scene of the girls being bullied in the bathroom. At home, the squad talks about a few things but want to change the topic. Any choice you choose does not matter. The day will advance.
[6/12]
[Academy: 3-B]
You can pick your lesson. Since there is nothing else to do, head home.
[Squad Six House]
Advance your story. You will get a scene with those three girls entering the cemetery to make a deal with a hooded man for a device, but get scared and run away. The day advances.
[6/15]
[Academy: Gate]
Upon arriving, you will be told that there was another victim. After class, you approach Emiko (one of the bullied girls) to learn about the situation. You end up in Canaan Paradise. Eventually, the day will end.
[6/19]
[Squad Six House]
Your group will mention about going to save the bullied girls at the Church.
(Glitch: If you pause your game, you will see the date has an error. It said 5/19 for me instead of 6/19)
|SAVE YOUR GAME|
When you leave the house, you will have to location markers to choose from. The main event is at the [Church], but head to [Canaan Paradise]. There isn’t anything here, but if you head to the Church now, you will get a scene with the girls.
Scene # 8 “Taken by Homeless Men…”
After getting the scene, save when you can on a separate file. This will save the scene to your gallery. Then reload the first save, to before the scene. Keeping the girls alive allows you to have their individual scene in the next chapter.
Head to the Church first this time.
[Church]
Follow the path to the cemetery to save the girls. Afterwards, you will jump into a battle.
(Battle) (Gray Steel)
The game advances to the next day where you tell the Director about the events.
Chapter Three (Part 1)
Before you play, note how critical this chapter is for the game. This chapter contains two missable romance routes, finishing Quest # 3, obtaining Quest # 9, and the follow-up Quest # 12. By not following the right path, you will have a lot of empty days of just advancing the story.
[6/22]
[Academy: 3-B]
The class is told about an upcoming music festival to partake in. You will then head home to talk more about the festival and the day eventually ends.
[6/23]
[Academy: 3-B]
You can pick your lesson. Your group decides to head to a music store for instruments. Head to Canaan Paradise.
[Canaan Paradise: Main Street]
Approach the event marker to advance the story. Inside the Music Store, each character will choose their own instruments for the festival. Afterwards, the group will head outside. The girls will want to go enjoy some crepes before going home. While choosing the crepes option gives each girl some affection, you will miss out on everything in this chapter. Instead, choose “I’m going home.”
As your character heads home alone, you pause at the Café seeing that the owner, Natsuki, needs help. You agree to work there. Natsuki wants to pay you; choose “No, I’m good.” Natsuki will instead pay you with bass lessons for future shifts. Had you accepted the money, you would not be allowed to romance Natsuki. After your shift, head to the Red Light Section. DO NOT GO HOME!
[Canaan Paradise: Red Light Section]
Head to the bottom left area where the bouncer is blocking a building. As you approach, you will see your teacher, Mika, walking with someone. You are given an option. Choose “Call out to her”. If you remain quiet, you will not be able to romance her. While trying to call out, you are prevented by the bouncer. You will then head home automatically.
[Squad Six House]
You will see that the girl, Allie, is now living with you and the day ends.
[6/24]
[Academy: 3-B]
You can pick your lesson. After class, head to the Teacher’s Lounge.
[Academy: Teacher’s Lounge]
Head up and talk to Mika about the previous night. Mika tells you that she was there with a doctor on a matter of her sick sister and he was escorting her home. Leave here to go for some scenes to collect. Head to the Canaan Park first.
[Canaan Park]
Above the fountain, speak to Keiko for her scene.
Scene # 17: “Sex with Keiko”
Afterwards, head to the school.
[Academy: 3-B]
Examine the shiny part on your desk to find a letter from Emiko. Head to the Red Light Section.
[Canaan Paradise: Red Light Section]
Speak to Emiko on the top right to get her scene.
Scene # 18: “S&M with Emiko”
Afterwards, head back to the school.
[Academy: Gate]
Head up and a new option appears; select “???” Approach the hearts for a scene with Sayoko.
Scene # 19: “Sex with Sayoko”
After viewing all three scenes with the girls, you will receive “What’s yours is mine” illumina.
Since there is nothing left to do, head to the Café to work.
[Canaan Paradise: Main Street]
Head inside the Café. Natsuki will briefly mention about her past. Afterwards, the day will end.
[6/25]
[Squad Six House]
This will be the weekend for the second date! At any point that you forget what date you are on with a particular girl, you can view what date level a girl is currently on. This would be date two, so look for “Date Level 2”.
The day ends after the date.
[6/26]
[Academy: 3-B]
You can pick your lesson. There is nothing else to do, so head to the Café to work.
[Canaan Paradise: Main Street]
Head inside the Café. Natsuki will discuss about siblings and give you a choice. Either option does not matter, but the second choice is better for romancing. Choose “I’d rather you by my girlfriend.” Afterwards, the day will end.
[6/27]
[Academy: 3-B]
You can pick your lesson. Today will be your first band practice for the group. Head to the Music Store.
[Canaan Paradise: Main Street]
Head inside the Music Store and to the left room to practice. The day ends afterwards.
[6/29]
[Academy: 3-B]
You can pick your lesson. There is nothing else to do, so head to the Café to work.
[Canaan Paradise: Main Street]
Head inside the Café. You will get a scene about a man exiting the cafe; he hit her. Afterwards practicing, the day will end.
[6/30]
[Academy: 3-B]
You can pick your lesson. Today will be the second band practice for the group. Head to the Music Store.
[Canaan Paradise: Main Street]
Head inside the Music Store and to the left room to practice. The day ends afterwards.
[7/1]
[Exodus HQ: Control Room]
The Director will brief you on an upcoming mission in the Astral Church with people going missing to there. He wants you and Kenshin to go investigate. After the meeting, the day ends and will skip to Friday, the night of the mission.
[7/3]
[Squad Six House]
After regaining control, speak to Nana to receive an “Elixir” and then exit to the World Map.
[World Map]
The Astral Church is on the left, but click on the marker on the right. This is Old Town.
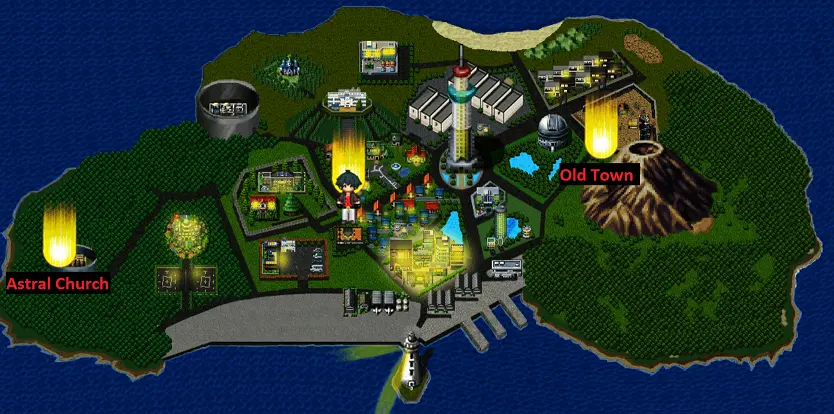
[Old Town]
As you enter, you get a scene with Mika and eventually that same doctor. After coming to her defense, you are forced back to the World Map. Head to the Church.
Chapter Three (Part 2) – Astral Church
[Astral Church]
You will glide over and into the Church. Make sure you equip Kenshin with illumina before proceeding. Head to the next screen to the right. Follow the path and you will approach the double door to see a scene. A large group of kids are sacrificing missing people for a ritual. After you escape, you are forced into a lab room. The founder of the church reveals the dark secret about these kids and their purposes; to become Magnas. Then you are thrown into a battle with the altered kids.
(Battle) (Child x 3) During this battle, you notice that the kids have a barcode on them like Allie does.
After the battle, exit the room.
(Battle) (Assault AI: Dinosaur)
After this battle, head right and into the next room. Walk down to the console to deactivate the laser wall in the hallway.
Exit and enter the next room on the right. There is a chest with “Cold Injection” here. Exit and head up the stairs. In the next section, you regroup with all of the squad. As the squad moves around, you will be cornered by machines and Magna kids. You are allowed to pick your group before a battle.
(Battle) (Assault AI: Metal Hound)(Assault AI: Lionguard)
After the battle, you are now in the dungeon part of the church.
[Astral Church]
Items:
All items in this dungeon are in chests.
(Energy Bar)
(If you’re sorry, pay up) (Illumina)
(All must come to an end) (Illumina)
(1,500yen)
(Phoenix Feather)
(Jack of all trades) (Illumina)
(Murphy’s Law) (Illumina)
(Panacea)
(Take a shower first) (Illumina)
(Astral Church Key)
(Megalixir)
(Like moths to a flame) (Illumina)
(Portable Tent)
(Portable Tent)
(Grammar Nerd) (Illumina)
(Viva la Revolucion) (Illumina)
(2,000yen)
(Cake)
(Paper Fan)

At this point, you can equip illumina to everyone. Head up through the door into a small room, and then up again. From here, head left and then down into a room with four chests; “Energy Bar”, “If you’re sorry, pay up” illumina, “All must come to an end” illumina, and 1,500yen. Exit the room. Head all the way to the right, and then up inside the room. There is a chest with “Phoenix Feather” inside. There is nothing left on this floor, so exit and head to the northwest part and advance to the next floor.
On this staircase, there is a hidden passage to the right on the first landing. Two chests at the end for “Jack of all trades” and “Murphy’s Law” illuminas. After the chests, head up the stairs.
Here, you will see a spiral leading to the center of the room. Instead of going all the way around, search for hidden parts of the wall in the middle to walk through. Inside the center room are five chests. “Panacea”, “Take a shower first” illumina, “Astral Church Key”, “Megalixir”, and “Like Moths to a flame” illumina. As you leave the room, you will be thrown into a battle.
(Battle) (Polygon Head)
Exit the room and make your way to the southeast part of the room to the next screen. Head down and approach the double doors to the left. Use the key on the door and then enter. Inside this small room, there is a chest on both sides. They both contain “Portable Tent”. Head upstairs.
Head right first. You will see a chest in a secluded alcove. There is a hidden passage along the bottom right, go in it and up for “Grammar Nerd” illumina. Head back to the entrance and walk to the left side. There is another secluded chest with a hidden passage; “Viva la Revolucion” illumina. Head up from here for a chest with “2,000yen”. Head to the right, then down at the crossroads. There is a chest for “Cake”. Head back to the crossroads and go right for a chest for “Paper Fan”. Back at the crossroads, head upstairs to the boss room.
(Boss) (Founder) You can’t win this first fight because it ends.
(Boss) (Founder) The Founder becomes a Magna, now you can beat him.
After the Founder, Kenshin sense there is another enemy in the room.
(Battle) (Twin Jacob) You can’t win this fight, it ends.
After the battle ends, the church starts to crumble around you. The group warps out of there. They watch the news to hear about the church, then the day ends.
Chapter Three (Part 3)
[7/13]
[Academy: 3-B]
Head to the Teacher’s Lounge to confront Mika.
[Academy: Teacher’s Lounge]
Mika isn’t there, so talk to Nurse Wakana. She will tell you to trust Mika. Mika shows up and asks Nurse Wakana to take over her class for a few days. Nothing else here, so exit the school.
[World Map]
Old town is now permanent. Head there.
[Old Town]
Enter the bar and talk to the bartender.
Quest # 3: Update
The bartender has the “Exorcism”, but wants a trade. He wants alcohol called “Sacrifice”.
To find this, head to the squad’s home and examine the shiny object in the kitchen. Make
the exchange. Head back to the old man in Canaan Paradise to finish. Receive “Old
Man’s Feelings” illumina.
With another quest done, head to Exodus HQ.
[Exodus HQ: Control Room]
Talk to Ritsuka to advance her romance.
– “In the personal sense…”
Nothing left to do, so head to the Café for work.
[Canaan Paradise: Main Street]
Head inside the Café. After entering, you see a familiar man having an argument with Natsuki. She tells you about her deceased brother and the man is her ex-boyfriend. You don’t receive training today, so head home.
[Squad Six House]
Advance the day.
[7/14]
[Academy: 3-B]
You can pick your lessons; and it’s with Nurse Wakana. Head to the Café for work.
[Canaan Paradise: Main Street]
Head to the Café to see her ex leaving and the Café has broken items everywhere. You run out to catch up to her ex to fight him, threatening him to stay away. Afterwards, you help clean up the place and Natsuki takes you out on a date. You return back to her place.
Scene # 9: “With Natsuki in Her Room…”
[7/15]
[Academy: 3-B]
You can pick your lessons; and it’s with Nurse Wakana. Exit the school to check on Mika.
[World Map]
Izu Hospital is open. Head there.
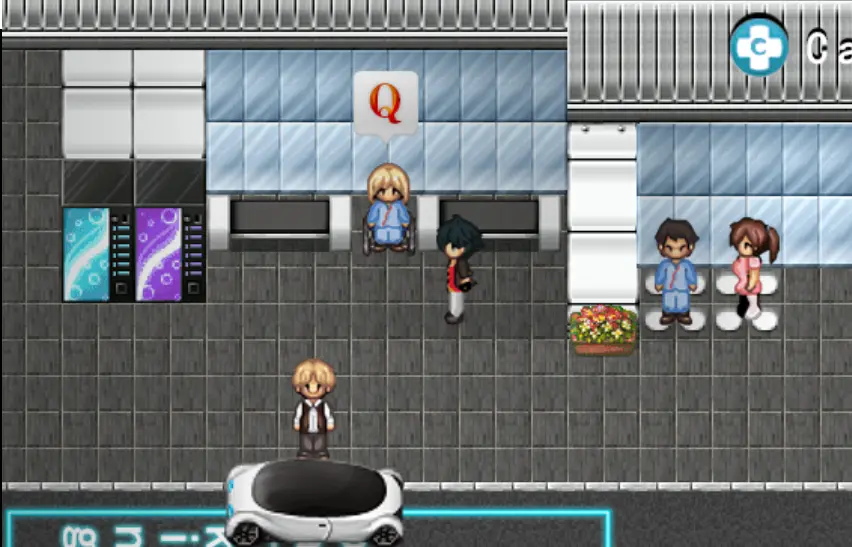
[Izu Hospital]
Enter the hospital. Head right, past the nurse’s station and around the hallway. Follow Mika into the bathroom. She asks you what she should do about the doctor trying to marry her so he can save her sister.
– “I don’t want you to get married.”
Mika will refuse the doctor. The game will transition to night time at the hospital. Enter and follow the scream. Head inside Mika’s room (closest to the bathroom). The doctor is not happy about being turned down, so he attacks her. He turns into a Magna, so you fight him to save Mika.
(Battle) (Shindo) Caution here, you will slowly lose health.
After the battle, the doctor jumps out of the window and the day ends.
[7/16]
[Academy: Teacher’s Lounge]
Mika informs you that her sister has been moved to a different hospital. After the discussion, you end up in the classroom.
[Academy: 3-B]
Exit the school and go check on Mika at the new hospital.
[World Map]
Izu Hospital is now gone, but Canaan Hospital is open.
[Canaan Hospital]
Upon entering, you see a girl in a wheelchair outside.
Quest # 9
The girl wants “courage”. If you created the “100% Courage” illumina, head to the Garage
in Canaan Paradise to turn the illumina into a doll for the girl. Then give her the doll.
Receive 1 WP.
Note: This quest is only available after completing Quest # 5.
Now head in the hospital. After, you end up in Mika’s room. After some time, Mika takes you home to cook you dinner and give a treat.
Scene # 10 “With Mika in Her Room…”
The day ends.
[7/18]
[Academy: 3-B]
You can pick your lesson. Head to the Music Shop for your final practice.
[Canaan Paradise: Main Street]
Head inside the Music Store and to the left room for the final practice. The day ends afterwards.
[7/19]
[Academy: Gym]
Today is the day of the festival. The squad waits in a room for their turn, but sense that a Megiddo opened up nearby.
Chapter Three (Final) – Megiddo (Zain)
[Megiddo: Zain]
Items:
(Green) (Medicine)
(Green) (Energy Bar)
(Yellow) (Common Wealth)
(Yellow) (No More War)
(Yellow) (Stay Tuned)
(Blue) (2,500yen)
(Green) (Paper Fan x 3)
(Yellow) (Crunchy Taste)
(Green) (Magic Mirror)
(Green) (Charm of Tokugawa)
(Yellow) (Close to Victory)
(Green) (Charm of Houjou)
(Green) (Charm of Guan Yu)
(Yellow) (Luck is my strength)
(Blue) (2,500yen)
(Yellow) (I’ll do it tomorrow)
(Green) (Blueberries)
(Yellow) (Time to pay the piper)
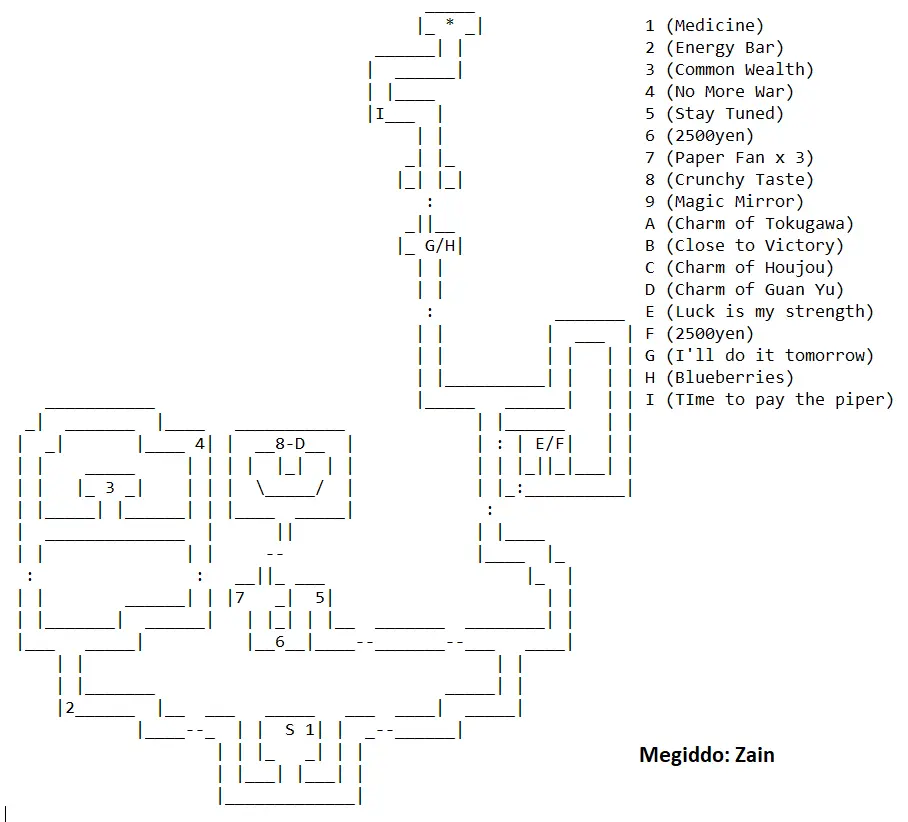
Right at the start, there is a green orb for “Medicine”. Head down and exit to the left. On the next screen, there is a green orb along the way for “Energy Bar”. Follow the path up and left to the next screen. At the intersection, head right and up for a yellow orb for “Common Wealth” illumina. Back at the intersection, head up and around for a yellow orb on the way for “No More War” illumina. Go down from here and continue towards the direction of the beginning.
Take the right path. Follow the hallway to the next intersection, go left. Continue left on this short area to the next. Follow the path to the doors; getting a yellow orb “Stay Tuned” illumina, blue orb “2,500yen”, and a green orb “Paper Fan x 3” along the way. Inside the room, go around to the back. There are six orbs here: yellow “Crunchy Taste” illumina, green “Magic Mirror”, green “Charm of Tokugawa”, yellow “Close to Victory” illumina, green “Charm of Houjou, and green “Charm of Guan Yu”. Back track a few screens.
At the main intersection you first turned left, head right and up to the next screen. From here, you can see a door to the right.
There is a hidden passage that lets you get to it quicker instead of walking around. In the room, there is a yellow orb for “Luck is my strength” illumina and a blue orb for “2,500yen”. Head back through the hidden passage and go up and right to the next screen. Head up to find a yellow orb for “I’ll do it tomorrow” illumina and a green orb for “Blueberries”. Enter the room. Grab the yellow orb for “Time to pay the piper” illumina and follow the path to the boss.
(Boss) (Daoloth x 2) (Asinine) Take out the two smaller enemies first.
After, the Megiddo will end and it will be your turn for the festival. If you followed the extra romances, you will see Mika and Natsuki in the crowd cheering you one. After the festival, you obtain 10,000yen.
Chapter Four – Megiddo Trials
[7/21]
[Academy: 3-B]
The class notes that it’s hot, meaning that the summer break is almost there. After class, head to Exodus HQ.
[Exodus HQ: Control Room]
Talk to the Director. You will be briefed about the trials you will conduct on an island. The day ends.
[7/22]
You start the day on a boat with the squad. Akari will ask you to talk to Satsuki.
– “Go talk to her”
During the conversation, Satsuki questions your motive.
– “I do have something to say”
Upon arriving, the group and other squads arrive to a hotel. The squads enter to the lobby for introduction. You learn about her rivalry with Satsuki and her twin sister. The day will then end.
[7/23]
[First Trial]
Today is the first Megiddo trial. After the group senses its location. Head up and to the northeast; all other routes will not let you through.
[Megiddo: Zain]
Items:
(Green) (Medicine)
(Green) (Energy Bar)
(Yellow) (Common Wealth)
(Yellow) (No More War)
(Yellow) (Stay Tuned)
(Blue) (2,500yen)
(Green) (Paper Fan x 3)
(Yellow) (Crunchy Taste)
(Green) (Magic Mirror)
(Green) (Charm of Tokugawa)
(Yellow) (Close to Victory)
(Green) (Charm of Houjou)
(Green) (Charm of Guan Yu)
(Yellow) (Luck is my strength)
(Blue) (2,500yen)
(Yellow) (I’ll do it tomorrow)
(Green) (Blueberries)
(Yellow) (Time to pay the piper)
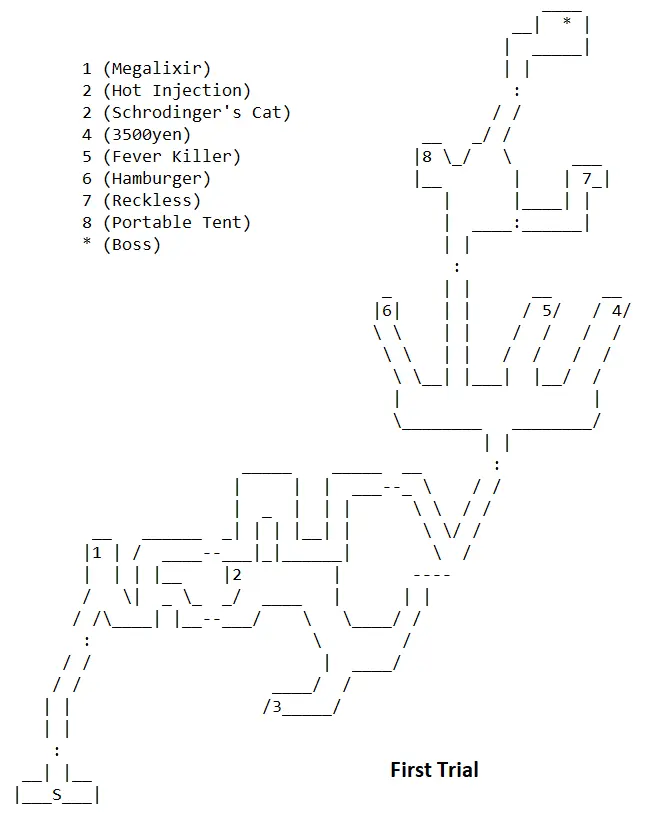
In the cave, there are four routes to take. From right to left: right path has a chest for “3,500yen”, then chest for “Fever Killer”, the next path is the exit, and the left path is a chest for “Hamburger”. Exit to the next screen. Immediately head to the right to find a hidden passage that leads to a yellow orb for “Reckless” illumina. Head back and up for a chest for “Portable Tent”. Follow the path up for the boss area.
You end up being the last group to arrive for the boss. Watch the other squads win. Then activate the crystal to continue.
[Second Trial]
The second trial will start soon after the first one.
Items:
(Yellow) (Pickpocket)
(Cake)
(Shadow Injection)
(Yellow) (Trilingual)
(Yellow) (Not For Sale)
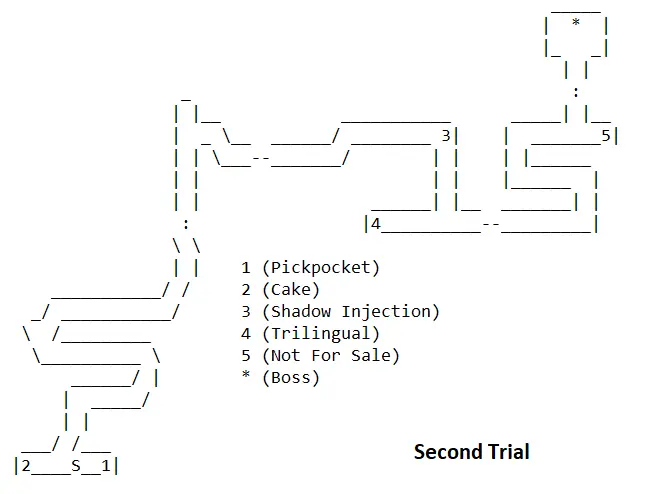
Head right for a yellow orb for “Pickpocket” illumina. The head all the way to the left for a chest with “Cake”. Now head up the mountain. Continue following the path until you cross two bridges. Under the tree on the other side of the bridge is a chest for “Shadow Injection”. Follow the path down and to the left for a yellow orb for “Trilingual” illumina. Head right. Follow the path upwards. Before heading up to the next area, head to the right and find a yellow orb “Not For Sale” illumina under a tree.
Head up to the boss area. Again, you are last. This time, the other squad defeats the boss. You’ll head back to the beach.
[Third Trial]
Soon after, the third trial starts and your group takes off first.
Items:
(Yellow) (Thunder Cook)
(Yellow) (Sold Out)
(Hamburger)
(5,000yen)
(Hamburger)
(Yellow) (20 Shots)
(Yellow) (20 Shots)
(Portable Tent)
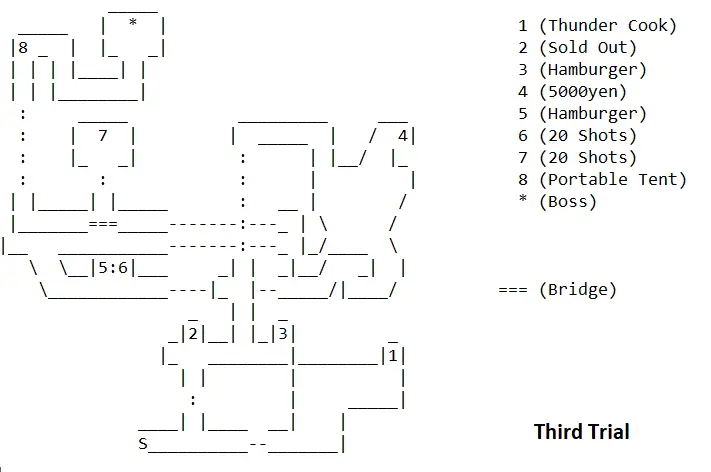
Before heading up at the intersection, head right to the next screen. Here you see the beach line. Head to the northeast section, under the rocks. In the far upper right corner, there is a hidden yellow orb for “Thunder Cook” illumina.
Head back to the intersection to head up into a cave. Head up for a yellow orb for “Sold Out” illumina. Then head all the way to the right for a chest for “Hamburger”. Take the path that leads up and to the next screen. Head down into the water but then up to the northeast for a chest for “5,000yen”. From here, head down into the water and follow the water all the way south. Head left to the next screen.
Enter the nearby cave section. Inside you will see a chest for “Hamburger”. Halfway down the hallway, there is a hidden passage that leads to a yellow orb “20 Shots” illumina that is all the way on the right. Exit the cave section. Head left and up to go under a bridge. Inside the room behind the waterfall is a yellow orb for “20 Shots” illumina. Exit, and then head right to go across the bridge. Cross the bridge to the next area. Grab the chest “Portable Tent” along the way. You will approach the boss area, and be the first squad.
(Boss) (Fake Manga x 4) After a few turns, the battle ends. Satsuki gets hurt and the group argues.
Later that night, you are approached by Midori (Satsuki’s twin) and she is trying to recruit you to her group, but you turn her down. The night ends.
[7/24]
In the lobby, the group learns that they must work together if they are to win the trials. The group heads back to the beach for their final trial. The twins sense the final trial at the same time and take off.
[Final Trial]
Items:
(Hamburger)
(Yellow) (Awesome)
(Yellow) (Beatbox)
(Medicine)
(3,000)
(Panacea)
(Megalixir)
(Angel’s Drink)
(Foot Warmer)
Before heading up the steps, head right through the trees and up to find a chest for “Hamburger”. Head inside the tower.
On the first floor, head around to the left side and up to find a yellow orb for “Awesome” illumina. Now head the right path to head upstairs.
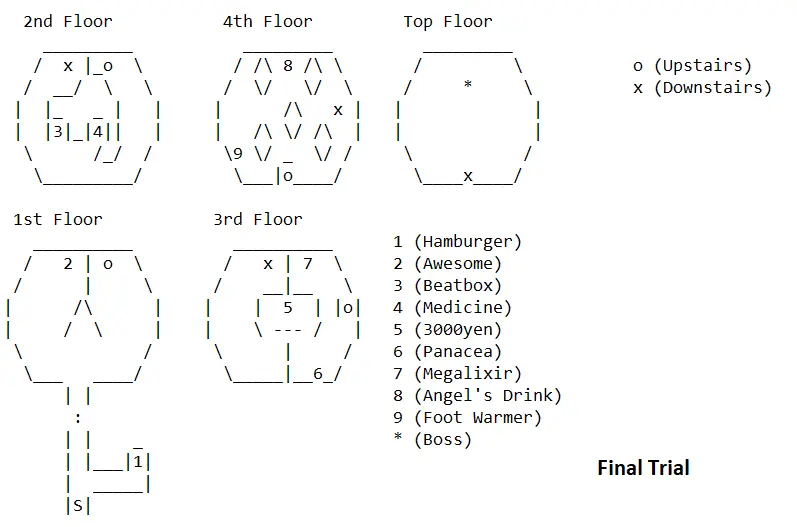
On the second floor, follow the path and enter the room near the center. Inside is a yellow orb for “Beatbox” illumina. Exit the room and head to the center of the room for a chest for “Medicine”. The hole in the floors drop you to the previous floor, so be cautious. Follow the path around upstairs.
On the third floor, head around and to the center of the room. Walk around the pit to get a chest for “3,000yen”. Then head near the stairs for a chest for “Panacea”. Before heading upstairs, go behind them for a chest for “Megalixir”. Now head upstairs.
On the fourth floor, grab the chest nearby for “Angel’s Drink”. Then head down to the bottom left area for a chest for “Foot Warmer”. Head back and approach the stairs from the right to go up them.
On the fifth floor, you arrive first with the other squad’s behind you. Each group gets their own boss.
(Boss) (Fake Magna Adona)
Your team will be the first one to win, and then they will head upstairs to be congratulated. After the trials are over, the groups take the boat back home and converse with each other. Later that night, you’ll get a scene of the man in the white robes again; this time he killed some people. The day will end.
Chapter Five (Part 1)
[7/25]
[Squad Six House]
You start off in your room. You can continue with the story or romance some girls. Let’s do the second option. Head to Canaan Paradise.
[Canaan Paradise: Entrance]
Enter the Cult Shop first. You’ll find Nemuko inside for a romance option.
Scene # 36: “In a Alley with Nemuko”
Afterwards, head to the Main Street.
[Canaan Paradise: Main Street]
In the center, near the large tree, there is a quest.
Quest # 10
She will want a “Spotlight”. Hand it over. Receive 1 WP.
Head into the Garage in the Entrance.
Quest # 12
The woman will want a “Magic Mirror”. Hand it over to her. Receive 1 WP.
Note: This will only appear when Quest # 9 is finished.
Head to Canaan Tower.
[Canaan Tower]
Head up the stairs and to the left. Speak to Keiji.
Quest # 15
Keiji will want an item, “US Army Binoculars”. I believe the only way to receive them is
inside the Megiddo simulator in Exodus HQ. Hand them over. Receive 1 WP.
Once done, head home.
[Squad Six House]
Advance the story.
[7/26]
This will be the weekend for the third, and final date! The day will end after.
If you are with Akari, you get a scene.
Scene # 21 “Akari’s Masturbation”
If you are with Remy, you get a scene.
Scene # 27 “Movie Theater Sex with Remy”
[7/27]
[Exodus HQ: Almakarta’s Hall]
You will be told here that you are now allowed to take your next test to rank up. Head to the simulator.
[Exodus HQ: Hall of Baphtus]
After talking to Soushin, you can examine the main platform to start your trial.
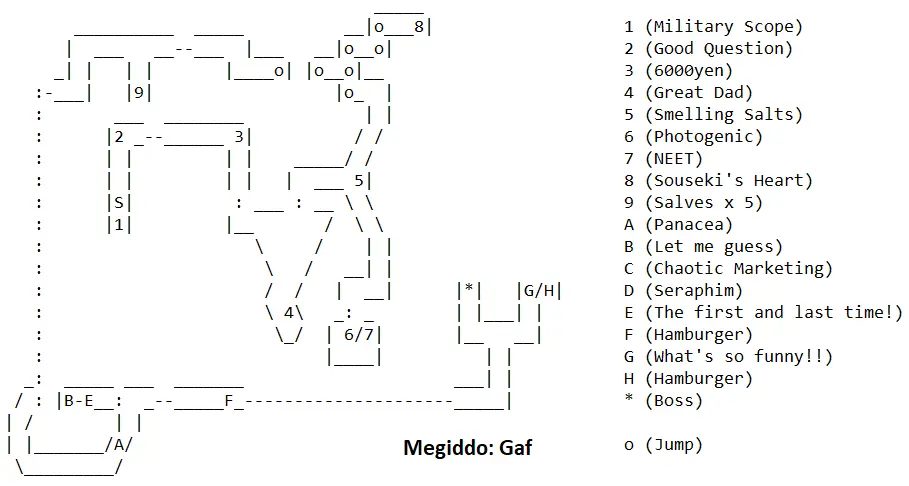
Chapter Five (Part 2) – Megiddo (Het) and Megiddo (Gaf)
[Megiddo: Het]
Items:
(Yellow) (I will always protect you)
(Yellow) (My power returns…)
(Green) (Portable Tent)
(Green) (Hamburger)
(Blue) (6,000)
(Yellow) (Pilgrimage)
(Yellow) (Adulterous)
(Green) (Magic Mirror)
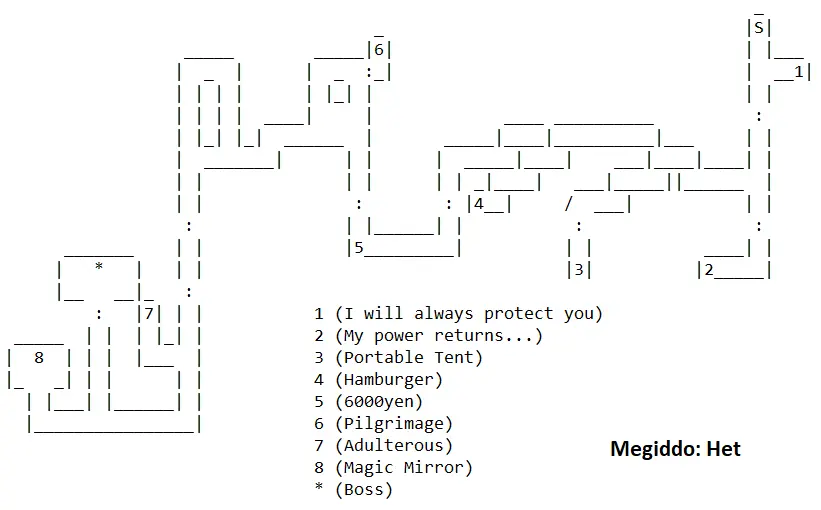
At the start, head down and to the right for a yellow orb “I will always protect you” illumina. Go back and head down to the next section. Before heading to the left, head down the stairs again. In the next section, there is a yellow orb for “My power returns…” illumina. Now head back to the previous section. Head left to see a series of bridges to jump. Make your way left and then down when you can. Head down to the next section for a green orb for “Portable Tent”. Go back, and cross the bridges to the left to reach the green orb for “Hamburger”. Now use the bridges to exit through the upper right area.
Follow the path and grab the blue orb for “6,000yen” along the way. In the next area, it appears you need to go left. Don’t yet. In the upper right area, there is a yellow orb for “Pilgrimage” illumina; find the hidden walkway on the right side to get to it. Now head let and down to the next section. Head around to the left for a yellow orb for “Adulterous” illumina. Follow the path down and around. At the intersection, go left and around for a green orb for “Magic Mirror”. Back at the intersection, head up and towards the boss.
(Boss) (Ubbo-Sathla)
After the simulation ends, you are promoted to the next rank. Afterwards, there will be a scene showing the men in robes with the man in white robes. They will soon be revealed. The day ends.
[7/28]
[Squad Six House]
Exit your room. Kenshin will stop you and tell you to clean the roof’s open bath (the one you aren’t allowed to use). While cleaning, you sense a Megiddo on the mountain. You explain to the group and then head out. Exit to the World Map.
[World Map]
Select the map marker for the Megiddo.
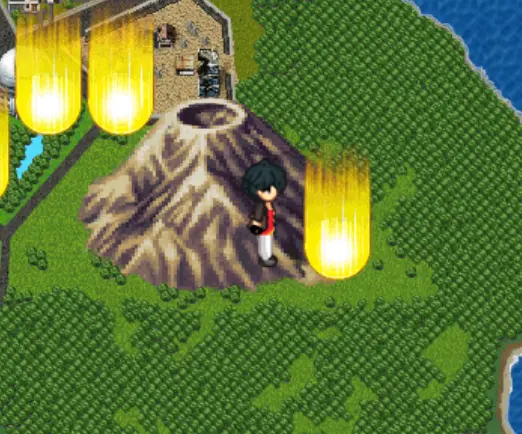
[Shiina Mountain]
The group enters the large tear; they sense a strong enemy is inside.
[Megiddo: Gaf]
Items:
(Green) (Military Scope)
(Yellow) (Good Question)
(Blue) (6,000yen)
(Yellow) (Great Dad)
(Green) (Smelling Salts)
(Yellow) (Photogenic)
(Yellow) (NEET)
(Yellow) (Souseki’s Heart)
(Green) (Salves x 5)
(Green) (Panacea)
(Yellow) (Let me guess)
(Yellow) (Chaotic Marketing)
(Yellow) (Seraphim)
(Yellow) (The first and last time!!)
(Green) (Hamburger)
(Yellow) (What’s so funny!!)
(Green) (Hamburger)
At the start, grab the green orb for “Military Scope”. Head up to grab the yellow orb for “Good Question” illumina. Enter the cave. Follow the cave to get a blue orb for “6,000yen” and continue through the exit. Head down instead of entering the next cave; down here is a yellow orb for “Great Dad” illumina. Head in the next cave. Along the way, there is a green orb for “Smelling Salts”. At the intersection, head down first and exit. Outside, there are two yellow orbs for “Photogenic” illumina and “NEET” illumina; head back inside.
Head up to find some bridges to jump across. Head up to grab the yellow orb for “Souseki’s Heart” illumina. Make your way across the bridges to the left side. On the next screen, head down at the intersection for a green orb for “Salves x 5”. Head back and follow the path forward. As you exit the cave and follow the path, you find a green orb for “Panacea”.
Instead of going right, follow the mountain counterclockwise to a hidden area. Inside are four yellow orbs for “Let me guess”, “Chaotic Marketing”, “Seraphim”, and “The first and last time!!” Head back and then continue right.
Cross the bridge and keep going right back into a cave. Head up and to the right to grab a yellow orb for “What’s so funny!!” illumina and a green orb for “Hamburger”. Take the left path. The group mentions that there is a hole there, but not boss. So the group jumps down the hole.
Inside, you will find some people in the red robes. They reveal to you that they are the “Gnostics”. One reveals himself as the Mighty Andre and wants to fight your strongest, Kenshin.
(Battle) (Mighty Andre) This is a tough fight that requires healing while trying to attack.
After the battle, the group joins in and fights him.
(Battle) (Mighty Andre) You can’t win. After enough damage, he uses a move that wipes the party out.
The group retreats, and the day ends.
Chapter Five (Final) – Megiddo (Ramed)
[7/30]
[Squad Six House]
You start off in your room. You can advance the story, but there is something to do first. Head to Exodus HQ.
[Exodus HQ: Section A]
In this room, head down towards the vending machines and speak to Ritsuka. Tell her:
– “I like your contradictory personality.”
After talking to her, you can do some more romances or head home end the day.
From this point forward, I recommend having Akari, Satsuki, and either Konoha or Kenshin in the group. Having two healers helps. Also, if you have enough Word Fragments, craft two “Varia” illumina since they reflect MOST magic (minus healing). If you have maxed out Nana’s ADAM, you can also use her “Meteora” ability to deal major damage to groups; and it won’t be reflected.
[7/31]
This is the beach adventure!
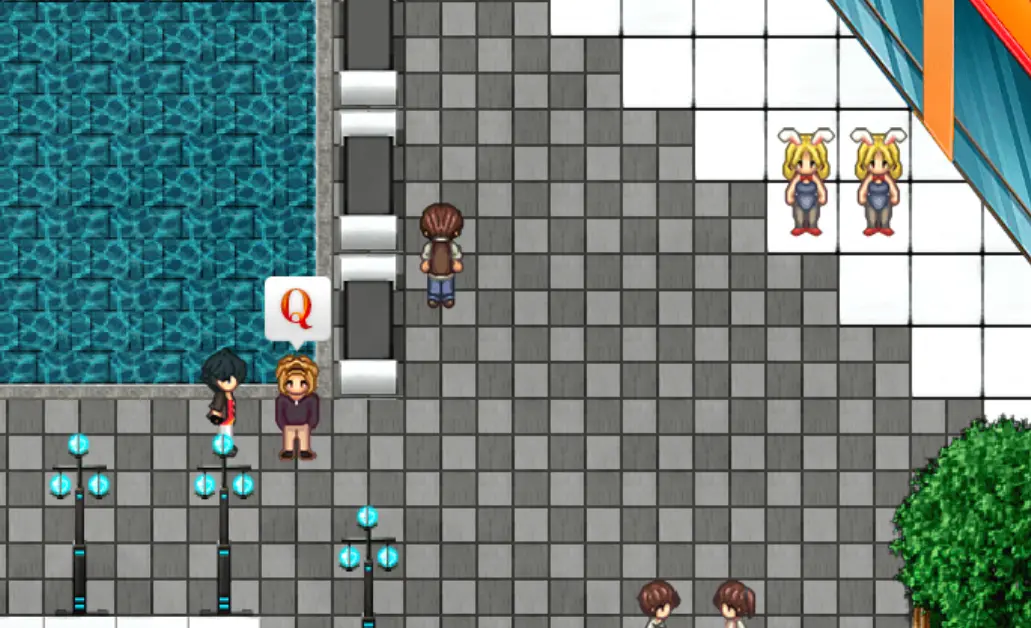
When the group heads to the beach, you get to see them in their bathing suits. They will ask you which one you prefer. Pick the girl that you are dating; this will help. After they are done showing off, approach the same girl to take her on a Jet Ski ride with you to find a cave. Follow the path south to be alerted that a tear is nearby.
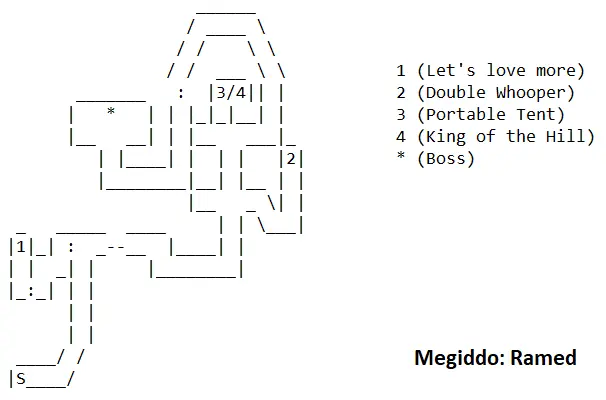
[Megiddo: Ramed]
Items:
(Yellow) (Let’s love more)
(Green) (Double Whooper)
(Green) (Portable Tent)
(Yellow) (King of the Hill)
This is the only Megiddo that lagged severely for me. Just take it slow to navigate narrow areas.
At the start, head up the stairs. At the top of the stairs, you can see a yellow orb to the left. The hidden passage is at the top left and zigzags down to the left. The orb contains “Let’s love more” illumina. Head back and go through the next section to the right. Follow the path around and to the water. At the water, you will get a short scene with the girl’s swimsuit slip. Afterwards, head up and right to find a green orb for “Double Whooper”. Head back and to the left. Go up from here and enter a room on the left. Inside are two orbs; a green orb for “Portable Tent” and yellow orb for “King of the Hill” illumina. Exit the room. Head around the hallway above you and down the stairs on the left side. Follow the path down the stairs and to the boss area.
(Boss) (Remnant)
After the battle, a man appears through another tear. He is one of the twelve Gnostics; and he wants to battle you.
(Battle) (Fire Pulip)
After the battle, you exit the Megiddo before it destroys you. Head back to the cave entrance to try and leave. Since you can’t, the two go find fresh water and wait. At this point, you receive the sex scene for the girl and their specific “_____’s Love” illumina. (There are six in total.)
Akari – Scene # 11 “First-Time Sex with Akari”
Satsuki – Scene # 12 “First-Time Sex with Satsuki”
(Glitch: “Satsuki’s Love” is named “Ritsuka’s Love” for me; might be for you.)
Konoha – Scene # 13 “First-Time Sex with Konoha”
Remy – Scene # 14 “Sex with Remy”
Kenshin – Scene # 15 “First-Time Sex with Kenshin”
Nana – Scene # 16 “First-Time Sex with Nana”
After the scene, you are rescued from the cave and taken back to Exodus HQ.
[8/1]
[Exodus HQ: Section B]
You wake up in a recovery room. Exit to try and find the girl you had sex with; they will stop you and tell you to head to the Control Room immediately. There, you learn that the English branch of Exodus was destroyed by the Gnostics.
Chapter Six (Part 1)
[8/3]
[Academy: 3-B]
You notice that earthquakes are beginning to occur. Once you have control, it’s time to explore. First head to the courtyard.
[Academy: Courtyard]
Speak to Masakari for an easy quest.
Quest # 14
Masakari wants a “Pretty Flower”. If you already have it, turn it in. Otherwise you can get
it in the Flower Shop in Canaan Paradise. Receive 1 WP.
Head down and near the fountain for the second Satsuki quiz.
Quiz №2
– “Midori”
– “108cm”
– “Omelet Rice”
[If you dated Akari three times and chose her both times at the beach, head to the infirmary.
Scene # 35 “In the Infirmary with Akari.]
Afterwards, head to Exodus for Ritsuka.
[Exodus HQ: Section B]
Head inside the room just to the left of the Control Room. Inside, speak to Ritsuka and she will break up two young lovers. She then asks for your opinion.
– “They’re lovers.”
Nothing else to do, unless you want to romance the girls or use the simulator. Head home.
[Squad Six House]
Make sure you also view Kenshin’s fifth romance interaction. There is a scene here in the kitchen.
– Scene #22 “Kenshin’s Fundoshi Milk Chugging”
– Respond with “It might be Remy’s”
Advance the story to end the day.
[8/4]
[Academy: Cafeteria]
You are enjoying lunch, but a small earthquake occurs. Then after that, you can head back to Exodus HQ for Ritsuka.
[Exodus HQ]
Simply head back inside the elevator for a scene with Ritsuka.
– Scene # 20 “Elevator Sex with Rituska”
That’s basically all there is to do until the end of the game. Feel free to return to any of the eight minor romances to have a pixel scene with them for more Word Fragments, head to the simulator, romance the main girls, or head home.
[Squad Six House]
Advance the story. At night, you are getting nightmares and another earthquake occurs.
[8/5]
[Academy: 3-B]
You can pick your lesson. Then, head back home; advance your story to the next day. You will get a warmly dream this time.
[8/7]
[Academy: 3-B]
You can pick your final lesson. There will also be a VR class, but you aren’t feeling well. Mika approaches you to see what’s wrong. If you romanced her, you have an option here; either option results in a kiss and then told to nap. You will have a nightmare about the entire class being killed.
This is also the last time you will be allowed to free roam around the World Map. When done, head home to advance to the next day.
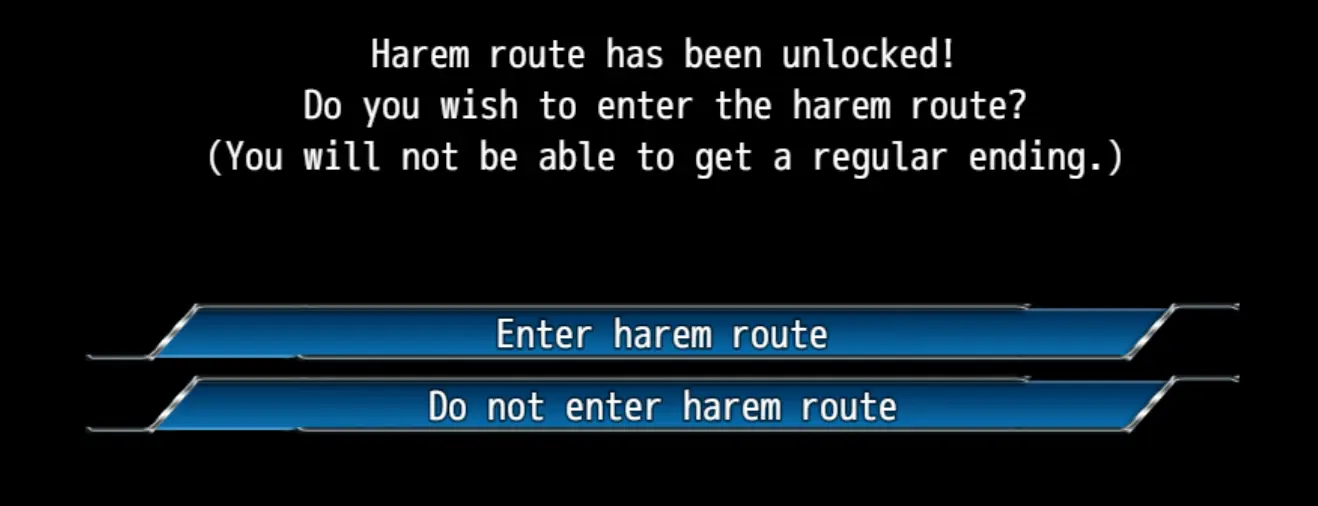
[New Game Plus route only. At this point, you will be told if you want to enter the Harem Route. Here you will get Scene # 33 “Lovey-Dovey Harem Sex” when you wake up, and Scene # 34 “Brides of the Apostle” at the end of the game. Choosing this route also prevents you from watching the scene with the girl you were dating.]
[8/9]
You will wake up and decide to do something with the girl you were dating for a scene.
Akari – Scene # 26 “Couch Sex with Akari”
Satsuki – Scene # 29 “Anal Sex with Satsuki
Konoha – Scene # 30 “Outdoor Sex with Konoha”
Remy – Scene # 28 “Watching Remy Masturbate & Sex”
Kenshin – Scene # 32 “Lovey-Dovey Sex with Kenshin”
Nana – Scene # 31 “Rubber Suit Sex with Nana”
[8/10]
[Academy: Gate]
Two tears have discovered and Ritsuka wants you to pick one partner to take to one of them. Choose whomever you wish, but it helps to have a healer with you if you are a low level.
After your choice, you take off to the tear.
Chapter Six (Part 2) – Megiddo (Mem) and Megiddo (Ain)
[Megiddo: Mem]
Items:
(Yellow) (Abracadabra)
(Green) (Whooper)
(Yellow) (Mysterious Desperation)
(Green) (Soul Supplement)
(Green) (Spiritus x 5)
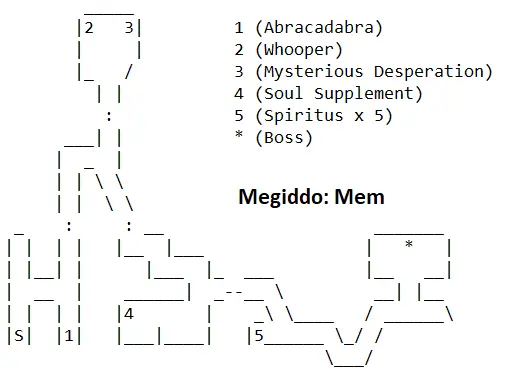
At the start head up and around to the right to grab the yellow orb for “Abracadabra” illumina. Exit north to the next screen. Head around the trees again but exit to the north. Grab the green orb for “Whooper” and yellow orb for “Mysterious Desperation” illumina, and then exit the area. Exit this area to the southeast. Head south and down to the left for a green orb for “Soul Supplement”, then exit to the east. Head south and grab the green orb for “Spiritus x 5”, then head east across the short bridge. Follow the path around to reach the boss.
(Boss) (Memento Mori)
After the boss, you will head back home. There, you will be told that there is another Megiddo that Nana discovered. Head to the World Map.
[World Map]
Head back to Shiina Mountain for a second Megiddo here.
[Megiddo: Ain]
Items:
(Green) (Hot Injection)
(Yellow) (Burning Spirit)
(Green) (Double Whooper)
(Purple) (Battle: Shoujou) (The Fruit of Love)
(Yellow) (Sauna Machine)
(Green) (Angel’s Drink)
(Yellow) (Thank you, come again)
(Green) (Fever Killer)
(Green) (Whooper)
(Yellow) (Guts)
(Yellow) (A skilled hawk hides its talons)
(Green) (Portable Tent)
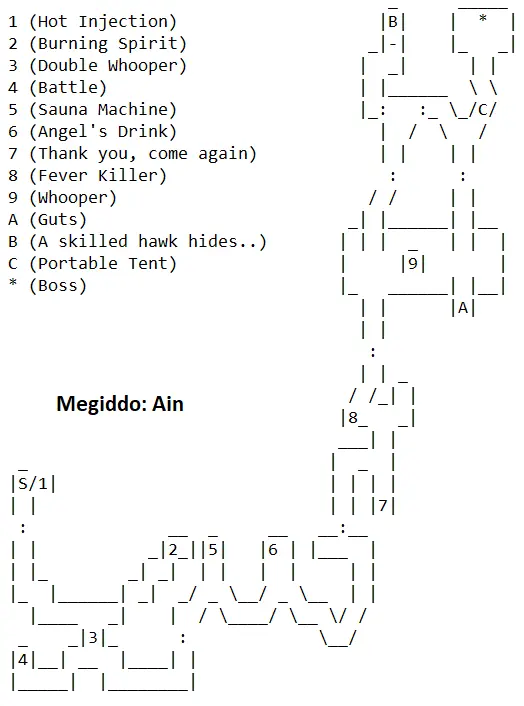
Right at the start, grab the green orb for “Hot Injection”. Head south to the lava room. Follow the path to the intersection and head right for a yellow orb for “Burning Spirit” illumina. Return to the intersection. Follow the path down to get a green orb on the way for “Double Whooper”. Take the left here for your first purple orb; this is a strong battle. Save your game!
(Shoujou) After the battle, you get “The Fruit of Love” illumina.
Head to the right of the area and head into the next cave section. Head up for the yellow orb for “Sauna Machine” illumina. Follow the path and head up for the green orb for “Angel’s Drink”. Follow the path to the right and around to the next section. Walk around to the right to reach the yellow orb for “Thank you, come again” illumina. Head up and go left to grab the green orb “Fever Killer” along the way. Exit to the north.
This is the second lava room, and you will have to run through it; you take minor damage with each step. Head for the center island for a green orb “Whooper”, then head to the right for a yellow orb for “Guts” illumina. Then head up to the next section. You will notice that two paths lead to this area, but head to the left side. Walk through the hidden wall and keep heading left through the hidden passage. Through the passage is a yellow orb for “A skilled hawk hides its talons” illumina. Head back and go up to the boss area. Grab the green orb for “Portable Tent” along the way.
(Boss) (Anomalocaris x 2) (Unstable)
Chapter Six (Final) – Megiddo (Gaflet)
[X.X]
As you can see by the day, you are almost to the end of the game.
[Academy: 3-B]
There is a large earthquake. Your class evacuates outside, but you get a call about a huge tear above the ruins of the Astral Church. The group heads off and enters the tear.
[Megiddo: Gaflet]
Items:
(Yellow) (The End of the World)
(Green) (Back Scratcher)
(Green) (Smoothie)
(Green) (Double Whooper)
(Yellow) (My little sister can’t be)
(Green) (Charm of Guan Yu)
(Yellow) (Swaying Sunflower)
(Yellow) (Carried Spirit)
(Purple) (Battle: Azathoth) (I’ve got the power)
(Yellow) (Know when to run)
(Yellow) (Counting Stars)
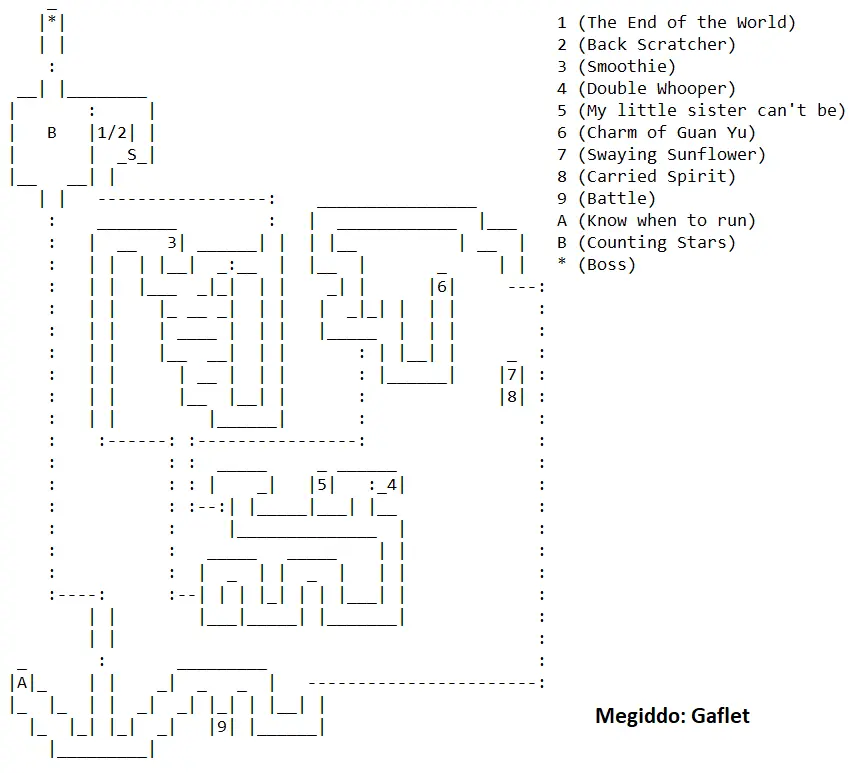
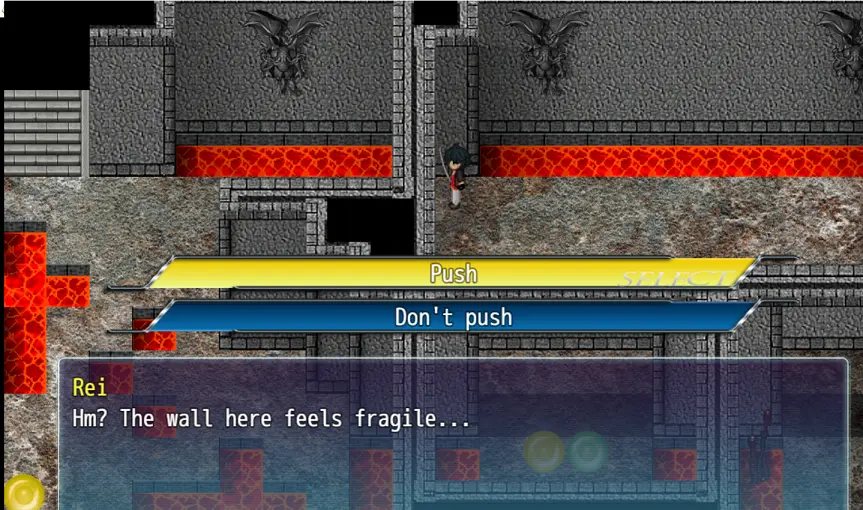
Warning: At this start of this level and right above the first two orbs, there is a hidden wall just outside that small room with the orb that let’s you bypass the entire Megiddo. Push the wall and advance, or play through for items.
At the start, head up to grab a yellow orb “The End of the World” illumina and a green orb “Back Scratcher”. Then head back and go down the stairs. You can go south and around, but head left in the start for a hidden passage to bypass the long walk. After the hidden passage, head up to grab the green orb for “Smoothie”. Head off to the left and down to the next section. Follow the twisted path around to the right. When you head up, head through the hidden passage to grab that green orb for “Double Whooper”.
Head to the left to grab the yellow orb for “My little sister can’t be” illumina. Head back to the main path and exit to the left.
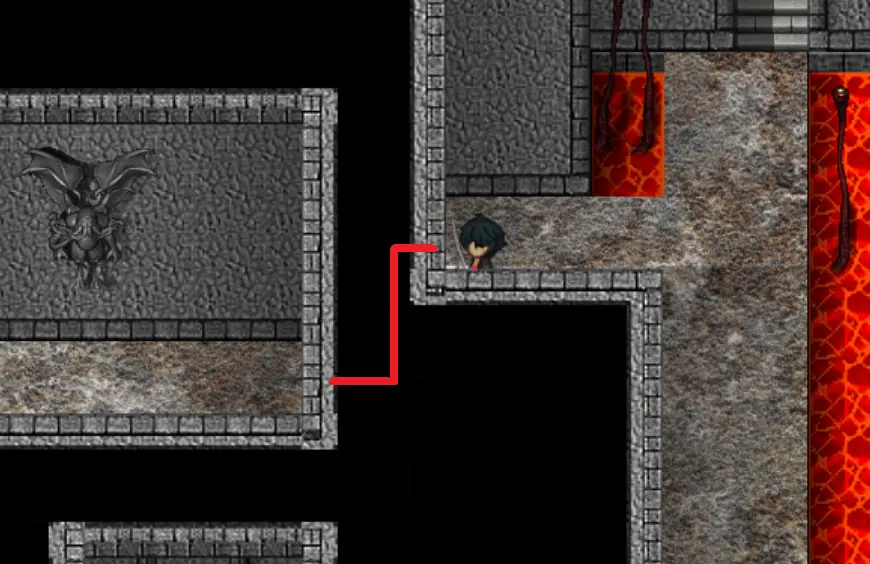
You will appear in a lava room. Go to the right to grab the green orb for “Charm of Guan Yu”. Head back and take the left path around the room. Stop when you see small stairs going into the lava. Head straight down to the bottom right of the room to see two yellow orbs. The hidden passage is halfway up the wall. Grab the “Swaying Sunflower” illumina and “Carried Spirit” illumina. Get out of the lava and proceed to the right to the exit.
Follow the path that leads to the left and enter the small room before the zigzag path. In this room, there is another purple orb. Save the game!
(Azathoth) After the battle, you get the “I’ve got the power” illumina.
Exit the room and continue left. Head left at the intersection to get the yellow orb “Know when to run” illumina. Back at the previous intersection, head up to the next section. Head forward in the large area to grab the yellow orb for “Counting Stars”. Exit behind the orb to the next section where the boss waits.
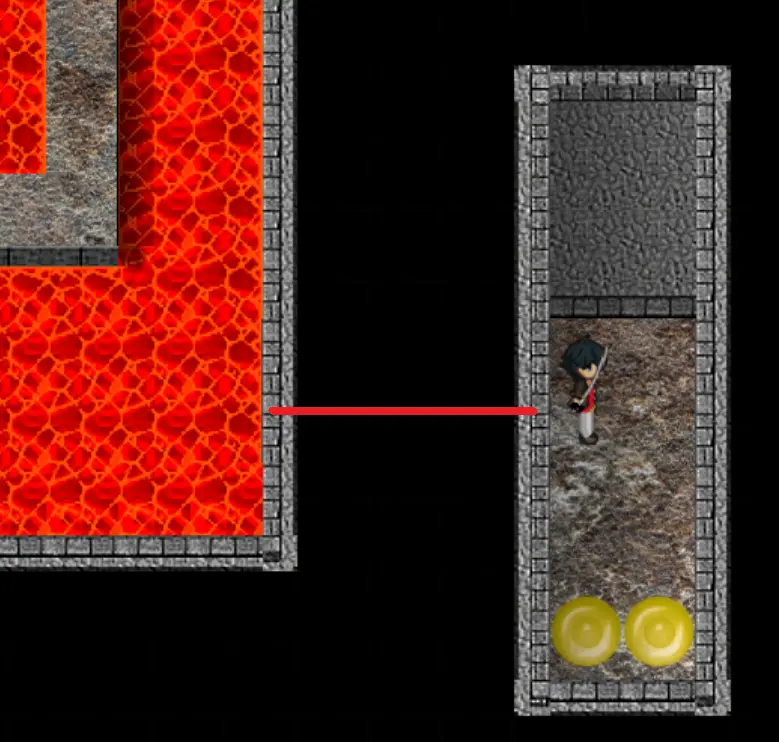
(Boss) (Mighty Andre) This time, you can beat him.
Chapter Seven (Part 1) – Magna World Towers
This is the last chapter of the game where the Magna have launched their attack on the world.
[Canaan Tower]
The group arrives at the base of the tower to see the attack by one of the Gnostics. A small group takes him on while the rest head to Exodus HQ.
(Battle) (Inverted Cross Petro)
[Exodus HQ: Section B]
The second group is trying to clear out all the Magna that made it inside.
(Battle) Near the elevator. (Cyaegha) Receive “Double Whooper” after.
(Battle) Right hallway. (Gloon) Receive “Medicinal Guidebook”.
(Battle) Outside right room. (Anzu x 2) Receive “Panacea”.
(Battle) Inside nearby room. (Vulthroom) Receive “Phoenix Feather”.
(Battle) In front of Control Room. (Bifrons)(Khnum)(Ithaqua) Receive “Portable Tent’.
(Battle) In front of Almakarta Hall. (Eihort x 2) Receive “Back Scratcher”.
After the six battles, head inside the Control Room. You can’t enter here until all battles are done; otherwise, you are told there are still some Magna left.
Inside the Control Room, you will see some Gnostics and Allie among them. She is forced to battle with you, but the battle ends after she attacks once. Once she disappears with Remy, you are forced to battle a Gnostic.
(Battle) (Forged Simon)
When the battle is over, you board the spaceship Noah that heads for the Magna home world. Head around the ship to the platform in the north to exit the ship.
[Magna World]
Follow the path to the left a few sections until you head up to see some towers. You will get a scene that people are being heard into the left tower. A battle will be forced on you.
(Battle) (Vual)
After the battle, you will be in the tower to save the rest of the people.
Dungeon
[Magna World: Shalloche Tower]
Items:
(Green) (Word Fragment (Red))
(Yellow) (Swaying Sunflower)
(Yellow) (Matchmaker)
(Green) (Triple Whooper)
(Yellow) (Legacy)
(Yellow) (Frog in the Well)
(Green) (Soul Supplement)
(Yellow) (Road Runner)
At the beginning, head to the right and into a room for a green orb for “Word Fragment (Red)”. Go back to the beginning and head left. Follow the path and go right at the intersection for another room. Inside is a yellow orb for “Swaying Sunflower” illumina. Exit the room and head up the stairs to the north. Follow the path around to two rooms. Right room has a yellow orb for “Matchmaker” illumina, and the left room has a green orb for “Triple Whooper”. Exit and head upstairs to the next floor.
Follow this path around, but head south through the hidden passage to a room. Inside this room is a yellow orb for “Legacy” illumina and a yellow orb for “Frog in the Well” illumina. Exit and head up the stairs you passed.
Head up and inside the room for a green orb “Soul Supplement”, then head back to the start of the floor. Head down and up the stairs to the next section. Walk to the north and the second path down to get a yellow orb for “Road Runner” illumina. Then head left and around to take the path to the next section for the boss.
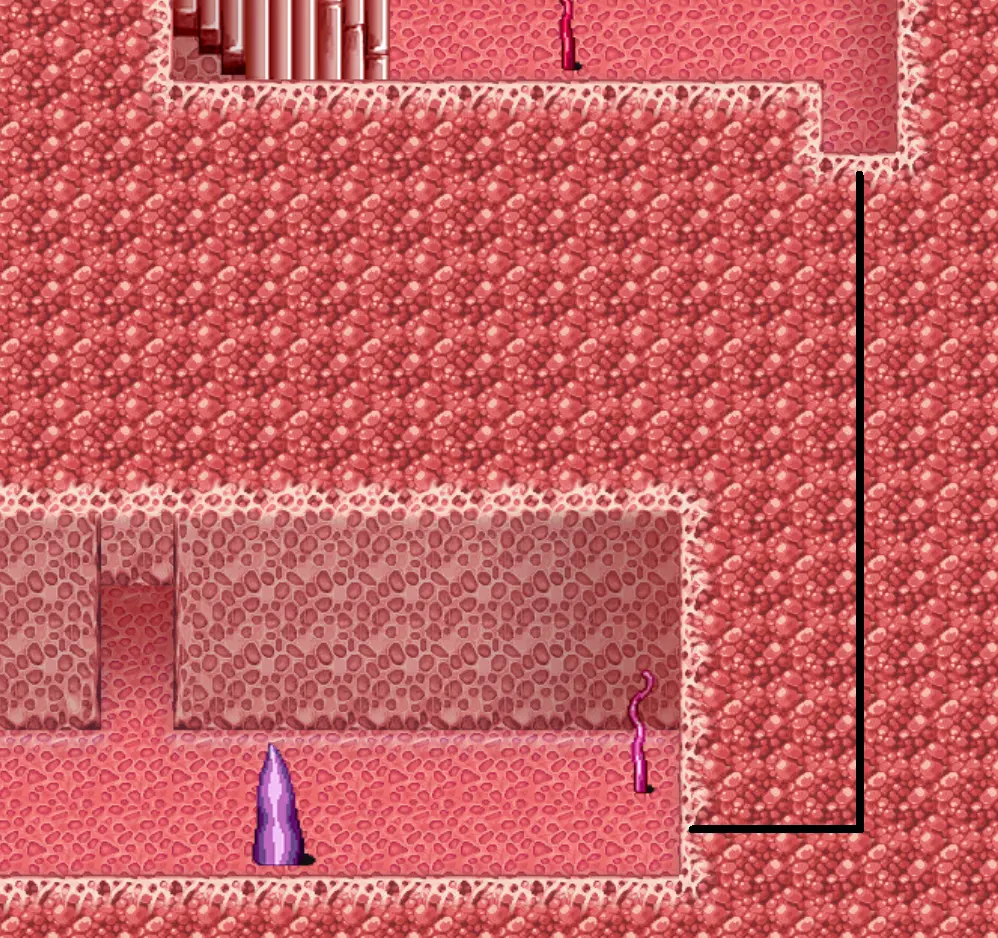
(Boss) (Vual x 2) (Rotbottom)
After the battle, you save the remaining people in the tower and escort them back to Exodus. These are the people that were taken from the ceremony at the beginning of the game. So you head back to the Magna World to find more survivors.
[Magna World]
The group walks north to the center tower and learns they must clear the right tower to enter here. Head to the right tower.
Dungeon
[Magna World: Toly Tower]
Items:
(Green) (Word Fragment (Black))
(Green) (Portable Tent)
(Green) (Megalixir)
(Yellow) (So Lewd LOL)
(Yellow) (Grade Check)
(Yellow) (Mistakes of the Past)
(Yellow) (Burning Heat)
(Yellow) (Oh my aching heart)
From the start of the section, grab the two green orbs on the right and left for “Word Fragment (Black)” and “Portable Tent”. Then walk around and grab the green orb above the last one for “Megalixir”. Walk north to the intersection. Take the left path down and up the stairs. Grab the yellow orb for “So Lewd LOL” illumina, then return to the intersection. Take the right path around and upstairs.
Walk around the hallway to get the yellow orb nearby for “Grade Check” illumina. Head north, right at the intersection, then north at the next intersection to exit to the next section. In here, head to the southeast part of the floor to get the yellow orb for “Mistakes of the Past” illumina. Exit to the west to the stairs for the next section.
Head north and then right at the first intersection for a yellow orb for “Burning Heat” illumina. Head north and to the left for an intersection. Head left first to grab a yellow orb for “Oh my aching heart” illumina. Then head north to the boss.
(Boss) (Gorgonops Grolheit) (Pterigoth Grolheit) (Occult Box) (Slagon) Take out the Occult Box first
because of the damage it does on its attack.
After you clear this tower, enter the center tower now.
Dungeon
[Magna World; Gaina Tower]
Head north into the room for the most disturbing image of the whole game. There are a bunch of Magna having sex with people, then dismembering them afterwards.
(Battle) (Harpues)(Akamata)(Balam)(Shishinoke)(Andras)(Carnazoo)(Shoujou) Use area magic with Nana to make this battle go faster.
The group then rushes forward for another battle to save your old friend Masaru.
(Boss) (Twin Jacob) Having “Varia” illumina on really helps to reflect a lot of his magic.
After the battle, the group rushes back to Exodus.
[Exodus HQ: Recovery Tanks]
Nana puts Masaru in a recovery tube to try and save him. Meanwhile, your character heads to the vending machine to wait. The Director finds you, and tell you about the entire situation, including your past and family. Then you head back to check on Masaru. Exit the room and head back to the elevator. Select “Board the Spaceship Noah” to go back to the Magna World.
[Magna World]
Head north and back in the tower to clear it out.
[Magna World: Gaina Tower]
Head north to where you rescued Masaru. Ascend the stairs to the next area. Head north into a room with people in tubes. This is the rest of those taken at the ceremony. You will find Mikoto in one of the tubes (and Izumi if you selected her in the Prologue; if you didn’t choose her, she doesn’t appear). The suspicious priest from earlier appears and battles you.
(Boss) (Wise Matthew) This battle you can’t win; uses “Meteorite” to deal max damage to all. If you
have “Varia” on, you can reflect it to win, but it’s still a loss.
After the battle, Remy and Allie come in to save you. Then you have to battle him again.
(Boss) (Caravaggio Da Merisi x 4)(Wise Matthew) Recommend using Nana for area magic. Get rid of the four enemies that buffer the boss first.
After the battle, you will be in a private room on the Noah. You have a scene here with the girl you selected during the Prologue. (Izumi scene is only if you won the fight; lose, you don’t get her.)
– Scene # 25 “Hot & Steamy Sex with Mikoto”
– Scene # 23 “Bathroom Sex with Izumi”
After the scene, head to the Control Room.
[Exodus HQ: Control Room]
Speak to Ritsuka here, if you romanced her, to get “Ritsuka’s Thoughts” illumina. Head back to the Noah and back to the Magna World.
[Magna World]
You will be in a different area of their world. This will also be the last dungeon of the main story. If you want to try your luck with the secret dungeon, take the Noah back to Exodus or skip ahead.
Amendment
After clearing Magna World: Toly Tower, head back inside. Head to where the boss of the tower was located. There is now a green orb that contains:
– Word Fragment (Red) – 20 total
– Word Fragment (Black) x15
– Word Fragment (Gold) x5
Thanks to “sleepyzect” for this find!
Chapter Seven (Part 2) – Secret Dungeon
[Exodus HQ]
Head into the “Hall of Baphtus” and progress through the simulators. When you reach the final Megiddo (Gaflet), beat the boss to learn that there is something off in this simulation. A tear appears before you. This is the secret Megiddo. The boss at the end is also very difficult to beat. Make sure you also have at least four “Varia” illumina. The final boss’ second form uses a lot of magic. “Varia” reflects every magic but “Death” and “Absorb” attacks. Once a character dies from “Death”, the reflect shield is gone. (Recommended Level 100+)
[Megiddo: ???]
Items:
(Yellow) (Samurai Soul)
(Yellow) (Even a creek becomes a river)
(Yellow) (Light is followed by shadow)
(Yellow) (Love your enemy)
(Yellow) (Still waters run deep)
(Yellow) (Might is right)
(Yellow) (Light is followed by shadow)
(Yellow) (Ask and you shall receive)
(Yellow) (Out of my way, Fate)
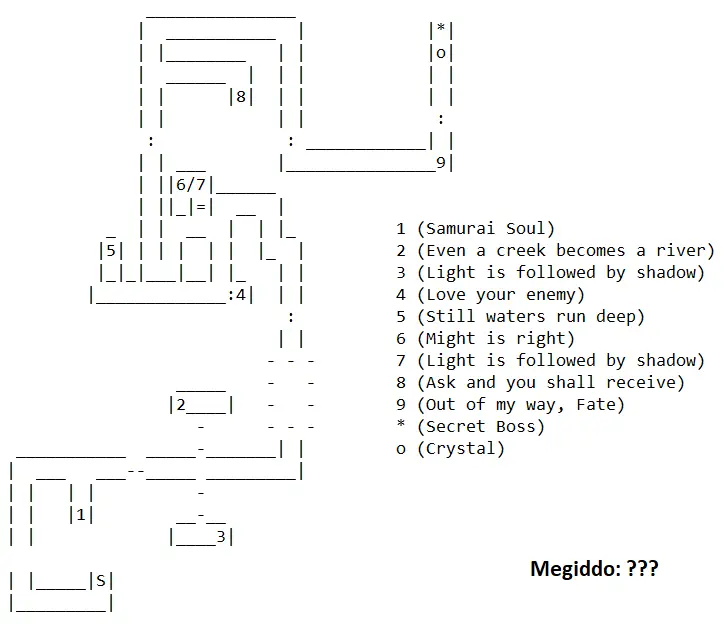
This dungeon is almost linear, but the enemies are very tough here. Recommend being at least level 90-100. At the start, follow the path left to the next section. Head around to the right and take the first down for a yellow orb for “Samurai Soul” illumina. Head right to the next section. Here, jump across the small platforms top and bottom to get a yellow orb for “Even a creek becomes a river” illumina and yellow orb for “Light is followed by shadow” illumina. Head to the right and hop across the platforms to the next section.
Continue north and around, then all the way south. Head through the hidden wall to reach the yellow orb for “Love your enemy” illumina. Then head all the way to the left and inside the room for a yellow orb “Still waters run deep” illumina. Exit, and then backtrack to the first intersection to head left for another room. Inside here are two yellow orbs for “Might is right” illumina and “Light is followed by Shadow” illumina. Exit the room and follow the path to the left for the next section.
There are two sets of stairs ahead, take the lower stairs that lead to a yellow orb for “Ask and you shall receive” illumina. Then progress the upper stairs and around to the next section. Follow the long set of stairs going up. At the top, there is a yellow orb for “Out of my way, Fate” illumina. Head north to the final section.
Here, there is a blue crystal that also allows you to warp out of the dungeon. Behind it is the hardest boss in the game. Make sure you are ready and saved the game.
(Secret Boss) (King of Magna)
The first form is straight forward. Buff your party with Magic Defense, have “Varia” illumina already equipped, and heal when needed. After beating the first form, the second one will have two or three attacks each turn. Watch out for “Death” attacks. Revive the player when you can, or switch them out to keep going.
Use the green crystal to unlock the scenes. If you chose to ignore this dungeon for now, head to the Magna World for the final dungeon.
Chapter Seven (Final)
[Magna World]
Items:
(Green) (Word Fragment (Black))
(Green) (Triple Whooper)
(Green) (Soul Supplement)
(Green) (Charm of Tokugawa)
(Green) (Magic Mirror)
(Yellow) (Marital Vows)
(Yellow) (That hit the mark)
(Yellow) Tugging at Heartstrings)
(Green) (Phoenix Feather)
(Green) (Megalixir)
(Purple) (Battle: Shark of Legend) (Desperate Struggle)
(Yellow) (Chance Meeting)
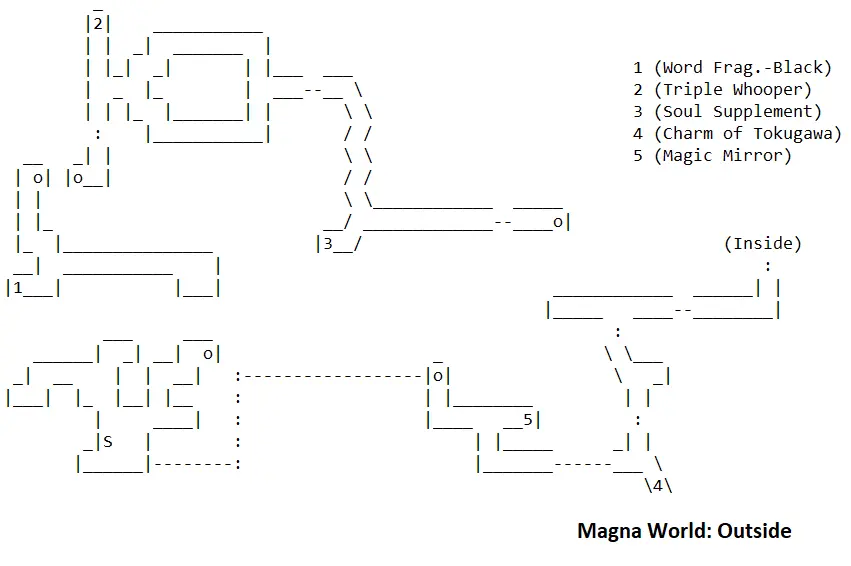
At the start of the area, head to the upper right area and jump to the next section. Head to the left and grab the green orb for “Word Fragment (Black)”. Head north and jump across to the next platform and then to the next area. All the way up is a green orb for “Triple Whooper”. Head to the right, either path leads to the same spot. On the next section, head down the zigzag path and grab the green orb for “Soul Supplement”. Head to the right and up the stairs to the next section.
Jump down to the platform below. At this intersection, head south to another section. Here, there is only one way to go, and there is nothing on the right side under the tentacle structure, so head south. Grab the green orb at the bottom for “Charm of Tokugawa”. Head left to the next section. Follow the path around and grab the green orb for “Magic Mirror”. To the left is a jump pad back to the Noah ship, but head back to the main intersection after the jump. Head to the right this time and enter the structure before you.
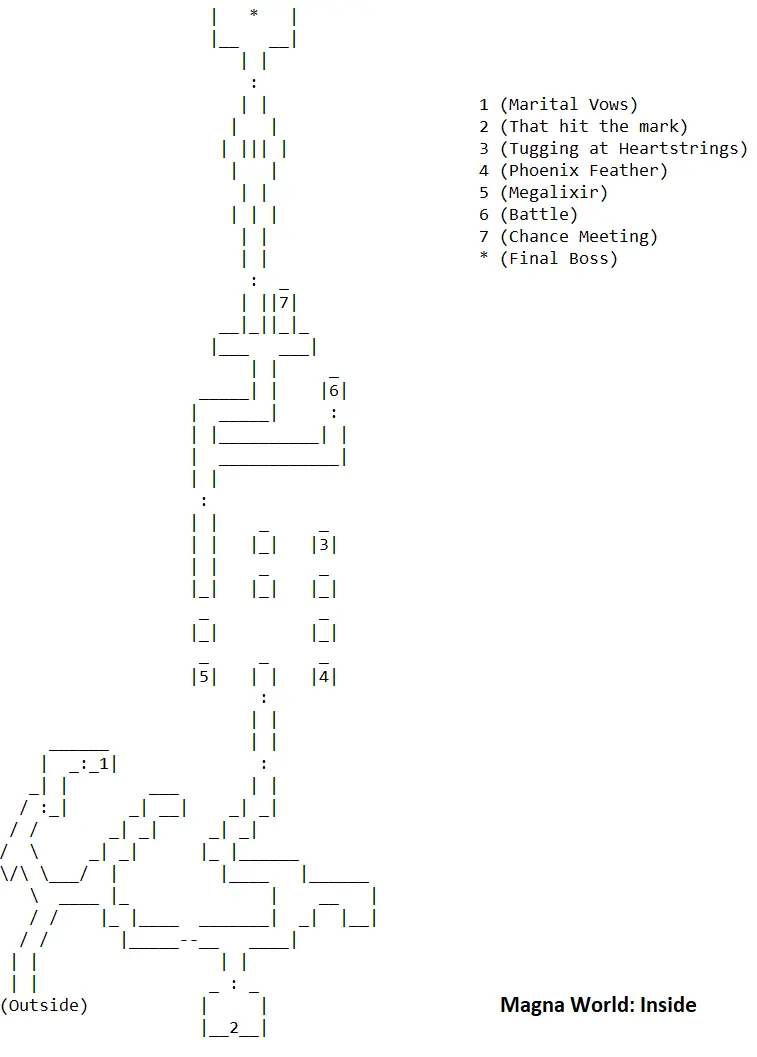
Head up and as far north as you can on the left side. There is a hidden passage that leads to a yellow orb for “Marital Vows” illumina. Exit to the southeast to the next section. Head down when you can to a room with a yellow orb for “That hit the mark” illumina. Head back and go all the way to the north. You will be back outside and see another structure to enter.
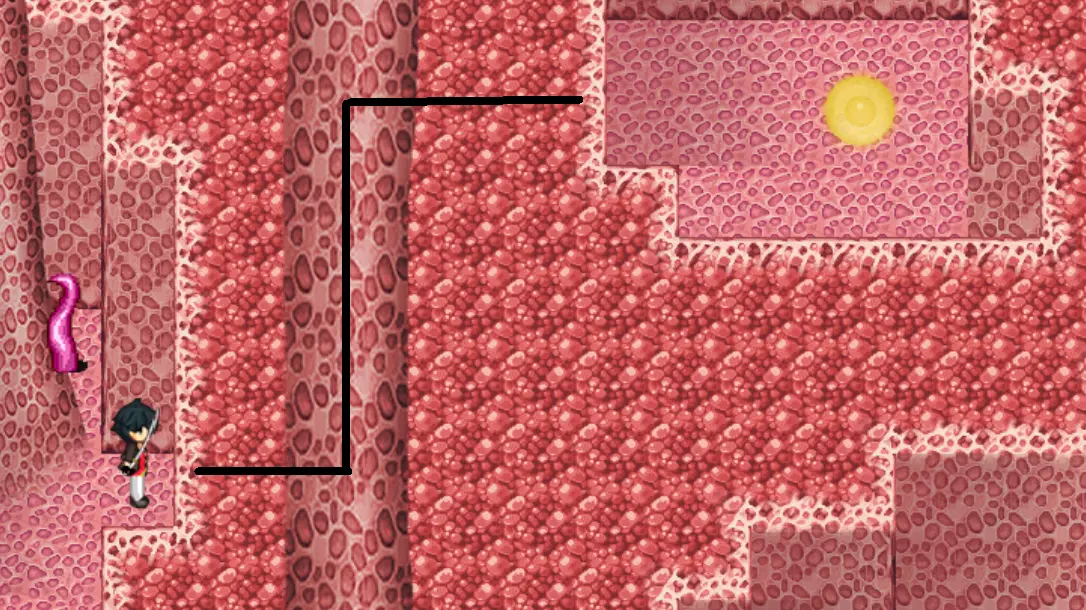
There will be blue platforms and smaller ones to ride on. Head up twice and to the right for a yellow orb for “Tugging at Heartstrings”. Head back two platforms and go right. Head down two platforms for a green orb for “Phoenix Feather”. Head back one platform and go left. Head down here to grab a green orb for “Megalixir”. Then head all the way up to the next section. At the intersection, head right and into a room for a purple orb.
(Battle) (Shark of Legend) This is a tough battle. If you can reflect his water and lightning attacks, it is so much easier. Receive “Desperate Struggle” illumina.
Backtrack to the intersection and head north. There will be two rooms to take, enter the right room first. There is a yellow orb here for “Chance Meeting” illumina. Then enter the left room. Follow this path through a bright hallway. Stop just short of the door. This will be the start of the end of the game.
|Save your game!|
Head forward to meet the final boss, Ace Oogami. The first battle you are thrown in is a solo battle where your character automatically attacks but then ends.
After a scene, everyone heads back to the Noah to try and leave. However, the boss attacks you again and with his full strength of his attribute.
(Battle) (Ace Oogami) Don’t worry about trying to debuff the boss since he will reflect as well as remove your buffs. Simply work on reflecting his magic and healing when necessary.
After the battle, the boss will try to destroy everyone and the ship. Everyone but Allie is sent off back to Exodus. Allie stays behind to take on the boss herself but is absorbed by him. In Exodus, there is a large tear outside that rips across the sky trying to bring the Magna World into ours. Save your game again. Talk to the Director to begin the last battle. Ace Oogami is trying to absorb every Magna he can to get stronger. This is the last battle of the game.
(Battle) (Ace Oogami) This will be a very long fight. Every time you deal enough damage to the boss, a new head will pop up. Keep doing this until about six additional heads appear. Make sure you have “Varia” read since he loves to use magic. Reflecting his “Gravidia” spell right back at him will deal a major amount of damage (since it reduces his health by a fourth!) Also, the more heads that appear, the more attacks he will use, so plan ahead near the end. Nana’s “Meteora” spell to deal high damage is valued here and can’t be reflected.
After the boss, watch the final scenes of the game.
After the credits rolls, you will get the ending of the girl you dated by going to her room, or the Harem Ending if you chose it.
Trouble Quests & Quizes
Quest # 1 – “Hand out Asuka’s Letter!”
First available: (Only available during Prologue)
Last available:
Location: Opening classroom
– Head a letter to a student.
– Return to Asuka
Quest # 2 – “Give diet pills to Mami!”
First available: (Received on 5/21 in Chapter One)
Last available: (Last available on 8/7 in Chapter Six) Last “free roam” period.
Location: Academy: Teacher Lounge
– Talk to Mister Macho Man
– Buy the pills from the peddler in Canaan Paradise: Red Light section.
– Hand them back to Mami.
– 1 WP
Quest # 3 – “Looking for rare booze”
First available: (Received on 5/25 in Chapter Two)
Last available: (Last available on 8/7 in Chapter Six) Last “free roam” period.
Location: Canaan Paradise: Main Street – Seven mart
– Talk to the old man.
– (Can’t progress until 7/13 in Chapter Three; during Mika romance)
– In Old Town, talk to the Bartender.
– Grab the “Sacrifice” from the Squad Six House (in the kitchen).
– Return it to the Bartender for an exchange.
– Hand over “Exorcism” to the quest giver.
Quest # 4 – “Find Mar’s biker-jacket-wearing crush!”
First available: (Received on 5/28 in Chapter Two)
Last available: (Last available on 8/7 in Chapter Six) Last “free roam” period.
Location: Canaan Paradise: Main Street – Arcade
– Talk to the biker group.
– Head to the School: Courtyard and talk to the girl.
– Head to the Harbor to help her out.
– Receive “Red Dragon Explosion” illumina
Quest # 5 – “Cure Mitsuo’s debate anxiety!”
First available: (Received on 5/28 in Chapter Two)
Last available: (Last available on 8/7 in Chapter Six) Last “free roam” period.
Location: Canaan Paradise: Main Street – Otaku Store
– Speak to Mitsuo.
– You will need to craft “Debate Knowledge” illumina.
– (Can’t craft until after 6/5 in Chapter Two; access to Megiddo simulators)
– After receiving 15 copies Word Fragment (White), craft the illumina. It turns into a charm.
– Hand it to Mitsuo.
– 1 WP
Quest # 6 – “Let’s Build a plastic model!”
First available: (Received on 6/5 in Chapter Two)
Last available: (Last available on 8/7 in Chapter Six) Last “free roam” period.
Location: Canaan Park
Requires: Must finish Quest # 5
– Talk to the boy near the playground.
– You’ll need to craft “Skillful Hands” illumina.
– After receiving 15 copies of Word Fragment (White), craft and equip the illumina.
– Talk to the boy with the illumina equipped.
– 1 WP
Quest # 7 – “Save the hungover man!”
First available: (Received on 5/21 in Chapter One)
Last available: (Last available on 8/7 in Chapter Six) Last “free roam” period.
Location: Canaan Paradise: Red Light Section
– Speak to the quest giver.
– Hand him “Smelling Salts”
– 10,00yen and 1 WP
Quest # 8 – “The man wants to burn!”
First available: (Received on 5/21 in Chapter One)
Last available: (Last available on 8/7 in Chapter Six) Last “free roam” period.
Location: Canaan Tower – Top
– Speak to the man at the top.
– Hand him “Hot Injection”
– 1 WP
Quest # 9 – “Grant the hospitalized girl courage!”
First available: (Received on 7/16 in Chapter Four)
Last available: (Last available on 8/7 in Chapter Six) Last “free roam” period.
Location: Canaan Hospital
Requires: (Only available during the Mika romance)
– Speak to the girl outside.
– You will need to craft “100% Courage” illumina.
– After receiving 15 copies of Word Fragment (Red) and Word Fragment (Gold), craft the
illumina.
– Speak to Ikujin, he will turn the illumina into a doll.
– Hand the doll to the girl.
– 1 WP
Quest # 10 – “Make him stand out!”
First available: (Received on 7/25 in Chapter Five)
Last available: (Last available on 8/7 in Chapter Six) Last “free roam” period.
Location: Canaan Paradise: Main Street
– Speak to the woman near the large tree.
– Hand her “Spotlight”
– 1 WP
Quest # 11 – “Find the dropped wallet!”
First available: (Received on 5/28 in Chapter Two)
Last available: (Last available on 8/7 in Chapter Six) Last “free roam” period.
Location: Academy: 3-B
– Speak to the student just outside of the classroom.
– The red wallet is near the fountain in the Academy: Courtyard.
– Return the wallet, but it’s not the right one.
– The black wallet is underneath a tree in the Academy: Cafeteria.
– Return the wallet to learn she had hers all along.
– Receive Melon Bread and 1 WP
Quest # 12 – “I want the Magic Mirror!”
First available: (Received on 7/16 in Chapter Four)
Last available: (Last available on 8/7 in Chapter Six) Last “free roam” period.
Location: Canaan Paradise: Entrance – Garage
Requires: (Doesn’t appear until after Quest # 9 is finished; Mika romance route)
– Speak to the woman
– Hand her “Magic Mirror”
– You get a ring and 1 WP
– You can choose to either keep the ring or turn into illumina for “A Scandal in Bohemia”
Quest # 13 – “Bring three charms to Dousan Shudou!”
First available: (Received on 5/21 in Chapter One)
Last available: (Last available on 8/7 in Chapter Six) Last “free roam” period.
Location: Shopping Mall
– Speak to the old man
– Hand over “Charm of Guan Yu”, “Charm of Houjou”, and “Charm of Tokugawa” (found in
Megiddos)
– 10,000yen
Quest # 14 – “Prince’s confession”
First available: (Received on 8/3 in Chapter Six)
Last available: (Last available on 8/7 in Chapter Six) Last “free roam” period.
Location: Academy: Courtyard
– Speak with Masakari.
– Hand him “Pretty Flower” (received from Flower Shop clerk)
– 1 WP
Quest # 15 – “Find US Army binoculars for Keiji!”
First available: (Received on 7/25 in Chapter Five)
Last available: (Last available on 8/7 in Chapter Six) Last “free roam” period.
Location: Canaan Tower
– Speak to Keiji to the left of the base.
– Hand over “US Army Binoculars” (found in Megiddos)
– 1 WP
Quiz # 1
– “Red”
– “Cross”
– “Saijou”
Quiz # 2
– “Midori”
– “108cm”
– “Omelet Rice”
Romances
There are six main girls and ten additional girls to romance. The main girls can have up to ten hearts each. Six hearts are required to go on a date with a main girl. After three dates and the beach date, you receive a follow-up scene with each main girl.
All interactions can be done until 8/7 in Chapter Six during the last “free roam” period.
Akari:
– Squad Six House (Near outside pool) – “Of course I’m not going to peek.”
– Canaan Paradise: Red Light Section (Near Crepe vendor) – “Eat it”
– Church (Cemetery) – “Right”
– Academy: Cafeteria – “Intervene”
– Squad Six House (Her room) – “What’s wrong with that?”
– Canaan Tower (Base) – “How kind of you.”
Satsuki:
– Squad Six House (Third floor) – “I’d never do that.”
– Academy: 3-B (Hallway) – “Thanks.”
– Canaan Stadium – “Don’t say anything and just buy it for her”
– Shopping Mall (Stall five; clothing) – “I’m not giving you a bite.”
– Canaan Paradise: Red Light Section (Near Crepe vendor) – “You know what I mean.”
– Canaan Tower (Top) – “No parent hates their children.”
Konoha:
– Academy: Cafeteria – “Please tell me about it eventually!”
– Academy: 3-B (Hallway) – “Sure.” And “That’s the spirit!”
– Academy: 3-B – “We should kick them out.” (Opens the Martial arts club)
(Canaan Park is accessible on 6/5 in Chapter Two)
– Canaan Park (Left of fountain) – “Alright, let’s run!”
– Shopping Mall (Second stall) – “Sure”
– Canaan Paradise: Main Street (Arcade) – “Of course they did!”
Remy:
– Canaan Paradise: Main Street (Seven Mart) – “Still, I did come at the perfect time.”
– Shopping Mall (Last stall) – It’s surprising, yet charming.”
– Exodus HQ (Section B – Changing Room) – “What are you talking about?”
(Canaan Park is accessible on 6/5 in Chapter Two)
– Canaan Park (Playground) – “I don’t dislike them.”
– Squad Six House (Her Room) – “Please hide them.”
Kenshin:
– Canaan Paradise: Entrance (Flower Shop) – “Well I’ll be going now.”
– Squad Six House (Basement: Dojo) – “If there’s anyone who can handle it, then it’s you.”
(HP+100)
– Canaan Paradise: Main Street (Near Arcade) – “Get a bit closer.”
– Exodus HQ (Section A – Vending machines) – “Sure, got it.”
– Squad Six House (Kitchen) – “It might be Remy’s” (Scene # 22)
– Exodus HQ (Section B – Left of Control Room) – “Leave.”
Nana:
– Canaan Paradise: Entrance (Cult Shop) – “There’s more?”
– Squad Six House (Basement: Lab) – “Good luck on the next one.”
– Canaan Paradise: Red Light Section (Back section) – “Let’s try it.”
– Exodus HQ (Section B – Right of Control Room) – Close your eyes.” (HP+100)
– Canaan Paradise: Main Street (Otaku Store) – “That’s a pretty incredible invention.”
– Squad Six House (Outside) – “Swallow.”
Harem Ending:
– When you reach the Harem Ending option, you will receive a scene with all the girls in your
room. Then at the end of the game, you see the next scene where you marry the girls.
-Scene # 33 “Lovey-Dovey Harem Sex”
-Scene # 34 ‘Brides of the Apostle”
Mikoto:
– Prologue choice only.
– Select “Teacher’s Lounge”
– Scene # 1 “With Mikoto in the locker…”
– In Chapter Seven, after Gaina Tower
– Scene # 25 “Hot & Steamy Sex with Mikoto”
Izumi:
– Prologue choice only.
– Select “Vending Machine”
– Lose the fight for Scene # 2 “Gang Rape Behind the Gym…”
– In Chapter Seven, after Gaina Tower
– Scene # 23 “Bathroom Sex with Izumi”
Natsuki:
– During Chapter Three, the group will go buy instruments for the festival. When they ask about
getting crepes, reply with “I’m going home!” After helping Natsuki, she wants to pay you but
say “No, I’m good.” After that, you will work at the Café periodically for lessons. After that, on
7/14, you will go on a date with Natsuki.
-Scene # 9 “With Natsuki in Her Room…”
Mika Kudou:
– During Chapter Three, right after saying “I’m going home!” and meeting Natsuki, head to the
Red Light Section to the bottom right area to see Mika. Choose “Call out to her”.
– The next day (6/24) head to the Academy: Teacher’s Lounge and talk to Mika.
– On 7/3, you will have a night raid on the Astral Church. Instead of going to the church, head
to Old Town.
– On 7/13, head to the Academy: Teacher’s Lounge and talk to Nurse Wakana about Mika.
– On 7/15, head to Izu Hospital when you can. Choose “I don’t want you to get married.” There
will be a battle.
– The next day, head to the Canaan Hospital and go inside.
-Scene # 10 “With Mika in Her Room…”
Ritsuka:
– During Chapter Two, on 5/28, speak to her in Exodus: Control Room.
– “I came to see you”
– “Do you have a lover”
– “What sort of man do you like?”
– During Chapter Three, on 7/13, speak to her in Exodus: Control Room.
– “In the personal sense…”
– During Chapter Five, on 7/30, speak to her in Exodus: Section A near vending machines.
– During Chapter Six, on 8/3, speak to her in Exodus: Section B (left room)
– “They’re lovers”
– The next day (8/4), head to Exodus HQ and then into the elevator.
– Scene # 20 “Elevator Sex with Ritsuki”
Nurse Wakana:
-Obtained automatically during the story.
– Scene # 7 “In the Infirmary with Wakana…”
Keiko, Emiko, Sayoko:
– During Chapter Two, you will have a night mission to save them at the Church. If you choose
to go Canaan Paradise first, the girls will be killed by homeless men.
– Scene # 8 “Taken by Homeless Men…”
Keiko:
– During Chapter Three on 6/24, talk to her in Canaan Park.
-Scene # 17 “Sex with Keiko”
Emiko:
– During Chapter Three on 6/24, after Keiko’s scene, head to Academy: 3-B. Examine your
desk to find a note. Then head to Canaan Paradise: Red Light Section and talk to her.
– Scene # 18 “S&M with Emiko”
Sayoko:
– During Chapter Three on 6/24, after Emiko’s scene, head to the Academy and choose “???”.
Approach the hearts and talk to her.
– Scene # 19 “Sex with Sayoko”
Nemuko:
– During Chapter Five on 7/25, head to the Cult Shop in Canaan Paradise: Entrance to speak
to her.
– Scene # 36 “In a Alley with Nemuko”
You can spend 1 WP with the ten girls listed above to continuously have pixel sex scene with them. Most of the girls have this option soon after the initial sex scene. Nurse Wakana’s repeat pixel scene can’t be viewed until 8/3 in Chapter Six. Choosing the pixel sex with any girl has a chance for a random Word Fragment. This is the outcomes:
– 10 Copies of Word Fragment (White)
– 3 Copies of Word Fragment (Black)
– 1 Copy of Word Fragment (Red)
– 1 Copy of Word Fragment (Gold)
Dates:
1 – Chapter Two on 6/7
2 – Chapter Three on 6/25
3 – Chapter Five on 7/26
Beach – Chapter Five on 7/31
Scene List
| With Mikoto in the locker |
Prologue |
Chose Mikoto |
| Gang Rape Behind the Gym | Prologue | Chose Izumi, lose the fight |
| Nana’s Examination | Prologue | Story related |
| Satsuki Changing Clothes | Chapter 1 | Story related |
| Titf.uck Blowjob from Remy | Chapter 1 | Select Remy on first night in Squad Six House |
| Debauchery | Chapter 1 | Story related |
| In the Infirmary with Wakana… | Chapter 2 | Story related |
| Taken by Homeless Men… | Chapter 2 | Chose not to go to Church first |
| With Natsuki in Her Room… | Chapter 3 | Romance route (See “Romances” above for more) |
| With Mika in her Room… | Chapter 3 | Romance route (See “Romances” above for more) |
| First-Time Sex with Akari | Chapter 5 | Three dates and chose during beach adventure |
| First-Time Sex with Satsuki | Chapter 5 | Three dates and chose during beach adventure |
| First-Time Sex with Konoha | Chapter 5 | Three dates and chose during beach adventure |
| Sex with Remy | Chapter 5 | Three dates and chose during beach adventure |
| First-Time Sex with Kenshin | Chapter 5 | Three dates and chose during beach adventure |
| First-Time Sex with Nana | Chapter 5 | Three dates and chose during beach adventure |
| Sex with Keiko | Chapter 3 | Saved in Chapter 2; Canaan Park |
| Sex with Emiko | Chapter 3 | After viewing Keiko; view letter in Classroom |
| Sex with Sayoko | Chapter 3 | After viewing Emiko; select “???” in Academy |
| Elevator Sex with Ritsuka | Chapter 6 | Romance route (See “Romances” above for more) |
| Akari’s Masturbation | Chapter 5 | Third date scene |
| Kenshin’s Fundoshi Milk Chugging | Fifth romance interaction; Squad Six House | |
| Bathroom Sex with Izumi | Chapter 7 | Story related (chose Izumi; won fight) |
| Megido Nip Slips | Finished Harem Ending | |
| Hot & Steamy Sex with Mikoto | Chapter 7 | Story related (chose Mikoto) |
| Couch Sex with Akari | Chapter 6 | Akari’s ending; after three dates and beach scene |
| Movie Theater Sex with Remy | Chapter 5 | Third date scene |
| Watching Remy Masturbate & Sex | Chapter 6 | Remy’s ending; after three dates and beach scene |
| Anal Sex with Satsuki | Chapter 6 | Satsuki’s ending; after three dates and beach scene |
| Outdoor Sex with Konoha | Chapter 6 | Konoha’s ending; after three dates and beach scene |
| Rubber Suit Sex with Nana | Chapter 6 | Nana’s ending; after three dates and beach scene |
| Lovey-Dovey Sex with Kenshin | Chapter 6 | Kenshin’s ending; after three dates and beach scene |
| Lovey-Dovey Harem Sex | Chapter 6 | Harem Route |
| Brides of the Apostles |
Ending |
Harem Route |
| In the Infirmary with Akari | Chapter 6 | After three dates and beach scene; on 8/3, head to Academy Infirmary |
| In a Alley with Nemuko | Chapter 5 | Canaan Paradise: Cult Shop |
Have fun ❤