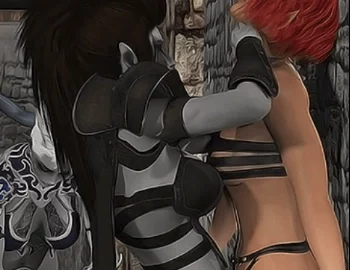
This guide to assist with a strategy to beat Nifa’s First Mission game. Note: Normal difficulty.
This is where the game shows you the controlls post some exposition. Travel, to the right until Nifa states monster when; you, encounter with the first one, a slime. After you kill your first slime you collect a life shard. They restore your health. After, that there’s more exposition; then, you defeat more slimes until you meet Frea. When, her exposition ceases; she, will give you seven Lilna flowers. After, that you’re tasked via Frea to save fellow soldiers and the princess. Although, whenever you restart the game; you’re, forced to redo it again.
Note: Flowers are obtained from either within certain level or from saving fellow soldiers.
Stats:
Health-Max HP
Attack-ATK
Technical-TEC
Defense-DEF
Mobility-LEG
Restoration-REC
Elf Forest
After, the title of the game disappears; move, towards the statue. It, allows you to save and level up stats; once, you increase it enough to unlock abilities. Use the seven flowers given to you to increase attack via five and technical via two.
After this continue right until you percieve a pitfall. Once, in the below section; you’ll, encounter your second monster, a wasp. Continue right post killing monsters until you return to surface area. Collect, the two Lilna flowers you can reach with single jump; prior, to confronting two giant slimes and saving your first captured comrade.
Flower locations:
#1: First area
#2: Second area prior to pitfall
#3: Second area past #2 that requires dash and double jump
#4: In pitfall area that requires double jump
#5: In pitfall area that you can collect
#6: Final area that requires double jump
Ruto Plains
This is a very simple level. You encounter a spike wall in the first area. Whithin, the second area there are two of them. Then, you’ll encounter the third monster; which, is a humpbacked orc. You must perfect your timing via wither crouching or blocking his projectile and striking the wall. He, flees towards the second wall; post, destroying the wall. After that you’ll encounter your second boss, a orc. Defeat him and save the comrade. After, you’ve defeated him; travel, to Elf Forest where you upgrade tactical via four and mobility via two.
No wild flowers.
Kurgus Woods
Once, you enther the first area; which, the second of two bosses throws a spike wall towards you prior to fleeing. Then, you’ll encounter your fourth monster; which, is a male dryad. Travel right towards the statue within the second area. Which, you upgrade tactical in order to acquire the ability double slash. Then, defeat the first boss; which, involves comrade location #2. Then, continue to the third area; where, the boss throws two boulders at you. Once, you’r in the fourth area; you must be quick falling through gaps in the floor. Which, you’re efficient enough can avoid them. Then, you’ll have to defeat the boss; post, taking care of a humpbacked orc firing a projectile at you.
After, you’ve defeated the second boss return to the statue you pasted; which, you’ll upgrade tactical via two and mobility via six in order to acquire dash and double jump in order to collect flowers both here and Elf Forest that you couldn’t reach prior to acquiring these abilities.
Flower locations:
#1: Accessible within the first area via jumping
#2: Accessible within the second area via jumping down from platform under statue
#3: Third area that requires dash and double jump
#4: Fourth area on platform that’s accessible via wall platform
#5: Fourth area on a platform that you jump down to from rock floor
#6: Fourth area that you jump to from #5
#7: Fourth area that requires double jump
Additional comrade locations:
#1: First area that requires double jump
#2: Upward platform to the left of statue will take you to a room where you must slay two dryads and two wasp hives
Mt. Hydeguld: Foot
You’ll encounter the fifth monster, a hellhound soon after entering this level’s first area. There are two paths to take here. The upward one takes you to second area and the other is base of fourth area. Then, you’ll encounter two rolling spike walls. Then travel left until you percieve wall platforms in order to enter the third area. Save at the second statue. You’ll have ten flowers to upgrade attack via two, restoration via two, technical and mobility to unlock jump shot. Once, you’re in the fourth area; which, you’ll encounter the sixth monster, a baby angel. Prior, to entering the fifth area; there, is a comrade in a cave underneath the floating platform. Which, you’ll have to hopscatch your way around the fifth area. The boss is in the room right next to the third statue. Increase technical and defense via two.
Flower locations:
#1: Third area on platform
#2: Fourth area on platform
#3: Fourth area on platform
#4: Fifth area on platform that you can jump down to
#5: Sixth area on left platform
#6: Sixth area on right platform
Comrade locations:
#1: Fourth area that unlocks Black Gate
Mt. Hydeguld: Summit
After, you spawn on this level; which, its boss will destroy the bridge and you fall. The second area is right past flower #2 post acquiring dash and double jump. Then, the third area has a spike wall. Which you wind up in the fourth area. Then, you encounter the seventh monster; which, is a skeleton without legs. Increase health and attack via two at the statue. After that you encounter the first of two bosses in this level. Once, in third area you encounter spore launching monster. The area post the second statue involves a fairy guiding you through a dark level prior to completing this level. You’ll, encounter the eighth monster via this area; which, is a ghost. The true boss is past the third area statue.
Note: You’ll have to acquire Fire later on.
Flower locations:
#1: First area post bridge destruction
#2: First area on other side of destroyed bridge
#3: Second area on upper platform
#4: Second area on platform
#5: Third area on platform
#6: Third area on platform
#7: Fourth area on top of mushroom
#8: Fifth area on platform
#9: Fifth area on platform
#10: Seventh area easy to perceive
#11: Seventh area via platform on the left
#12: Seventh area via downward path that fairy doesn’t lights
Comrade locations:
#1: Second area further below post flower #4
Black Gate
This, area is another darkened level; however, you’re capable of illumination via crystals that can be hit via the fire spell. Unfortunately, this mechanic will take some time to traverse this area; which, doesn’t have a boss. Within, the second area you will the tenth monster; which, is a giant worm. Then, within the third area you”ll encounter the eleventh monster; which, is a vore worm.
Flower locations:
#1: First area right next to locked gate
#2: Second area via platform
#3: Second area via left dead end
#4: Second area via platform
#5: Third area via platform
#6: Third area behind pillar to destroy on lowest ground
#7: Third area that you must jump down post second vore worm
Riddle Tunnel
This is a level that involves floor spike traps that are activated via being stepped on via you or humpbacked orcs.
Flower locations:
#1: First area requires double jump
#2: First area leftwards that requires double jump
#3: Second area requires double jump
Comrade locations:
#1: Second area on floor platform to the left
#2: First area other side of Flower #1 from second area and travel right
Dark Elf Forest
There’s, exposition via the Dark Elf princess; which, she’ll teach you a technique. However, in order to obtain it’ which, you must slay the area boss. Within, the second area you’ll encounter your twelfth monster; which, is a water spirit.
Flower locations:
#1: First area on platform hidden via tree
#2: First area on top of platform prior to second area
#3: Second area on platform
Orc Fortress
You have to kill some humpback orcs prior to entering the fortress via the first area. Inside the second area, you’ll encounter the ninth monster; which, is a female orc. Now, there are two paths via bottom left and right. Which, within both areas involves a alarm; that, involves a onslaught of orcs via either room you choose. Then, once you reach the statue; which, you’ll encounter two armored soldiers that defeat you. Fortunately, instead of a being given a defeat scene; which, you end being captured. Eventually, Frea rescues you when you end up back within Riddle Tunnel; which, you’ll receive the ability to shoot fire balls when you swing sword from her. You have to beat both the two armored knights and later on post fifth area a orc both in order to access a laboratory around comrade #2. However, it’s the bottom path within the second area; which, you must reach the door to enter the ninth area. Then, once inside you’ll encounter the tenth monster; which, is a scientist. Then, post defeating more scientists within the tenth area; which, you must deactivate the alarm in order to enter the eleventh area. Then, this area has the princess within a humanoid beaker; which, Frea appears to tell you how to free her. Then, the twelfth area is where you’ll encounter the first phase of two of the final boss; which, post defeating him you’ll have to defeat more scientists to create a path towards Frea to carry the princess outside the fortress. Although, post some exposition; then, you’ll have to engage the second phase of the final boss. Once defeated you’ve completed the game.
Flower locations:
#1: First area accessible via the platforms
Comrade locations:
#1: First area the drawbridge, past flower #1
#2: Second area upper pertain
Bonus
Alright, post completing the game; which, you unlock the salary and a bonus. Within this bonus you can choose between either a new game+ with everything you’ve unlocked or a new game+ with only fire. Although, the second option sounds as; if, everything you’ve unlocked is retested.
Have fun ❤
