A general guide on Glory & Miserable Survivors DX (AKA Daisenka / Great Senka). Includes lore, early, mid and late game strategy, game mechanics, attributes, characters, weapons, accessories, deployables and achievements.
Introduction
Glory & Miserable Survivors DX, also known as Daisenka (Great Senka). This game is made by TLACHTLI (Jaggar Senshi), published by Mango Party and drawn by Namako Dai Bakuhatsu (AKA Namako, Takorin and on their Twitter). This game can be found originally on DLSite by TOKURATORI.
The game combines 1vE rogue-lite, tower defense, time survival and H into one game: Daisenka. Very similar to Vampire Survivors but with victory conditions and different heroes, with playability ranging in 5-15 hours.
The kingdom of Sezen has been invaded after a blitzkrieg to the Capital by the enemy nation of Garvecia, tearing up the maintained peace treaty. They are known as a mighty military nation as well as for their barbaric and pillaging ways, destroying forests and poisoning rivers, and the murdering and violation of many people.
Numerous “misfortunes” have happened around the nation due to Depraved Demon Lord’s new capability to interfere with the outside with her new magic while imprisoned under Sezen. Events such as demonic beast sightings near the border; tying up the royal mages to deal with them, in addition to landslides on all major routes; blocking mercenaries and communications, as well as the appearance of the Kraken; delaying the return of the Princess’ ship, have happened “coincidentally” around Sezen. How will the kingdom defend against these threats, and will it be glory or damnation that awaits you?
This guide contains no H.
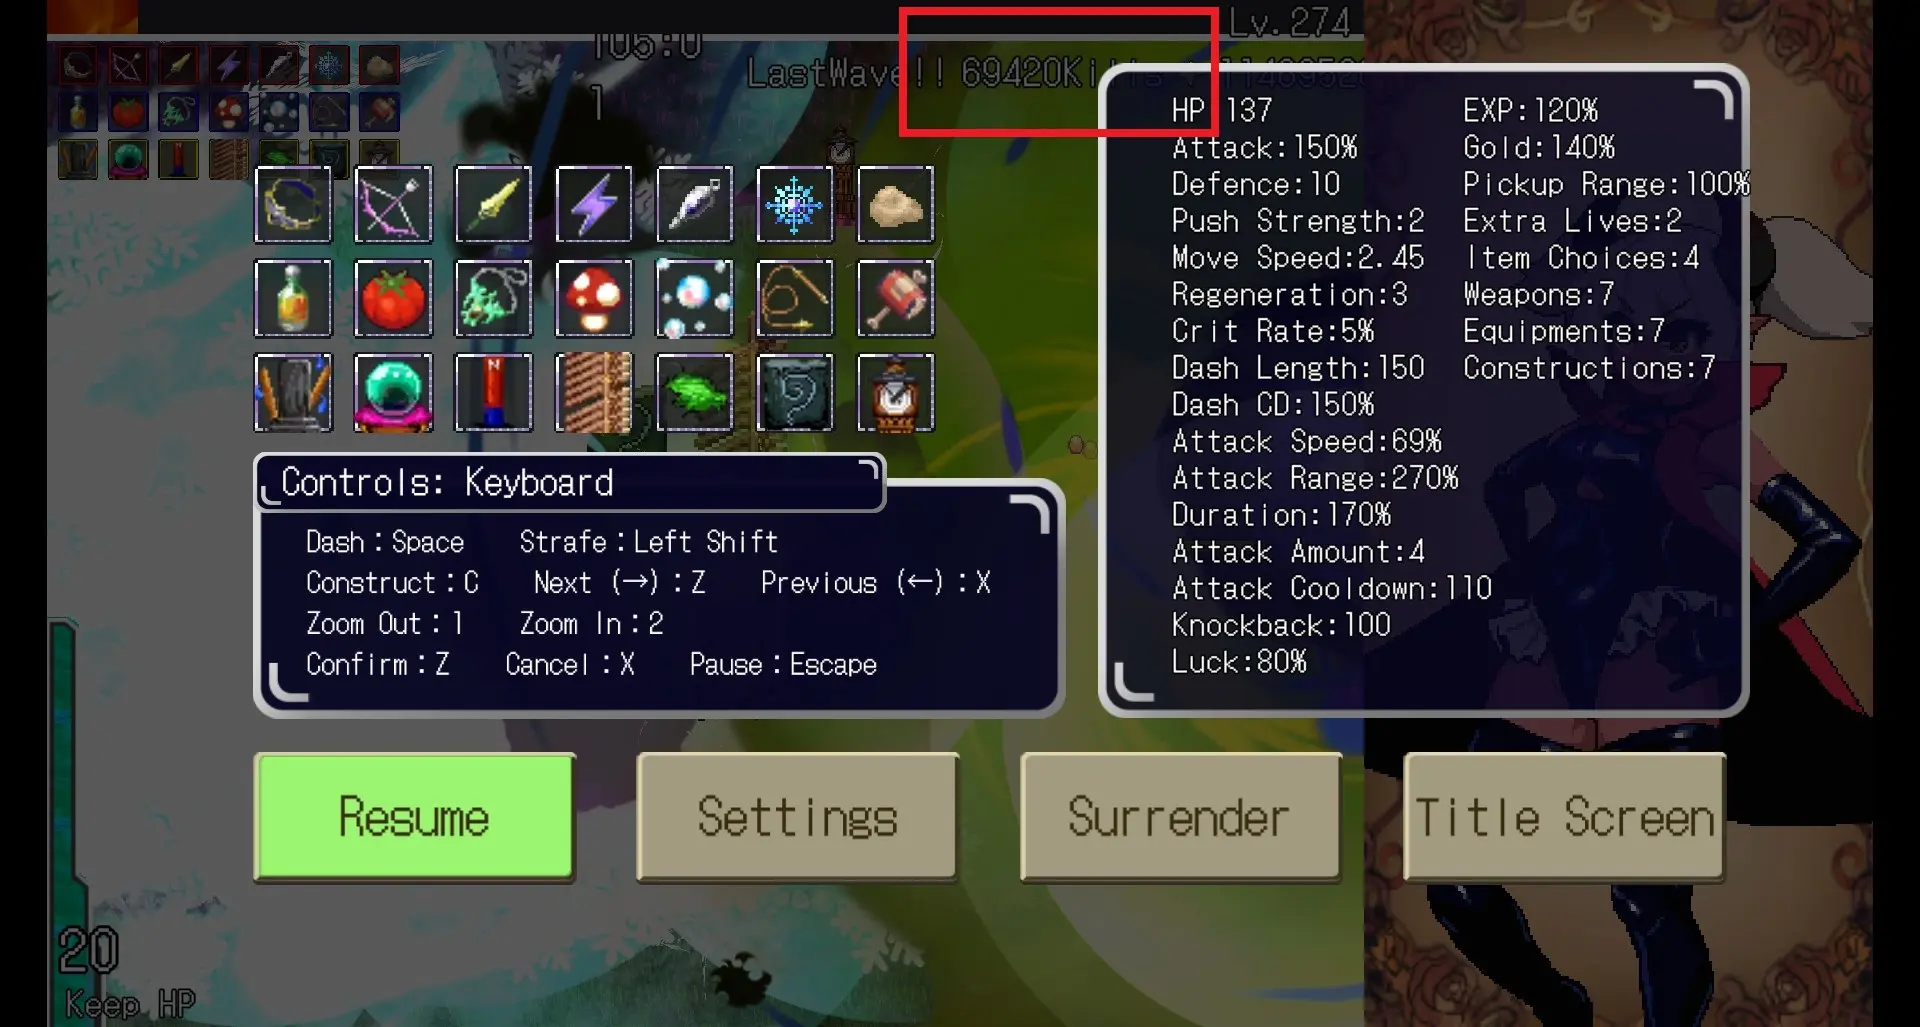
Controls & Mechanics
Enemies spawn of the right side of the screen. Your goal is to prevent them from reaching the left and lowering the HP of the Keep, as well as maintaining your own health.
You can play this game one-handedly. Mouse is not required and every control is possible on keyboard, allowing your free hand to do whatever it wants…
Use WASD to move. In Daisenka, weapons attack automatically in the direction you are facing (denoted by appearing around your character) after their reload time. You are allowed to face eight directions: vertically, horizontally and diagonally.
A vital mechanic to understand is how to strafe; this lets you move your character while maintaining their direction of attack, as moving regularly has your character face the direction of movement. I highly recommend keybinding this to LSHIFT key instead of the default F key as it allows unlimited movement while strafing instead of holding up your index finger while strafing.
In addition, you can dash using the SPACE key. While dashing, you are invulnerable, can phase through collisions and can still attack; different characters have different dash lengths and cooldowns. The dash cooldown is represented as a red bar above your health bar which is in yellow. Similarly to dashes, different characters have different HP pools and regeneration. Collisions with enemies allows them to deal damage to you.
Other attributes, such as crit rate, luck, attack speed and range and allotted item slots also differ from character to character. Every character has the inherent ability to “pull” enemies into fighting you instead of trying to invade the Keep. This pull range differs and some enemies (Rushers) resist your pull much more than others.
Use the WASD keys when focused in a menu to select choices.
You can use the Z and X keys to respectively Confirm/Select or Cancel/Go Back.
Use the C key to construct buildings, and the ESC key to pause the game.
Use the 1 and 2 keys to respectively Zoom In and Zoom Out. This is a vital part of the game as zooming out allows you to see enemies like Rushers on the edges of the stage and to modify the bounds of which weapons like the Kunai depend on to “bounce” on the edge of the screen.
Controller support is available as well.
Every attack has a chance of becoming a critical attack depending on your character. Criticals deal double damage.
As characters receive damage, Armor Break applies at the first third and two thirds of your health pool’s losses. Each Armor Break does not affect defence and only cosmetically changes the character’s sprite displayed on the right.
Enemies also drop Gold when you or your constructs kill them (except the Propaganda poster). Gold can be used in-game to reroll item choices at every level up (the price to reroll doubles every time you do), or on attribute upgrades. Gold drops despawn over time, and characters must move close to pick them up within their differing Pickup Ranges.
I recommend you take a look at the in-game tutorial as well. It also includes controller support and kebindings, as well as more information.
Experience Level & Items
As you defeat enemies, your character gains experience that fills an experience gauge. When your character fills that gauge and levels up, your experience quota resets and you are given a choice of items to give your character in three categories: weapons, accessories and deployables. The number of choices given can be increased by the attribute “More Choices”. Each character is allotted a maximum quota of each type of item, depending on the character and respective attribute “More [item type] Slots”. Experience gain can be increased by the attribute “EXP Up”, or the attribute “Pheromone Up” and accessory of the same title, which both increase the number of enemies and thus the amount of experience gained by defeating them.
Items come in three types: Weapons (with red background color), Accessories (with blue background colour) and Deployables (with yellow background colour). Each has its own role; weapons deal damage or have unique effects, accessories boost your character’s stats and deployables serve a variety of purposes.
When you max out your character’s maximum allowance for each item category and all item levels, levelling up only offers gold bags worth 100 gold or healing items worth around 25HP.
Your character can push deployables by moving against the sides of one. Certain characters have different push speeds. If you push a building to the edge of a stage, you can bring it back by moving diagonally; away from the edge and into a side orthogonal to that edge at the same time. However, boundaries for buildings exist closer from edges and characters can usually move around buildings and bring them back simply.
Treasure Chests
 Defeated bosses drop treasure chests on the ground. Upon collision with a treasure chest, your character must open the box; each has a chance of containing either one, three, five or eight items; highly dependent on your luck stat. A treasure chest containing eight items is recorded to your character’s statistics as a “jackpot”. The contents of the treasure chest are guaranteed to be an item upgrade for a weapon, accessory or deployable that you already have. If you have a starter weapon (Knights Sword, Elven Bow, Lightning Rune, Assassin’s Dagger, Sanguinous Ring, Trample or Bayonet) at level 10, the treasure chest will take priority to upgrade your character’s respective starting weapon to its special version. If you have the “Starting Weapon Upgrades Unlocked” attribute and have another character’s starting weapon via the “Drop [respective weapon]” attribute, you are able to upgrade another weapon that does not belong to your current character. If all your items are at maximum level, the contents will be bags of 100 gold.
Boss drops are useful in early to mid game, when you are trying to max out your damage potential by increasing item drops, However, in late game, players save treasure chests and wait until they have a starting weapon to upgrade. When you can afford Experience Up or Pheromones, boss drops lose some significance.
Characters & Origins
Princess Kukuru Ankers

The princess of Sezen, a tomboy from young and a formidable knight. She has a stronge sense of responsibility and justice. She is sailing to defend the kingdom after being held up by a Kraken in the seas.
- Kukuru has high HP, attack and some regeneration, with standard stats for the rest.
- Her starting weapon, the Knight’s Sword, as low to medium reach and damage and is a decent all-rounder.
- Her starting weapon upgrade, Velmanway, deals extremely high DPS in a small AOE around Kururu in the direction she faces and is one of the best sources of damage in the game.
- She starts with 5 weapon slots, 3 accessory slots and 4 construct slots, allowing her a large variety of damage from weapons but less damage boosting potential.
Henrietta Moss

A wandering adverturer and bounty hunter who is terrible with money. She left her elven home village from boredom and learned her crafts from combat, and is described as enthusiastic, amicable, yet brash and careless. She is in debt after purchasing a magic bow and is looking for a way to repay it quickly.
- Henrietta has a slightly longer dash, larger pickup range, higher gold gain and much more luck. She has high push strength, applicable to pushing enemies and constructs quickly.
- Her starting weapon, the Elven Bow, has a very large attack range and deals small AOE bursts to random targets, which is good for mobbing.
- Her starting weapon upgrade, the Storm Bow, deals extremely high DPS to random targets with higher ammo capacity and rainbow effects, and is one of the strongest mobbing damage dealers in the game if you don’t specialise exceptionally in a certain loadout.
- She starts with 4 weapon slots, 3 accessory slots and 6 construct slots, restricting her damage potential but increasing her options with constructs.
Lady Louise Dittenberger

A genius royal mage of the kingdom of Sezen who only thinks of magic as a hobby. She is lethargic and lax, and the best mage in the entire kingdom with her endless research and magic scriptures. Since the other royal mages have been keeping demonic beasts away at the borders, she has been called upon to defend the nation herself.
- Louise has high weapon effect duration applying to all weapons, slightly higher experience gain and a much larger pickup range.
- Her starting weapon, the Lightning Rune, is good for mobbing and shoots out homing lightning balls. However, it can’t focus on a boss well; she must use a different weapon.
- Her starting weapon upgrade, Prismatic Lightning, has increased damage and weapon effect duration. It also has very good mobbing capabilities.
- She starts with 3 weapon slots, 6 accessory slots and 5 construct slots, offering her high damage boost potential but low damage variety.
Ouka Crouch

An elite ninja from the village where the mercenary group Sabba resides. She is the best fighter among them all and is always sent to dangerous frontline missions. She is tasked to take out the trash with the unreasonable request to defend the nation by herself .
- Ouka has low HP, larger crit rate, lowered dash cooldown and lower weapon knockback.
- Her starting weapon, the Assassin’s Dagger, shoots daggers in the facing direction, with low-medium single-target damage such as for bossing.
- Her starting weapon upgrade, the Dance of the Reaper, shoots out piercing daggers continuously in the facing direction with higher damage, colored purple.
- She starts with 5 weapon slots, 5 accessory slots and 3 construct slots, sacrificing her “tower defence” capabilities for damage potential.
Depraved Demon Lord Anis

A Greater Demon, part of many who caused chaos, havoc and hellscapes throughout the land a century ago until the first King of Sezen subdued and imprisoned her under the Palace of Sezen. Prideful, selfish, spiteful and arrogant, she plans on using Garvecia to gain the crown of Sezen after repelling the enemy army away.
- Anis has a long dash length, a large weapon AOE size applying to all weapons, much lower luck and a slightly higher gold gain.
- Her starting weapon, the Sanguinous Ring, summons a medium AOE damaging vortex that follows her. It deals medium damage over time (DOT) for all enemies inside.
- Her starting weapon upgrade, the Lich’s Torment, has much higher damage, hit rate, AOE and thus DOT than the basic blood ring.
- She starts with 5 weapon slots, 5 accessory slots and 5 construct slots, allowing her a variety of gameplay opportunities.
Jing Lei

A beast girl and martial artist who journeyed the world for training. She is popular, highly athletic, incredibly charismatic and a heroic, altruistic outlaw, as well as a ruthless hidden killer when needed. Her hometown has been destroyed by the Garvecian Army, as well as numerous forests and rivers along their path of destruction. She fights to protect innocents, to avenge her hometown and to protect the delicious fish residing in the rivers.
- Jing has low HP, a faster move speed, faster dash cooldown and less weapon knockback.
- Her starting weapon, Trample, trailblazes a wake of fire behind her dashes with high DOT.
- Her starting weapon upgrade, Clear Sky, leaves a wake of blue fire behind her every move, including while standing still. It has extremely high DOT, especially when fire particles stack while Jing is standing still.
- She starts with 5 weapon slots, 5 accessory slots and 3 construct slots, sacrificing her “tower defence” capabilities for damage.
Sister Estelle Cowen

A sister who serves the Church in the Capital of Sezen and a trained vampire hunter. Legend has it that she once faced off against a fortress full of evil spirits and won with her magic. Although she considers it a disgrace to fight other humans as a cleric of the Church, she would even face off God for the sake of the people.
- Estelle has low HP, a long dash length, a large weapon AOE size applying to all weapons, low luck and slightly higher gold gain.
- Her starting weapon, Bayonet, throws a boomeranging sword forward for medium damage on collision. Although the reload time is extremely long, it can be mitigated by catching the returning bayonet.
- Her starting weapon upgrade, the Inquisitor, throws a larger purple sword forward for higher damage, and it returns automatically to Estelle.
- She starts with 5 weapon slots, 5 accessory slots and 5 construct slots, allowing her a variety of gameplay opportunities.
Stages

- All stages feature enemies that spawn on the right and aim to decrease the Keep’s HP on the left or to attack your character.
- Keep HP varies per stage, and is displayed at the bottom left of the screen.
- Your goal is to defend the Keep and the rest of the nation by destroying the invaders.
- Every enemy that passes the Keep decreases its HP by 1.
- Allowing a boss to pass the Keep guarantees defeat.
- Keep HP can be replenished by the Repair Shop construct, which slowly regenerates Keep HP, or by having the appropriate attribute upgrade that regenerates Keep HP.
- Keep HP can be protected by redirecting damage to your character via the Scarecrow accessory.
- In addition, health packs () offered by your Keep spawn on the left and heal your character when picked up.
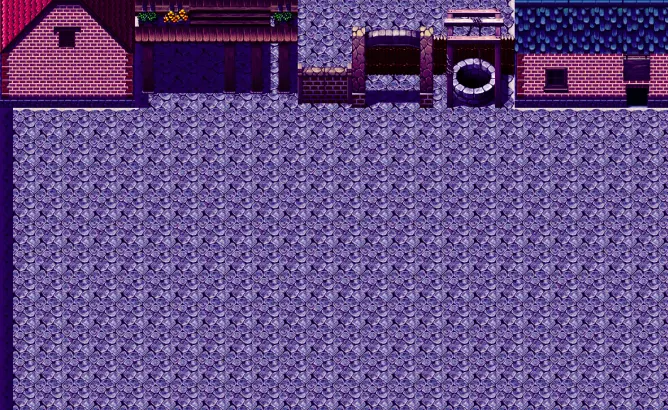
The Keep HP on stage 2 – “Fortress”.
Normal Stages
Stage 1 – “Chokepoint”
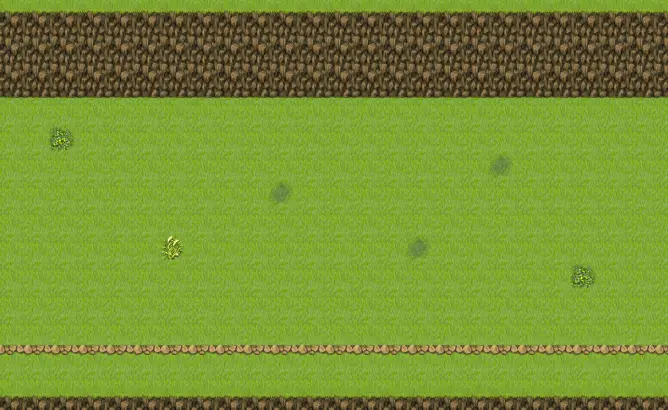
This stage is horizontally long and vertically short. Normal enemies that are easy to deal with. The Keep comes with 20 HP.
Stage 2 – “Fortress”
A stage with taller edges than stage 1; they offer Rushers more opportunity to run along the edges past you into the Keep, and narrower width means less room for you to run. The Keep has 15 HP, and all enemies are strengthened with higher HP, movement speed and attack, characterised by a blue tint.
Stage 3 – “Capital”
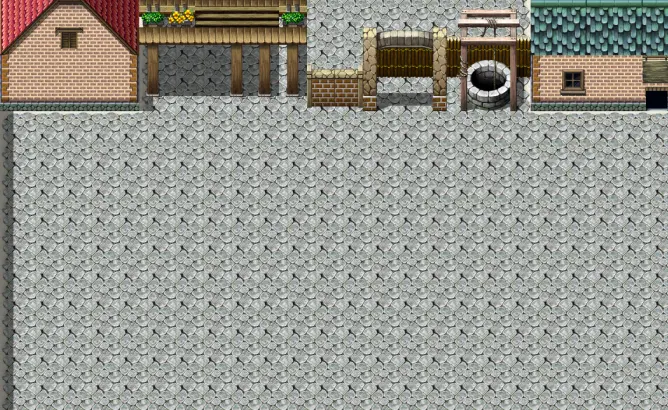
The tallest and narrowest stage, shaped square. Rushers become a main failpoint for players with a Keep HP of 10 and bosses can overwhelm you if you have the “Wanted Poster” deployable and bosses spawn on opposite ends. All enemies are further strengthened with higher HP, movement speed and attack, characterised by a green tint. Constructs may be used to shorten the area to defend and help you defend effectively by reducing wild movement chasing Rushers, for example.
Endless Stages
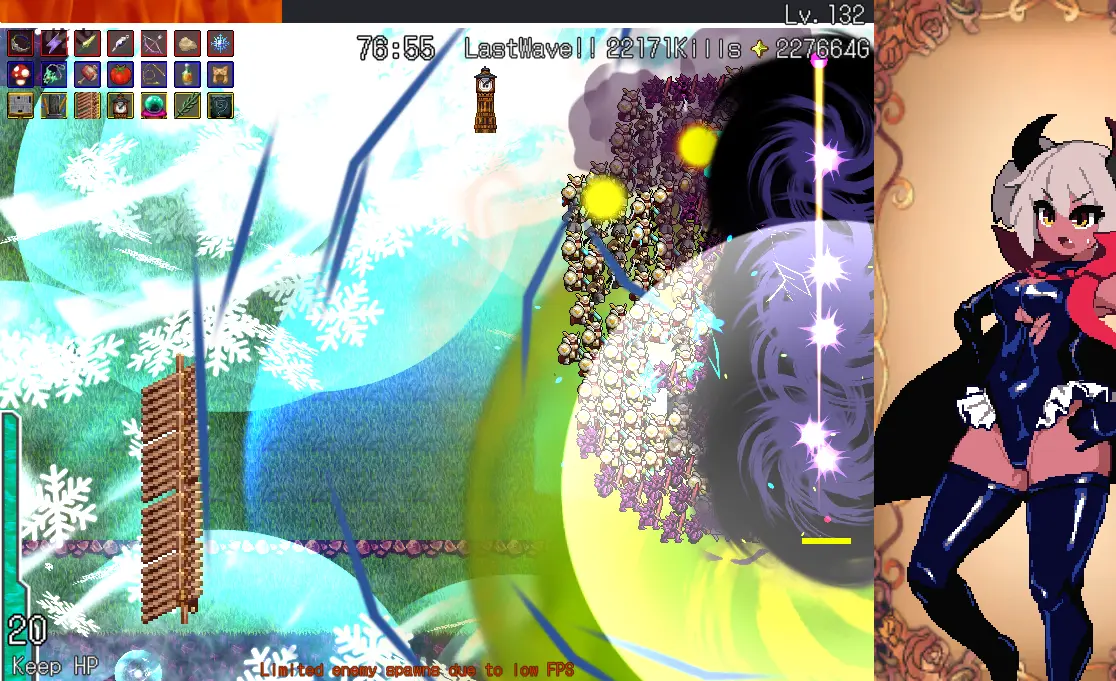
In endless stages, enemies are strengthened every wave and change between types frequently. Enemy spawn rates can soar. Thankfully, the developer has implemented a “Limited enemy spawns due to low FPS” function and we can play the game. Since a good source of lag comes from Damage numbers, we can freely toggle between smooth gameplay by turning off damage numbers and increasing exp gain from more allowed enemy spawns, or laggy gameplay by turning on damage numbers and decreasing spawn rates if things get too dicey.
Since endless mode is, endless, choosing Pheromones or the Scroll of Secrets isn’t really useful as you’ll end up levelling all the same before the real challenge comes. Your build should be able to handle all three: Soldiers, Rushers and Bosses effectively at the same time (elaboration under the Enemies & Waves tab).
Stage 4 – “Nighttime Chokepoint”
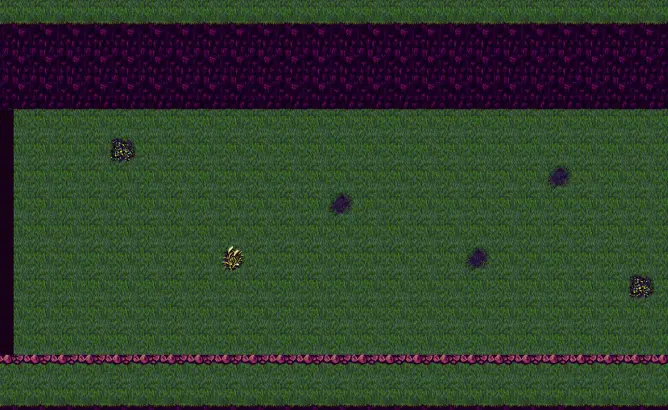
Similar to stage 1, except with endless waves. Enemies start at Normal difficulty. AFK is possible with a macro for pressing the “Confirm” button or a click on the item upgrades at each level up; more info in the Endless and Progression Strategies tab.
Stage 5 – “Nighttime Fortress”

Endlessly similar to stage 2. Enemies start with blue tint difficulty.
Stage 6 – “Nighttime Capital”
Endlessly similar to stage 3. Enemies start with green tint difficulty.
Enemies
There are three classes of enemies with a variety of types inside each class: regular units that focus on the player (Soldiers), fast units that focus on the Keep (Rushers) and fast, uncommon and strong units that focus on the Keep (Bosses).
Soldiers have many different classes within and certain units are stronger than others in terms of HP and attack. We have from weakest to strongest:

Knights

Paladins

Barbarians

Warlocks

Dark Knights

Holy Knights

Samurai
We also have two types of Rushers from weakest to strongest:

Cavalry

Aerial Cavalry
Bosses follow the same order of difficulty by type as Soldiers: we see Large versions of those units appear as bosses.
These appear on the dot and a large banner notification appears near the top of the screen to tell you.
In addition, every type of enemy in a class can come in five difficulties, characterised by colour tint from weakest to strongest, for example using the Knight:
Regular tint

Blue tint

Green tint

Yellow tint

Red tint
Waves
There are twenty enemy waves in non-endless stages, one at the beginning of every minute. Surviving all 20 waves results in victory, and in endless mode, the game continues until defeat. Certain enemies spawn on certain waves, as well as bosses on special waves. Bosses act like Rushers; they have high move speed and aim to destroy the Keep. Depending on the Pheromone attribute and accessory, you have at least 15, 10 and 5 seconds to deal with each boss respectively on stages 1, 2 and 3. If you let a boss into the the Keep or you let the Keep’s health go down to 0, you lose. Keep HP heals to full whenever a boss spawns so it’s fair that you take your focus off hunting Rushers for the boss.
Kururu, Ouka, Jing and Estelle can deal with bosses well enough on their own starting weapons. Henrietta, Anis and Louise will probably need help from another weapon, like the Elven Ring or Sunfire Cape to deal directed damage. If you have Revives to spare, using your character to push and bodyblock the boss can be effective in gaining Time to Kill, especially for Henrietta with the best push strength in the game.
If you are challenging stages 1, 2 or 3, your general item strategy should be to follow a set strategy (check the Non-endless Strategies tab) beforehand and to adapt whenever needed. If you are challenging endless mode, do not adapt as much and focus only on getting at least one copy of every vital item, as your loadout is critical when it comes to endless play and even the loss of one important component, like Bubbly Lotion, hampers your ability to progress and score well.
For example, Wave 1 starts at time 00:00, Wave 2 starts at time 01:00, Wave 3 starts at time 02:00 and so on.
Wave 1
Basic enemies (Knights) spawn. They are easy to kill with every starting weapon and shouldn’t be a big deal.
Wave 2
In addition to Knights, Paladins spawn as well. They have higher health and damage, and can start building up if your damage or AOE capabilities are lacking. Both enemies spawn at a 1:1 ratio.
Wave 3
The first boss (Large Knight) spawns. It is quite easy to deal with if you don’t only have a mobbing focused weapon like the bows, runes, kunai, etc. If you have the Wanted Poster deployable down, another copy of the boss spawns – randomly – you must consider your ability to kill both at the same time for double boss drops, even if you are unlucky and they spawn on opposing edges. Knights stop spawning and only Paladins spawn.
Wave 4
The first wave where the Rusher types appear in addition to the paladins. Cavalry (Horse Riders) start spawning in addition to the Paladins at an approximate 1:8 ratio. Rushers’ difficulty depends on which stage you play; on stage 1 “Chokepoint”, they are quite easy to kill. However, on stage 3 “Capital”, they are extremely hard to deal with without the Scarecrow accessory, extremely high AOE and/or movement speed. Rushers have high move speed and resist your character’s pull range unless you get quite close to them. They constantly aim for the Keep and try to ignore your character. Survive the wave by hunting down Cavalry, repairing the Keep and/or redirecting Keep damage and using a source of healing / the Keep’s healing items.
Wave 5
Paladins and Cavalry stop spawning and Barbarians start spawning. They have higher damage and HP than Paladins.
Wave 6
The second boss (Large Paladin) appears alongside the Cavalry and Barbarians. They seem to spawn at a 1:8 ratio. The second boss is generally also quite easy to deal with.
Wave 7
Warlocks start spawning in addition to the Barbarians and Cavalry stop spawning. Warlocks have higher damage than Barbarians and a little more HP.
Wave 8
Barbarians stop spawning, leaving only Warlocks. Focus on building a suitable source of damage before Dark Knight start spawning.
Wave 9
Aerial Cavalry (Pegasus Riders) appear in an approximate 1:8 ratio to the Warlocks and rush the Keep.
Wave 10
Dark Knights now appear, replacing Aerial Cavalry with an approximate 1:8 ratio with Warlocks. They have much higher HP than Warlocks and are a much higher step from the previous Soldier class to the next. If you don’t already have a good source of DPS, they will start to pile up and cause problems.
Wave 11
The third boss (Large Warlock) appears. Aerial Cavalry return with an approximate 1:8 ratio to the rest of the spawns, shared half and half between Dark Knights and Warlocks.
Wave 12
Dark Knights spawn more often than Warlocks. 1:6:2 ratio between AC, DK and WL.
Wave 13
Warlocks stop spawning and Holy Knights replace them for a 1:4:4 ratio of AC, DK and WK.
Wave 14
The fourth boss (Large Aerial Cavalry) spawns and DK leave. AC and HK spawn at a 1:8 ratio.
Wave 15
AC spawn at a much higher rate, between a 1:4-6 ratio for AC and HK.
Wave 16
Samurai now spawn, replacing AC for a 1:8 ratio for SMR and HK.
Wave 17
The fifth boss (Large Holy Knight) spawns. After defeating it, focus on your mobbing and CC power; the last wave contains too many Rushers to offset with the Repair Shop and many absorbent Samurai. SMR now make up half of spawns with HK.
Wave 18
Ninja start spawning and rush the Keep. Ninja make an eighth of the spawns and the rest is split half and half between SMR and HK.
Wave 19
All enemies spawn in larger numbers. Be careful if you have Pheromones already, as enemy units start coming in like they’re in a W*lmart store that announced they got a new shipment of graphics cards.
Wave 20 / “Last Wave!!”
The last boss (Large Dark Knight) appears. Enemies spawn in the largest numbers and Ninja and Samurai take half of total spawns each.
Wave 20+ / still “Last Wave!!”
For Endless waves, further waves take on a different type of enemy/ies every minute even though it is still called the “Last Wave!!”. By this point, your build should be set in stone and you should focus on balancing levelling up and surviving by toggling between No / Lag modes (Toggle damage numbers, as mentioned before), and surviving when done levelling up. You should be able to handle most importantly: high HP bosses, then focus on the mobs of Soldiers, then lastly Rushers. By this point, an effective strategy should be in motion, like using the Obsidian Pendant and Smokescreen as CC combined with Velmanway, the Mallet of Prosperity and the Hallucinatory Mushroom to deal extreme DPS over a large AOE, combined to slow, push and pull back bosses as you whittle away their HP. It is completely possible to stall bosses in place using bodyblocking on Shrooms, CC and Slow effects. Keystone accessories Giant Slayer and Bubbly Lotion are necessities for truly endless gameplay.
An Endless run on stage 4 – “Nighttime Chokepoint”. The player only built pure DPS, and lag caught up with the player. Their damage capability inevitably could not kill a boss before another appeared due to the lack of the Giant Slayer accessory.
The best build for endless play would include at least Velmanway, Smokescreen, Honey, Pomodoro, Duplicator, Mallet of Prosperity, Hallucinatory Mushroom, Giant Slayer and Bubbly Lotion. With a combination like this, waves’ HP scaling would not matter and true endless play could continue. More info in the Endless and Progression Strategies tab.
Attribute Upgrades
In between each game, you are allowed to use your earned gold to upgrade attributes that affect all characters, like attack, health, luck and more. The total cost for all gameplay-affecting upgrades is 5,165,000 gold (not including the H Experience display (1,000,000 G) nor Low Camera Angle (10,000 G)). Some rewarding attributes need to be unlocked by fulfilling several challenges. Below is a list of attribute upgrades as well as gameplay factors.
Note: Each attribute upgrade’s cost increases by 100% for every level. For example, “Attack Up” costs 2,000G to start with, then costs 4,000G, 6,000G, 8,000G and 10,000G for levels 2, 3, 4 and 5 respectively.
Attribute Upgrades Table
| Lvl. 1 Cost | Max. level | Effect | Factor per Level | Tier | Description |
|---|---|---|---|---|---|
| 2,000G | 5 | Attack Up | +5% | A | Can increase your attack by up to 25%. |
| 2,000G | 5 | Armour Up | -1 Damage Taken | B- | Reduces damage taken by up to 5. Useful when redirecting Rushers. |
| 5,000G | 3 | Max HP Up | +10 HP | D | Increases health pool. |
| 5,000G | 3 | HP Regen Up | +0.2HP / sec | C+ | Regenerates health. Health is more effectively gained from Lifesteal or Heal Orb deployable. |
| 20,000G | 3 | Cooldown Reduced | 5% | A+ | Decreases cooldown of weapons. Very useful as damage and CC boost. |
| 5,000G | 4 | Weapon Area Up | +5% | S | Increases all weapons’ AOE. Useful for all builds. |
| 5,000G | 4 | Attack Speed Up | 5% | D | Increases weapon projectile speed. The upgrade you’re looking for is Cooldown Reduction to decrease reload time. Only useful for Elven Ring and Lightning Rune & Upgrade. |
| 5,000G | 4 | Attack Duration Up | +5% | A- | Increases the lifetime of projectiles like the Obsidian Pendant, Elven Ring or Lightning Rune. |
| 100,000G | 1 | Amount Up | +1 Weapon Clip size | S+ | Essentially a Duplicator upgrade. Easily doubles damage in early game. |
| 5,000G | 4 | Move Speed Up | +5% | C+ | Increases move speed. Can be useful to catch Rushers, but weapon AOE much is more important. |
| 5,000G | 4 | Pickup Area Up | +5% | D | Increases Gold pickup Range. Literally just walk a tiny bit further. If you’re scared of losing HP, walk in and dash out or up your damage. |
| 5,000G | 4 | Luck Up | +5% | B | Increases your chances for more items per boss drop. Useful in early to mid game when trying to get high damage, but in late game when you can afford Experience Up and Pheromones, boss drops only take on the role to give starter weapon upgrades. |
| 5,000G | 4 | EXP Up | +5% | S | Increases the rate at which your character levels up. Incredibly useful to build your kit faster. |
| 5,000G | 4 | Gold Up |
+5% | A- | Only really useful in early game, when trying to purchase all attribute upgrades. Gold for item choice rerolling isn’t really a problem. |
| 10,000G | 5 | Pheromone Up |
+10% Enemy Spawn, Move Speed and HP |
A+ | Useful mid to late game. Used when you can start dealing high damage and can compensate for it by this appropriate risk and reward for more gold and experience drops. |
| 100,000G | 2 | Revives Up |
+1 Revive |
B | Grants you extra lives. Really only useful in early game. Later, your damage and sustainability greatly outclass other needs. |
| 5,000G |
5 | Construct Attack Up |
+5% | C- | All your damage should come from your character. Construct damage is laughable (even considering the Laser Tower and Rotating Saw). If you’re relying on your towers, that’s because you’re playing Bl**ns Tower Defence 17 instead of Daisenka. |
| 5,000G |
5 | Construct AOE Up |
+5% |
B | Increases deplyable AOEs. Constructs such as the Magnet, Swamp and Graveyard profit the most from this. |
| 5,000G |
5 | Construct AtkSpeed Up |
+5% |
C+ | There really isn’t a need for construct attacks. The one that benefits the most would be the Rotating Saw. |
| 50,000G |
2 | Keep Regen Up |
+0.1 Keep HP / sec |
C+ | Really only useful if you don’t care about Rushers. AOE and Black hole builds easily shadow the need for this. |
| 100,000G |
2 | More Weapon Slots |
+1 Weapon Slot |
A+ | More weapon damage opportunity. Very good to have. |
| 100,000G |
2 | More Accessory Slots |
+1 Accessory Slot |
S+ | More damage boosting capabilities. Extremely useful upgrade. |
| 100,000G |
2 | More Construct Slots |
+1 Construct Slot |
C | More deployables. Given the lack of utility compared to weapons and accessories, constructs just suffer a ton and aren’t really useful enough to warrant having more of them. |
| 300,000G |
1 | More Choices |
+1 Item Choice |
S+ | Increases level up item choices. Allows you to find desirable items more often and decreases the need to reroll and spend gold and could spell the key between beating or losing to a boss. |
| 200,000G |
1 | Drop Knight’s Sword |
Lost the treasure of the Ankers family. |
B- / S |
Allows every character access to a decent weapon, or a very good bossing and mobbing weapon. |
| 200,000G |
1 | Drop Elven Bow |
And I bought this bow with… |
C+ / S- |
Allows every character access to a decent mobbing weapon, or the best mobbing weapon in the game. |
| 200,000G |
1 | Drop Lightning Rune |
This will shock the Mage Assoociation. |
B / A | Allows every character access to a good mobbing weapon or a very good mobbing weapon. |
| 200,000G |
1 | Drop Assassin Dagger |
Could an amateur even use this? |
D / C |
Allows every character access to a poor bossing weapon, or a decent bossing weapon. |
| 200,000G |
1 | Drop Sanguinous Ring |
This is not meant for human use! |
B- / A- | Allows every character access to a decent mobbing weapon, or a very good mobbing weapon. |
| 10,000G |
1 | Display H Experience |
Show H Exp when picking character. |
H | A mentionable statistic display choice that does not affect gameplay. Displays a maiden’s private experiences in Character Select. |
| 200,000G |
1 | Drop Trample |
Picked up a leg. Scary. |
C+ / A |
Allows every character access to a decent weapon, or a high DPS dual weapon. |
| 200,000G |
1 | Drop Bayonet |
Smite those heretics and vermin! |
C- / B | Allows every character access to a relatively weak weapon, or a decent all-rounder weapon. |
| 10,000G |
1 | Low Camera Angle |
Can be toggled in the Options menu. |
H | A mentionable cosmetic choice that displays your maiden’s lower regions. Does not affect gameplay. |
| 1,000,000G |
1 | Starting weapons upgrades unlocked |
All starter weapons can be upgraded. |
S+ | Only consider this in mid to late game. Starter weapon upgrades perform powerfully and having multiple can win you a game. |
Weapons
S Tier
Obsidian Pendant

Best not to get caught in it.
This is the best weapon in the game. It summons a forward-creeping black hole with high pull strength that entraps enemies inside in addition to some DOT, giving you incredible crowd control (CC) and focus for your smaller AOE attacks. Use of the Duplicator and the Mallet of Prosperity are critical to effectively using this. Also helpful would be Honey, Pomodoro and Hallucinatory Mushroom, as well as using either Anis or Estelle due to their inherently large weapon AOE for overkill. Currently the best CC option.
Velmanway (Knight’s Sword Upgrade)

Slices through enemies with multiple longswords.
This weapon has one of the highest DPS out of all the weapons. Although the reach is quite short and has medium damage, the ROF is extremely high, making it a suitable weapon for bossing. It can also be used as a mobbing weapon with AOE and enemy pulling enhancements. Use Primal Strength and Pomodoro for damage with this as well as Hallucinatory Mushroom, Mallet of Prosperity and Demonic Bracelet for a devastating high attack high AOE combo.
Smokescreen

Create a lingering zone that slows.
This weapon creates a zone that slows enemies by approximately 50%. It is quite useful in buying time to kill, especially for early bosses in stage 3 – “Capital”. This is one of the best CC options in the game. Pair this up with the Mallet of Prosperity and the Pomodoro or Honey.
A Tier
Storm Bow (Elven Bow Upgrade)

Rains arrows.
This weapon has one of the highest DPS out of all the weapons. Although it targets enemies randomly, the high AOE damage often clears most enemies off the screen. It is one of the best damage-based mobbing weapons. The best accessories for this weapon are the Pomodoro and Primal Strength.
Flail

Big knockback damage. Medium range.
This weapon deals very high damage in a large area. It is quite useful in catching fast enemies that don’t target the player because of its reach. However, its reload time is slower than others. This is an incredible damage focused mobbing weapon. Upgrading the Mallet of Prosperity and the Duplicator accessory boost this weapon to this tier, as well as with the Hallucinatory Mushroom.
Prismatic Lightning (Lightning Rune Upgrade)

Continuous lightning shocks.
This is a very good mobbing weapon due to its good damage, consistency, high homing capability and fast projectile speed. Pair this up with Honey and the Duplicator. The lightning trail it leaves behind is cosmetic, with the illusion of damage caused by balls passing through others on the way to their targets.
Crystal Phoenix’s Soul

Creates ice storms at random locations.
Despite its random summonings, the Soul has quite high DOT. With the Mallet of Prosperity, Duplicator and Pomodoro, it can easily cover the entire screen and act as a global effect. It effectively rids the edges of Rushers at higher upgrades and does very good damage.
B Tier
Elven Ring

Fires random homing orbs.
Despite its description, this ring summons orbs that home in on the nearest enemy, making it capable of focusing bosses. When paired with the Pomodoro and Duplicator, the ring can output a constant stream of orbs and is quite capable on its own tearing down bosses. Additional use sees Honey as well as Primal Strength.
Lich’s Torment (Sanguinous Ring Upgrade)

A trailing vengeful blood pool when moving.
This ring summons a large pool of blood following the player. It features high damage in a medium area. Use with the Mallet of Prosperity and Honey. Additional enhancements see the Pomodoro and Primal Strength.
Clear Sky (Trample Upgrade)

Leaves a damaging trail.
This weapon leaves a trail of blue fire as if your character had eaten four servings of Taco B*ll and blue G*torade the day before. Each trail particle has medium DOT and new particles are constantly spawned behind your character at all times. If all particles are stacked on top of each other, it has extremely high DPS. I have seen entire runs with only the Clear Sky as the main weapon, almost full AFK as high HP enemies like the Holy Knight and Samurai melt withing a fraction of a second as they are pulled by your character into a pile of flaming blue taco remnants they themselves are standing in. Otherwise, running up and down along the length of the map (less applicable to the Capital) works fine as well. Other than this niche playstyle, it isn’t really worth any effort to build as there are usually plenty of better, focused damage options for both mobbing and bossing. Build with the Demonic Bracelet and Honey, as well as Movement Speed and Mallet of Prosperity as needed.
Lightning Rune (Louise’s Starter Weapon

Chain lightning attacks at random enemies.
This weapon (maybe staff?) summons lightning orbs that have medium damage, very good homing capability and fast attack speed at a large range. You must have another source of damage to deal with bosses since this weapon targets randomly. Pair with Honey and Duplicator, furthered by Pomodoro. Lightning balls do not leave behind damaging lightning trails.
Sunfire Cape

Incinerates nearby enemies.
This cape gives your character a fiery aura and deals good DPS at short range. However, it cannot catch up to enemies with high health and you risk taking damage as they tank through the majority of your aura. Pair with another source of damage and the Demonic Bracelet, as well as Primal Strength and Mallet of Prosperity.
Elven Bow (Henrietta’s Starter Weapon

Shoots skywards arrows at random enemies.
This bow shoots high damage, small AOE arrows with a medium reload at a large range. A decent mobbing weapon. It targets randomly and you must have another source of damage ready to deal with bosses. Pair with the Duplicator and Pomodoro, or Primal Strength.
Trample (Jing’s Starter Weapon)

Damaging zone after dashing.
This trailblazer features high DOT and functions much like a molotov cocktail coming off your character’s shoes and is a good mobbing weapon. However, its uptime is quite limited due to dash cooldowns, and cannot effectively focus stronger bosses like other weapons can because bosses move quickly through the effects of Trample (you can still can fight the first boss easily). Use with Honey for mobbing, else Demonic Bracelet and Flagbearer’s glory for damage.
Dance of the Reaper (Assassin’s Dagger Upgrade)

Continuous dagger throws.
Your character masters the art of dagger throwing and now throws piercing daggers continuously like a turret. However, since your character can only face eight directions, using this weapon is hard if you cannot strafe in front of bosses or if a large group of enemies surround you. It has medium single-target DPS. Use with the Pomodoro and Primal strength.
C Tier
Sanguinous Ring (Anis’ Starter Weapon)

Creates a trailing damaging area when moving.
This ring summons a vortex with low to medium DOT and is focused on mobbing. The vortex is supposed to feel sluggish, which promotes you to run inside enemy lines for maximal damage and sometimes nets you a nick on the arm of you don’t dash. Use this with the Pomodoro and Mallet of Prosperity. Note: Anis’ weapons, the Sanguinous ring and Lich’s Torment, are known as blood rings for short.
Inquisitor (Bayonet Upgrade)

An auto-returning weapon for smiting the heretics.
This weapon boomerangs outward to deal high damage at medium frequency and arguably small to medium AOE and homes in to return to your character. Damage is not calculated as DOT but on collision. Enemies that remain inside a spinning blade receive no additional damage unless they exit the blade and reenter. This is a very decent dual weapon; throwing out a sword into a crowd does good damage in a decent area but lets enemies flank you from the sides, but chasing a boss from behind is effective since the blade is caught more often as your character follows the boss; thus more damage. Use with Primal Strength, Mallet of Prosperity.
Blade Shield

Deals damage when attacked.
This niche weapon is fully capable of damage, provided its user can survive the double sided gun. This functions similarly to the Thorns enchantment from M*necr*ft, dealing medium damage in an small AOE upon receiving damage. This can be quite the effective damage dealer with appropriate defence and healing sources; use Iron Armour over the Hallucinatory Mushroom if possible, as bossing is already quite difficult as bosses have high attack and movespeed, and the shrooms hinder what ability left over to deal with bosses. Better items serve its purpose, such as many weapons above, or the Propaganda / Cedar forest to retreat to or use as a last resort. Avoid using Miss Impervious at any cost, as it decreases ROF. Use the Mallet of Prosperity (and Shrooms if you can deal with the effects effectively) and Iron Armour and appropriate healing. Since its AOE with all of Anis or Estelle and Mallet of Prosperity and Hallucinatory Mushroom combined is around the size of a max level blood ring, you’ll need some way of dealing with Rushers otherwise.
Knight’s Sword (Kururu’s Starter Weapon)

Strikes in a semicircle in front.
The first weapon in the game has medium damage and low attack range. It can deal with early waves effectively using the Duplicator and Pomodoro, but quickly falls apart unless upgraded in later waves. Additionally use Primal Strength or try to upgrade this weapon into Velmanway.
Fireball Staff

Fires at a random enemy.
This weapon summons fireballs that deal good single target damage. It is a good bossing weapon in early game, but completely falls short in late game due to AOE damage.
Cloaking Leaves

Orbits around the character.
This weapon orbits around the character and deals good knockback and decent damage on every leaf collision with an enemy. It can protect your character well, but we are also playing a game where offence is the best defence. Use Duplicator to increase the number of leaves.
Explosives

Caution. Handle with care.
Although this weapon appeals to anyone with a single braincell for AOE, it has low starting damage and a frustrating targeting system that goes for the nearest enemy instead of down the middle of your facing direction. Explosions with good AOE and good damage are often thrown to the side and wasted, letting enemies come in on the other side. Effective use is in the CQC range. Pair this up with the Duplicator and Mallet of Prosperity, as well as Primal strength and Pomodoro.
Kunai

Throws piercing kunais that bounce at edges.
This weapon shoots a low damage, piercing projectile that bounces on stage edges and edges of your screen. This means that you can change your zoom level to suit your needs from this weapon; zooming in concentrates thrown kunais for a smaller AOE and higher damage, and zooming out functions almost like a screenwide, better Psychedelic Flower for mobbing. The downside is that while zoomed in, you obviously can’t see far, and when zoomed out, kunais have an extremely low chance of hitting corners and are not consistent in dealing with Rushers at low weapon levels. Use with the Duplicator and Honey for consistency, or use Demonic Bracelet and Primal Rage for damage.
Gunpowder

Enemies explode when dead.
This trait deals a small amount of damage to surrounding enemies on enemy death in a small AOE. I don’t recommend this in early game when players don’t usually get Pheromones as it deals abysmal damage, but it turns into only decent mobbing damage when the enemies come in large numbers. Use with Mallet of Prosperity and Primal Strength.
Scale

More intense attacks the closer to the Keep.
This weapon summons a column of lightning that hits vertically along the screen, and increases in damage depending on distance summoned from the Keep. I believe the main purpose of this weapon to be to catch Rushers near the Keep when they are out of your other weapons’ attack range, but when you properly play the game, there is no use for this weapon anymore. Simply the Repair Shop, CC, Scarecrow and AOE or even some Constructs will outclass this in terms of damage for equal or better Rusher hunting.
D Tier
Death Punch

Greater attacks at lower HP.
Deals medium to high damage depending on HP in a small AOE in front of you. This build can be quite dangerous to maintain. Although damage can be high, it has a slow ROF and requires low HP, which can be hard to balance. You need to be careful using this effectively because a wrong move ends you quickly. If you like this kind of build, you need the Emergency Shield, some source of healing of backup or revives, and a CC option.
todo:
backstrike
Shuriken
evil punch
Katana
Assassin Dagger
Bayonet
leatherbound book
javelin
dark blade
Giant level-up laser
Note: I guess I can make the descriptions of these after my exams. They aren’t really worth building or mentioning since their damage pales in comparison to better weapons.
Accessories
S Tier
Scarecrow

Take damage in place of the Keep.
Isn’t this just a Voodoo doll? This accessory is the key to winning in the “Capital” stage. Because the stage is so tall, enemy rushers often slip by along the edges and players can’t afford to guard both edges at the same time. The solution is to tank in place of the Keep, and pairing this with healing (Iron Armour accessory not required, but can help) is most often the only way players manage to clear stage 3. In other, shorter stages where strategies that hunt and leak Cavalry on purpose are viable, taking the Scarecrow can be overkill just to deal with Rushers and a more justified use of your accessory slot is to free it up with the Repair Shop for more damage boost and weapon support.
Duplicator

Weapons attack more times.
This accessory is often the key to whether you win or lose a game, although it is possible to win stage 3 without it. Increases weapon clip size by 1. Especially in early game, even one Duplicator level (max. 3) could boost your damage by up to 100% (often less as you progress in each stage) and is a main source of damage boost to deal with early game bosses. Useful to all weapons and CC.
Mallet of Prosperity

Weapon area up.
That’s it, I’m gettin’ me mallet. This accessory increases your weapon reach and projectile size. It is very useful, assisting in catching rushers and enlarging your AOE weapons significantly. Useful for many weapons and CC.
Pomodoro

Reduces weapon cooldown.
This accessory decreases reload time for all your weapons by 5% (max. 25%) and can boost weapon damage by a max of 33%. It can also affect weapons like the Obsidian Pendant or the Smokescreen and can shorten their cooldown times. Useful for all weapons.
Giant Slayer

Additionally deal 3% of enemy HP as damage.
Pretty sure this only works on bosses. This is a crucial item choice to have in Endless mode, as it allows you to deal an additional 3% of the enemy boss’ HP as extra damage, which is incredible when considering the crazy HP scaling of later Endless waves. Bosses melt with this. HP calculations scale off of Total HP, so bosses die within 30 to 40 hits of any damage. Use high ROF weapons like Velmanway, cape or rings to proc this often.
Bubbly Lotion

Chance of instant death upon dealing damage.
The rate of instant death is unknown. Assuming this accessory works as intended, you have a chance to instakill an enemy upon any instance of damage dealt; this is incredible specifically for Endless modes. When HP scaling goes off the charts, you have a chance to ignore that scaling and deal an instant kill; pair this up with high ROF weapons like rings, Cape, Velmanway and more to proc this often.
A Tier
Hallucinatory Mushroom

Enlarges Character.
Shrooms. Similarly to the Mallet of Prosperity, this accessory increases weapon reach, HP and Defence. However in exchange, it decreases your movement speed, increases dash cooldown and decreases weapon projectile speed. This is an incredible upgrade, sacrificing speed for even larger AOE damage potential, but dash becomes the only source of movement and makes it quite difficult to defeat bosses effectively without CC like Smokescreen. Small AOE weapons like Kururu’s Velmanway, when paired with the Mallet of Prosperity and the Hallucinatory Mushroom, can cover the entire height of stage 1 – “Chokepoint” or even stage 2 – “Fortress” if using Anis or Estelle and can allow full AFK gameplay. Your character becomes a hulking tank, even mimicking an appropriate size. The potential to bodyblock bosses without need for revives is revealed and you are virtually invincible as long as you don’t do anything with the intent to die.
Honey

Weapon Effect Duration Up
Where’s my supersuit? +10% weapon duration per level. This accessory is only useful for certain weapons, but the magnitute of strengthening is quite large and should not be ignored if you use weapons recommended with Honey.
Pheromone

Enemy Spawn, HP, Move Speed Up
This is just perfume. Not recommended for early game. +10% spawn rate, enemy HP and movement speed. This accessory most importantly boosts enemy spawn rate at the cost of increasing their move speed and HP. This largely increases experience gain, which is vital for later waves, as well as gold drops. Only take this if you can handle additional, strengthened enemies.
Primal Strength

Critical rate up.
This accessory boosts weapons’ critical rate by 10% (max. 50%) and can boost weapon damage by a max of 50%. Useful for all weapons.
B Tier
Luring Bell

Enemy pull range Up
This accessory is good on stage 3 – “Capital”. Typically, standing smack in the middle can leak even normal enemies on the edges so pull range is good to get those. In addition, larger attract range for Rushers can distract them from the Keep. However, better solutions exist like the Scarecrow or Obby Pendant.
Scroll of Secrets

EXP Up
+5% experience gain per level, max 25%. This book increases the rate at which you gain other items. It takes a good part in preparing you for later waves when higher / better stats are needed from item enhancements. Not really needed in Endless mode.
Harp of Fortune

Luck Up (affects chests and drops)
+10% luck per level. This accessory is good for early-mid, when needing boss drops. Late game, you don’t need it and an accessory slot can be better filled with damage boosts.
Dragon Scale

Weapon Damage Up
+5% damage per level. Decent damage boost. It’d be better get a specialised upgrade like honey or bracelet before getting this.
National Debt

Increase Gold Loot.
+10% gold gain per level. Only useful for early to mid game when you’re dirt poor.
Soul of Sparta

Increases Constructs’ AOE
Pretty useful for constructs like the Saw, Magnet, Graveyard and Poison Swamp. Pretty much a straight support for some constructs. However, you must ask whether your constructs are really worth building, for example, expanding the AOE of your Saw setup or Graveyard over taking something like 25% more weapon damage.
C Tier
Iron Armour

Reduce damage received.
Increases defence. Better get good offence than good defence since we’re playing a 1vE gamemode, but it can help situationally with the Scarecrow and Blade Shield.
Magical Boots

Increase MoveSpeed.
Situationally good with Clear Sky for longer trails, to mitigate the Hallucinatory Mushroom or with the Luring bell for manual Rusher hunting. Rather than building movement speed, consider CC and AOE builds and don’y try to chase enemies around too much or Rushers will start leading you around by the head.
Pot of Resurrection

Grants more Revives.
Adds an extra revive. A revive is used automatically when your character’s HP reaches zero, and you gain invulnerability for a short period and heal to full. If you use them, you know your build is lacking and in the next minute you’ll be overrun. It’d be better to use one or two item choices on critical upgrades rather than getting extra lives. When bodyblocking bosses, revives are warranted; while doing so, you lose your HP quickly in exchange for valuable Time to Kill, and can even make use of the short Invulnerability period to further bodyblock without losing HP. Note that revives and the Scarecrow cannot be used to mitigate a Boss entering the keep.
Golden Hammer

Can now stun enemies.
Every instance of damage you deal now has a low chance of stunning the enemy. This is almost useless for mobbing, as crowd crush still pushes stunned enemies towards you, and can only be used effectively against bosses. This item can be quite effective at stunlocking bosses if you have high ROF weapons, and grants you valuable Time to Kill.
Healing Herb

HP Regen Up.
+0.2HP/sec. A very decent source of healing, comparable with lifesteal. The Orb of Restoration greatly outclasses both; and seeing as how Accessory slots are more useful than Constructs, you’d rather go with an offensive or weapon support option.
D Tier
Bloodlust

Grants lifesteal.
Debatably worse than Healing Herb, although both healing effects happen at the same rate (When are you not hitting an enemy in a run?), once every second. Since the healing rates are similar, just choose none out of the two, go for the Orb of Restoration and use an accessory slot for the better good (damage, weapon support).
Death Game Scroll

All abilities permanently strengthened upon revive.
This acts as a last resort powerup when your build has failed you and you need a quick solution. A small, general damage boost can be pretty useful, but generally no one dies if they’ve built CC and damage properly. Usually, players die on purpose for a stat boost if they have some extra revives like from the appropriate attribute. You must have revives to use, like from the attribute upgrade or accessory.
Bat of Grudges

Ignore Collisions.
You trade your ability to move buildings and bodyblock enemies for the ability to phase through collisions. Only good if you readily have defence, as Shurikens bounce well off enemies inside crowds and the Bloodrings can make use of higher enemy AOE exposure, increasing damage.
Emergency Shield

30% HP shield when low HP.
A 30%HP shield on cooldown when destroyed, activated automatically on low (lower third) HP. Can keep up with being surrounded because of high refressh rate at high enhancements. In combination with Miss Impervious, you can hold effectively against Brothel situations. It can also combine with the Blade Shield and Death Punch for a safer playstyle.
Palm of Ridgway

Increase Construct power.
Construct “Power” most likely refers to construct damage. Focus on your weapons over constructs; you could easily get a better accessory. This would be good for rusher guard type towers for more consistency with catching them.
Miss Impervious

Increases Invulnerability period.
Decreases the rate at which you can receive damage (allows you a small invulnerability window after being hit). Offence > defence, but can be quite useful for Brothel situations and bodyblocking.
Heart Container

Max HP Up.
Increases your health pool. Capacity for health is useless and this accessory slot is better used on something like healing or damage mitigation.
Heart of Petain

Increases Constructs’ AtkSpeed.
Just don’t. This boosts constructs’ projectile speed and is only useful for Firewall, Archer tower and Seven blade sword catching faster enemies like Rushers or enemies under Pheromone. Why are you building constructs when you could boost and support a weapon or CC??
Demonic Bracelet

Weapon AttackSpeed Up.
Clearly a gauntlet. +5% weapon projectile speed. This accesssory is almost useless; I can only see it benefitting the Elven Ring’s light orbs and Louise’s lightning. Can be taken if you prefer that your Obsidian Pendant pull enemies backward rather than imprison in place.
F tier
Goring Lance

Deals Damage-Over-Time to enemies.
This “upgrade” allows every instance of damage you deal to apply a small DOT effect to hit enemies, below par of the Psychedelic Flower. The damage is absolutely abysmal and is akin to attaching mosquitoes to your attacks in hopes of it infecting the enemy with the Zika virus or something. You’re just hurting your own brain instead; getting this is a huge waste of your time, gaming spirit and money.
Notes:
Percentages are additive.
Deployables
S Tier
Orb of Restoration

Creates a Healing Zone.
This is the best source of healing in the game. You can cheese healing out of this construct, and when paired with the scarecrow on Capital, you can freely ignore Rushers. You can run in and out of the orb’s range and trigger heal every time you go in, however, be warned: this cheese could be removed in an update. It still remains the best source of healing in the game without cheese.
Propaganda

Enemies retreat after reading it.
This construct has one of the greatest uses as an defensive tool when overwhelmed, especially when using the Brothel. It forcefully retreats (autokills) nearby enemies while sacrificing their xp and gold drops. “On kill” effects don’t apply to kills by this Construct. This can cheese some runs into a win condition. Bosses are not affected by Propaganda.
Wanted Poster

Increases the number of bosses.
+1 boss spawn, max level 1. Doubles boss drops, if you can handle it. Don’t use this on stage 3 – “Capital”, it could be too much to deal with at once.
Clock Tower

Freezes all enemies for a fixed time.
infrequent but extremely useful CC, best at later enhancements when the time stop actually becomes quite frequent and can happen at least once during a boss fight with the appropriate upgrades and support. This is especially useful on bosses and rushers, and gives valuable Time to Kill. However, can be overshadowed by frequent enemy spawns replenishing the ranks of time-frozen soldiers.
A Tier
Repair Shop

Repairs the Keep every 10s.
+0.1 Keep HP / sec / level. Its best use is in early to mid game when your attitude towards straggling Rushers isn’t very stressed, as it can help keep your mind off the Keep (I’m funny) and focus on damage and Gold gain.
Academy

Passive EXP Generation.
This is a good source of experience. Naturally, it is best to have this at the start of a run to more often enjoy the benefits of more frequent item choices .
Graveyard

Slow enemies inside range.
This acts as a more medium AOE, permanent Smokescreen. Enemies inside range have their movement speed reduced, increasing Time to Kill. Bonus points for catching a boss inside.
Exchange Centre

Passive Gold Generation
Passively generate gold. Despite being passive income, the imcome generated by quickly leveling up this construct is quite significant (in the order of six figures). Only useful for early to mid game when you’re poor.
Audit Office

Gold bonus +10% at the end of the game
+10% gold gain per level to the total calculated at the end of the game. At max level, almost double your total gold. Only useful for early to mid game when you’re poor.
Poisonous Spring

Creates Poisonous Swamp
What an amazing description. Low-medium damage with fast ROF in a smaller AOE than the Graveyard area as well as some slowing capability. This tower is essentially a smaller AOE Graveyard with good overall damage, but stronger enemies in later waves pass through before too much damage is done, especially if you have Pheromone upgrades.
B Tier
Horse Fence

Stun and damage enemies upon contact. Increases in size and power.
This construct stuns enemies consistently in once place and gives Time to Kill. The damage is high enough to solo an edge of a stage in early waves of Rushers.
Laser Tower

Sweeping laser, damaging enemies.
Place close to Keep to maximise its sweeping capabilities, as the distance swept increases as the distance from the tower to the enemies increases. High damage output with very large attack range and reach result in a good mobbing damage source.
Magnet

Places magnet that pulls in enemies.
A source of pull CC. Compared with Obby pendant, it might not be up to par but can help in Rotating Saw setups and Brothel setups. A good support construct, but should not be used as your main CC.
Divine Wind’s Protection

Creates a zone of Haste.
This construct creases a speed boost zone around itself. It is quite useful when used with the Hallucinatory Mushroom to mitigate the downsides of the shrooms. It is useful for catching up to bosses or Rushers. (I use it to cheese heal orb more effectively.)
C Tier
Turret

Arrow attack onto nearby enemies.
Low to medium single target damage, medium fire rate, small KB on hit. This tower can only guard one edge effectively against arguably at most three Rushers at the same time. Any more and this tower becomes useless, due to its nature as a single-targeting mechanism in a PvE game.
Rotating Saw

Slices enemies within the area.
Extremely high damage in a tiny AOE, extremely hard to use well. It almost requires you to stand immediately behind the construct or put a Magnet next to it (Usually never works since the magnet’s pull is weak) or to send Obby vortexes straight into it.
Seven-branched Sword

Fires homing damaging laser.
♥♥♥♥♥♥ homing laser, medium damage in tiny AOE. Can’t even catch rushers on one whiff of Pheromones. Good against crowds (pheromones, ironically).
Firewall

Defends with vertical direction fireballs.
Last Defence type tower. Maintains a slowly replenishing vertical firewall consisting of single hit fireballs that catch stragglers passing by. It has slow reload and can be overwhelmed unlike Horse Fence, but does have higher damage and has more utility than the Horse Fence in catching Rushers since it can deal with higher classes of Rushers until they inevitably become too strong.
D Tier
Homing Bomb

Explodes upon reaching the enemy.
Not even homing, never seen it try to home in on something. What a scam. It only has similar damage to one shot of the “explosive” weapon. Use your item choice elsewhere.
Psychedelic Flower

Low damage in large area.
Abysmal damage in a large area. Even CC does more damage (I’m joking) but fr obby pendant does more than this lmfao. Better use your item choice elsewhere.
Cedar Forest (Spring)

Hide from enemies in those trees.
It’s a worse place than Propaganda to retreat, although leaving enemies’ xp and drops alive. Enemies are repulsed by the forest and given KB, but enemies in a crowd crush (which happens often) can reach you. You usually have to hide on the other side of the forest to avoid enemies.
Seven Stars Altar

Periodic fullscreen enemies knockbacks with gale.
Weak ♥♥♥♥♥♥♥♥♥♥♥♥♥♥ KB. Feels like nothing. Maybe you gain 0.5sec Time to Kill for some Cavalry on the edge, and certainly doesn’t feel like it’s doing anything to bosses. Spend your item choice on something else.
Situational
Brothel

Strengthens nearby enemies, increases gold drop.
This deployable can lose you the game if you are not prepared to deal with the challenge. The Brothel increases the health, damage, move speed and gold drop of nearby enemies and makes them significantly harder to kill. I have often thought that my current character’s capabilities are more than enough, and suffer when a tankier and harder hitting enemy comes along. It gets worse when Bosses and Rushers become strengthened when you don’t mean for them to be; and I’m not sure if boss drops are increased in quality if a boss is strengthened by the Brothel. Always avoid the Brothel when going for victory conditions. However, note that the gold drop increase is quite significant; it is a good mid-game upgrade for earning money for the more expensive attribute upgrades. You should not use this in early game, since early weapons and attributes are not suited for the strengthened enemies, nor late game, since ideally you should have maxed out your attribute upgrades already and are challenging stage 3 “Capital” or the endless modes. Use with extremely high damage, CC or with Propaganda as a backup or failsafe by pushing or deploying Propaganda near the Brothel.
Possible other constructs in the game:
Shroom (1)
Transparent helmet with goggles
wacky candy given out of a van
evil teddy bear.
Quick Strategies
Read the appropriate sections if you would not like to go into in-depth analysis later on.
Recommendations are prioritized from top to bottom.
Gold Farm
- Play on stages 1 or 2 if inexperienced.
- Exchange Centre (All enhancements ASAP)
- Audit Office (At least once, get to max level by the end of run)
- Bounty Poster (more items)
- National Debt (more gold)
- Pheromone (more gold drops)
If you can handle it:
- Smokescreen (Honey as needed)
- Obby Pendant
- Brothel
Prioritise Smokescreen until its effects are consistently active.
Raise mobbing weapons, then bossing weapons over catching Rushers. CC will let you deal with them leisurely.
Stages 1 and 2
Avoid the Brothel and the Goring Lance at all costs.
Get a bossing weapon, then:
Focus on either Obsidian Pendant CC build or DPS AOE build.
Get Repair Shop or Scarecrow as needed.
Build a mobbing starter weapon upgrade for OPCC or weapon area for DAOE.
Maintain or adapt as needed.
Stage 3
- Have good attribute upgrades.
- Avoid the Brothel and the Goring Lance at all costs.
- Scarecrow
- Bossing weapon if only weapon is mobbing
- Orb of Restoration
First boss is easily dealt with most starter weapons.
Out-heal the first wave of Rushers.
First four waves are survivable using only scarecrow, hunting Rushers and healing via Keep healing items. Next:
- Either Obsidian Pendant CC build or Luring Bell DPS build.
- Scroll of Secrets as needed
- Mallet of Prosperity
- Mobbing Starter Weapon Upgrade
- Pheromones decrease your ability to deal with Rushers. Trade-off with higher XP gain, consider for yourself.
The second boss can be easily dealt with the earlier bossing weapon, even at lower enhancements. Next:
Focus on building CC. The Obby pendant should have support like Honey, Duplicator and Pomodoro.
Build your bossing weapon. have it at a high level before the third boss.
Next, build your mobbing weapon to avoid clogging your black holes, or your main DPS if going Pull build.
Use constructs if no rerolls are possible to assist in hunting Rushers along the edges.
Maintain or adapt as needed.
Endless
- Have all relevant attribute upgrades
- Avoid Brothel and Goring Lance at all costs
- Pheromone is optional: It can beneficially increase lag to have the opposite effect of decreasing spawns in later waves.
- Giant Slayer and Bubbly Lotion are almost requirements alongside Obsidian Pendant.
- Never pick up an unnecessary item. Always reroll or you’re shoo*ing yourself in the foot. That extra 15% could help.
You need a vital bossing weapon to deal with spongy bosses. Velmanway, Crit, Pomodoro as a basis and Mallet, Duper and Shrooms to extend ability to mobbing. OR a weapon with a fast hit rate to proc instant enemy mob death and Giant Killer.
Non-endless Strategy
Generally, players go by two strategies for the non-endless stages 1, 2 and 3 respectively titled “Chokepoint”, “Fortress” and “Capital”: Damage and Crowd Control.
Damage

A full run’s statistics board showing the damage potential of certain weapons. Most enemies are dead before they reach CQC range.
Using this kind of build depends on your ability to mow them down as your character pulls them in and almost ignores Rushers by either tanking and repairing with the “Repair Shop” deployable, or redirecting to your health and healing using the Scarecrow, and the Lifesteal accessory or Heal Orb deployable. There are two ways to do this; using CQC weapons like Kururu’s Knight’s Sword or Velmanway, the Sunfire Cape and Cloaking Leaves in addition to damaging accesssories like Primal Strength and Dragon Scale for a combination of extremely high DPS, or with an AOE build featuring the Flail, bows, runes, Elven Ring, Crystal Phoenix’s Soul or even the Kunai, added onto accessories like the Mallet of Prosperity and Honey to catch Rushers along the edges and to mow down most enemies before they reach you.
Note that combining these two methods is fully possible and I encourage to do so as damage variety is can be important.
Crowd Control
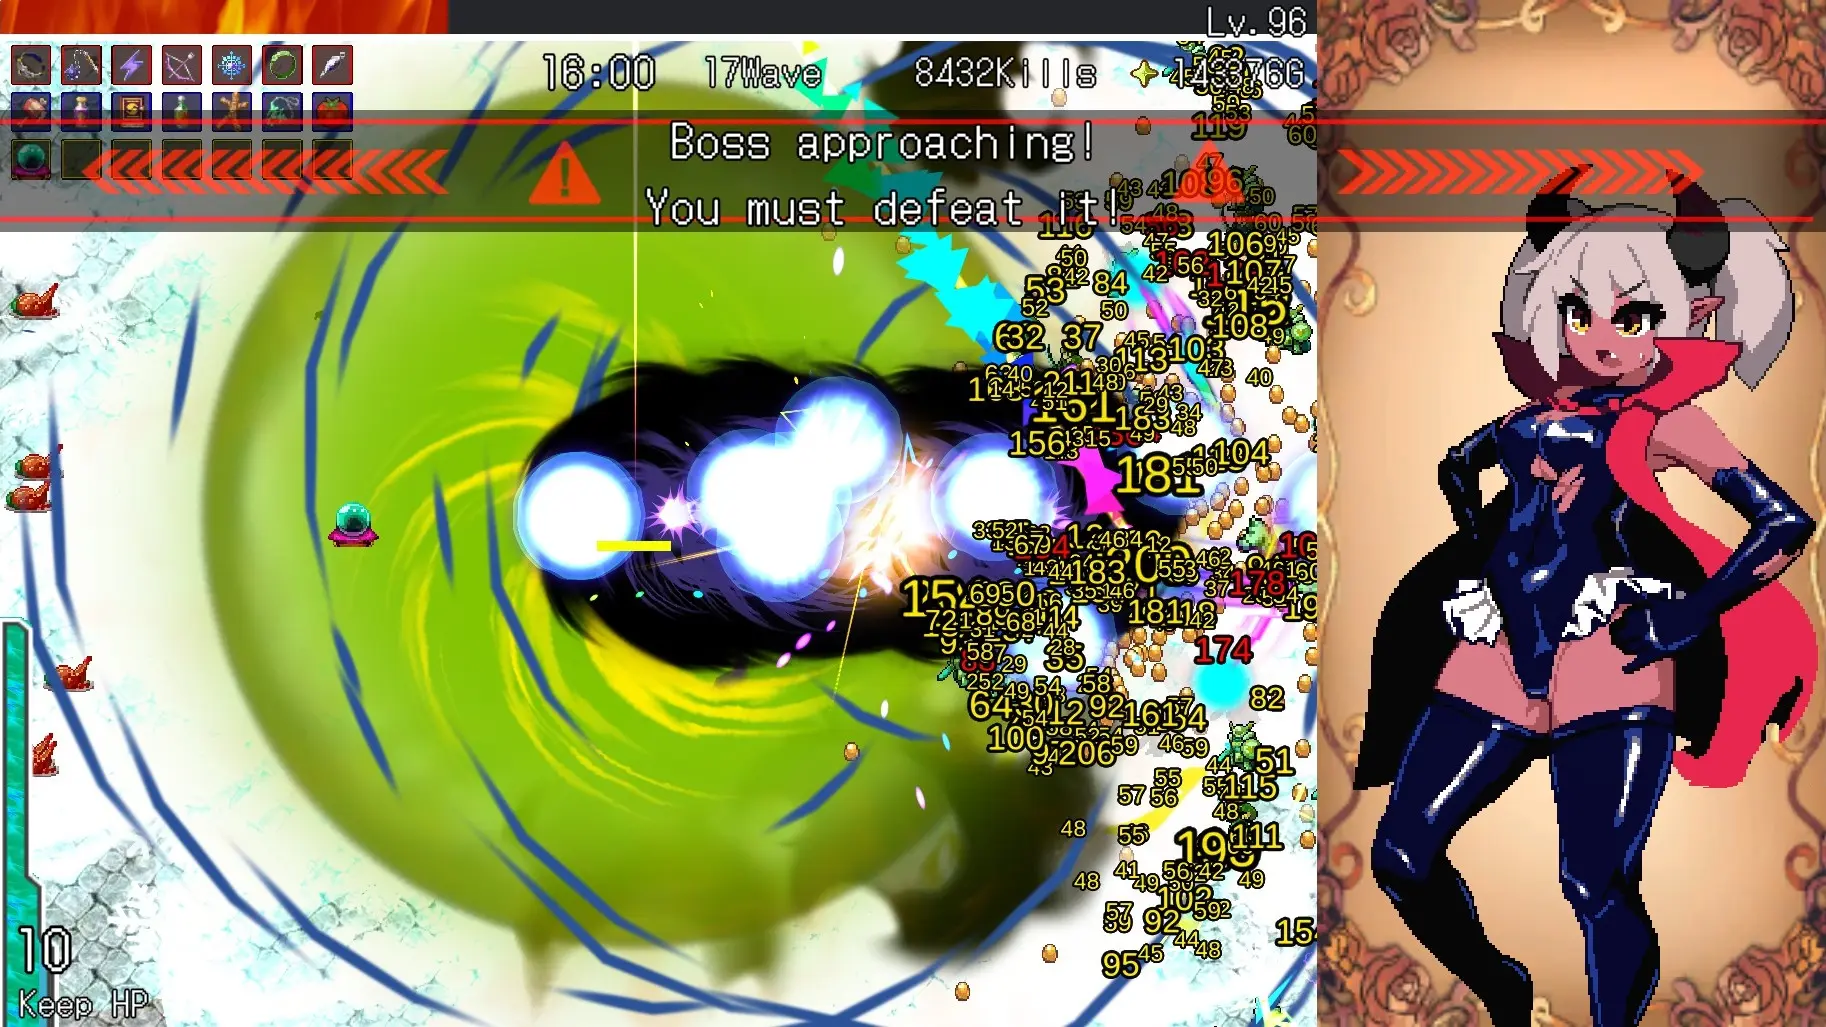
A run in progress showing the power of an CC AOE build (or Anis’ lore-accurate power). If only the Hallucinatory mushroom had appeared, the player would have been able to be AFK on one of the hardest stages.
Also known as the Black Hole build. This build entirely depends on one thing: the Obsidian Pendant. With the right accessories like the Duplicator, Pomodoro, Honey, Mallet of Prosperity and Hallucinatory Mushroom to boost black hole duration, summon frequency and pull range, nothing gets past five consecutive black holes (once Duplicator and similar attribute have been upgraded). Bonus points for using Anis or Estelle to further boost black hole pull range, or the Smokescreen, Magnet or Graveyard deployables to further ♥♥♥♥ on enemies. If done properly, you can AFK a Capital run (careful of bosses). Note that you need some form of damage to prevent black hole from clogging up, as their damage can be quite insufficient for high HP enemies like the Holy Knight or the Samurai.
Accessories like the Duplicator and Pomodoro should be used for both Damage and Crowd Control. Their effects are seriously so versatile that it often makes the difference in glory or damnation.
For Stage 3 and Stage 6 runs with tall and narrow maps, constructs can be more useful than usual since stacking them on one edge can let you focus on mobbing in a smaller area. Some strategies are to use combinations of the Magnet with either the Graveyard and Poisonous Swamp to lock down enemies with DOT, or Propaganda for an easy solution forgoing experience and gold drops. It may be worth decreasing your Pheromone attribute level so that you and your constructs can deal with less enemies at a time, albeit decreasing your experience gain.
An effective combination that adds great CC and the extreme DPS of Velmanway with weapon AOE boosters Mallet of Prosperity and Hallucinatory Mushroom on stage 4 – “Nighttime Chokepoint”.
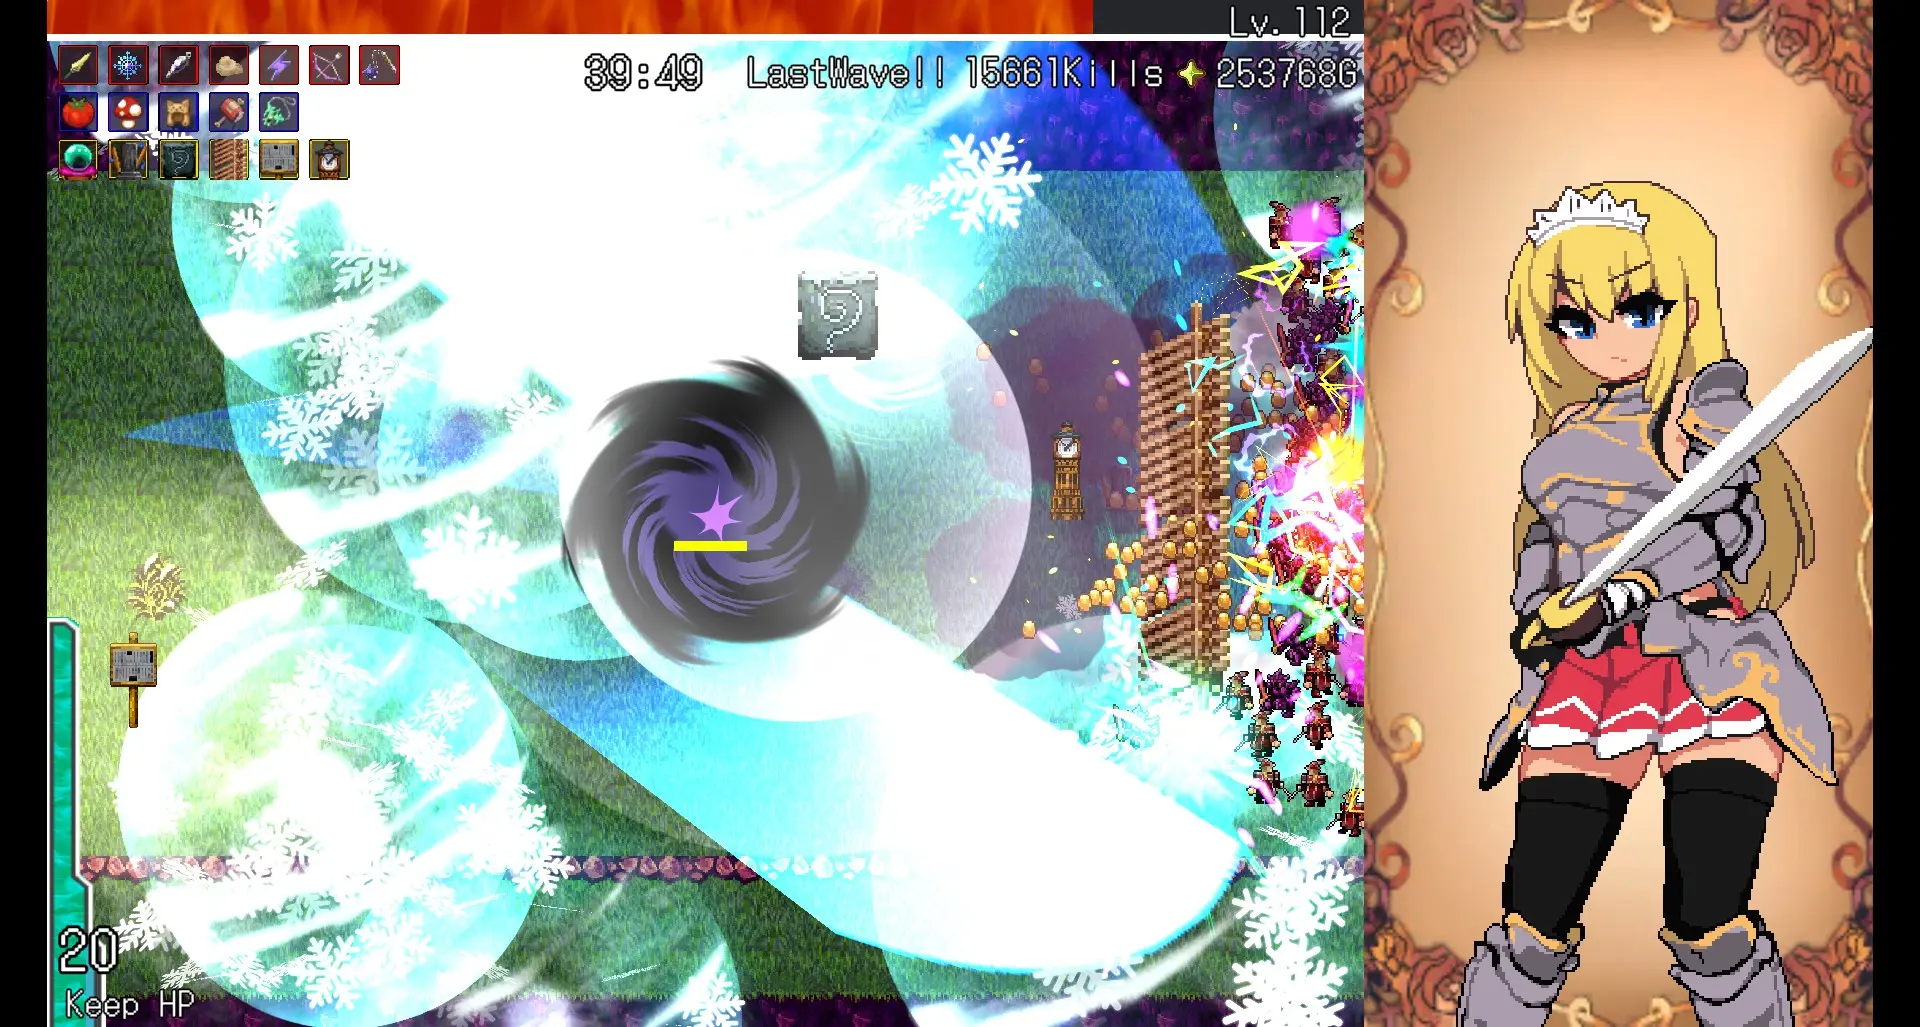
Velmanway’s reach extends past the edges of the stage, offering full Rusher protection for a high DPS AOE build, combined with CC in plentiful amounts offering pull and slow at all times.
Endless and Progression Strategies
Endless Stage Strategy
A third, uncommon strategy moreso aimed for the endless stages 4, 5 and 6 respectively titled “Nighttime Chokepoint”, “Nighttime Fortress” and “Nighttime Capital”, is to use high hit rate weapons like the Obsidian Pendant, Cape, Velmanway, Bloodrings or Elven Ring to quickly proc the effects of the keystone accessories Giant Slayer and Bubbly Lotion. This is a good strategy that can bring you past hours of endless play easily by ignoring enemy HP scaling as the waves progress. It is sort of a cheese to the Endless mode, but it’s not really “cheese” if it’s the only solution to keeping up with enemy HP scaling in later waves. With this strategy, you can finally roleplay the lore-accurate Anis.
The best build for endless play would include at least Velmanway, Smokescreen, Honey, Pomodoro, Duplicator, Mallet of Prosperity, Hallucinatory Mushroom, Giant Slayer and Bubbly Lotion. With a combination like this, waves’ HP scaling would not matter and true endless play could continue. Note that as your high ROF weapon and its AOE increase in size, the Obsidian Pendant can actually lose some of its value simply because the whittling power of high ROF and the keystone accessories Giant Slayer and Bubbly Lotion can already deal with all enemies. In fact, using the Obsidian Pendant can even lead to some unwanted movement, as enemies are pulled extremely quickly into the black holes the microsecond you start summoning them, pushing and jostling you out of a good position. Just Smokescreen, Graveyard and Poisonous Spring can suffice for CC with this build.
A player has an almost perfect item setup, save for the fact that rerolls were not enough to guarantee them the last Accessory slot as the Bubbly Lotion that was critical to progressing their score in Endless mode. They took Primal Strength instead out of irony as the next best accessory choice.
In Endless runs where your build is not perfect, you will eventually stalemated because enemies can’t overwhelm you due to game performance issues locking their spawn rates, and you not being able to kill them to progress your score or experience. A vital lesson is learned; focus on collecting every needed type of item before levelling them all up at the same time.
A player who roleplayed lore-accurate Anis, with a lucky start picking up all wanted items. After reaching a memorable milestone, they shortly capitulate to accurately capture Anis’ “depraved” element.

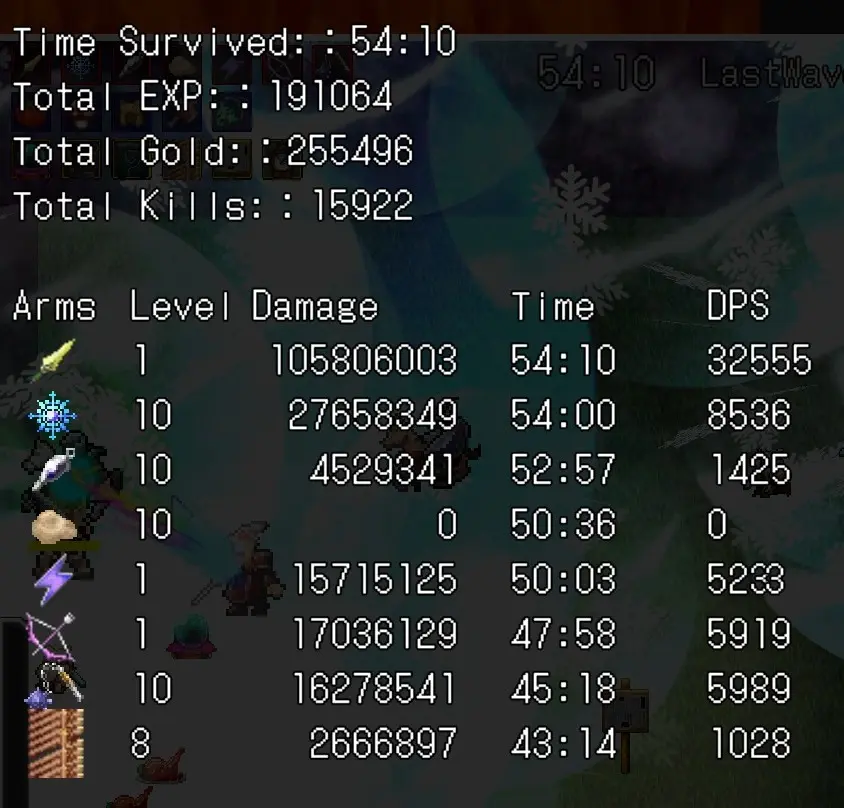
The stats screen almost immediately after capitulation, comparing different weapons’ effectiveness.
Early, Mid and Late Game
Just keep in mind that in this game, there is no “success” without “succ”; applying to both you at this game, and to your characters when they inevitably fall by Garvecian hands. In early game, you really have to suffer and try to learn the ropes and find the best weapon combinations that work for you, your playstyle and your character.. You’ll probably see a couple of our heroes meet their demises before you really start rocking Garvecian ♥♥♥♥. Heroes start off cheap and you’ll probably get around 10,000G on your first run, so try them each and their playstyles, as well as picking up different items and experimenting with each of them.
Midgame is the time when you start grinding gold for gain more attribute upgrades. To be efficient, max out the Exchange Centre deployable the earliest you can and have the Audit Office at max level by the end of the game and focus on surviving the longest time possible. Because the game offers item enhancements more often than new items, it is advisable to pick one Audit Office level over an Exchange Centre level if you don’t yet have it. Since there is no gold penalty for death, you can farm gold in endless modes, which also serves as a good introduction to stages 4+. You can try getting some National Debt (accessory, not the american kind) and the Pheromone accessory for additional gold drops and for a challenge. The last strategy is the Brothel deployable with the largest potential gold gain. Don’t try using the Brothel without strong CC that pulls and slows like the Obsidian Pendant and Smokescreen weapons and appropriate damage, and try to have Propaganda ready as a failsafe. Effective gold farming strategy can net well above 1,500,000G in one non-endless run with optimal Brothel usage. However, in endless mode, your potential gold gain doesn’t change much, which happens because of your inability to deal damage as a result of focusing on gold-making items. Your gold gain will only increase a little before defeat as enemies overwhelm you quickly on waves 21+.
Late game is when you’ve almost maxed out your attribute upgrades and are using optimal builds to challenge stages three and above. The focus is on clearing as much as you can using the best possible item combination after luck in item choices and many resets after non optimal item choices and rerolls. Avoid things that make your life harder, like the Brothel, Goring Lance and other detrimental choices. The focus is on building the best possible build, (succ)essfully defending the Capital and getting a high score in the endless waves.
Extra
Note: This game is completely family-friendly if you can avoid being hit or losing the game, since gallery H-scenes are only unlocked by defeat or similar conditions.
If you want to up your numbers in your end of game screenshots (because everyone knows bigger numbers == better), get Pheromones and the Brothel and start whacking away.